

We love to see what new projects our Shapeways Shopowners are working on, when we saw Urbano Rodriguez‘s new TriToy series our jaws dropped. A simple concept of connecting two pologyon shapes to build complex forms has unlimited potential. We talked to Urbano to learn more about what exactly went into this fun, new building system.

Tell us about your new project the TriToy, where did you come up with the idea?
Since I start making models to 3D print, about two years ago, I try to make things that really bring a new concept of design, and at the same time, a creative approach to solve simple things. Of course, some of these designs, only come as a result of a large research, and many sketches, trying to achieve a harmony with these two things.
Through my research, in what I was seeing some amazing low poly, and wireframe 3D printed models, I realized that almost all of them, are made by many joined triangular shapes, and suddenly, I thought how amazing would be if I have a modular triangle- a triangle that would encompass building not one, but many shapes as you desire, so this way, the idea to TriToy was born.

How did you decide to use the colored Strong and Flexible Plastics, what advantages did this material provide for your design?
After I developed the basic idea, and designed the first attachment system, I quickly needed to 3D print a prototype, to make the tests and see if the project was really feasible. The colored Strong and Flexible Plastics was my first choice at Shapeways. The material characteristics, short production time, and lower cost made the material ideal for my project.

What was the process like iterating on this design? What did you learn through printing?
The iterating process, in fact, was not quite easy with the TriToy project, and I needed to print 3 prototypes, until achieve the result I desired to the toy.
The first prototype, showed me that the idea and design were really feasible, but the attachment system didn’t work as I expect.
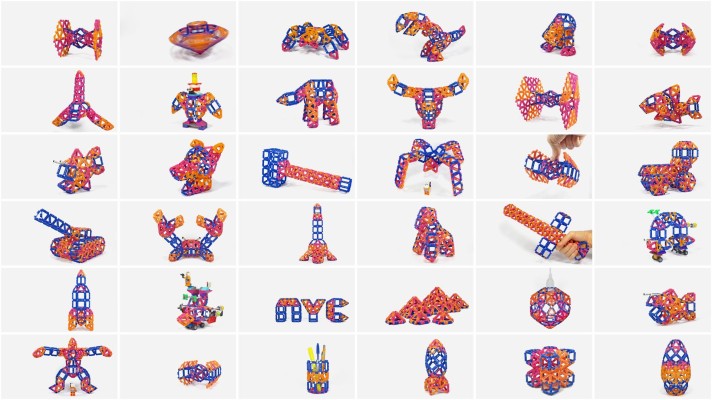
I completely redesigned the attachment system, and printed the second prototype, which worked great. This prototype was way better than the first one, but after some days playing, and building many shapes, I realized that some times, the pieces get stuck together when I try to detach them. So I needed to go back to the design, and change again some details in the attachment pins, and finally, the third prototype worked great!
All of these processes proved that even when you are sure about a design, you’ll really only understand the feel needed when you have it materialized in your hands. Knowing this helps to ensure that you have a finished, and ready to market, product.

Conceptually similar to the Danish JOVO(TM) system, but quite nice nonetheless. I suspect it does not solve the “problem” of having more than two faces share a common edge ?
Why no pentagon? You could make all the Platonic solids then.
@JJPR I wanted to keep the toy as simple as possible, and if you add 5 triangles, you have the outline shape of the pentagon. But maybe I make it in the future. 🙂
@mkroeker In fact, as you can see in the great number of shapes I already built, this is not a “problem” at all, due the versatility of the system, you always have many ways to turn around, and make the shape you want, without the need to attach more than two faces, to the same edge. BTW, this is a feature that a great number of building toys not provide, including LEGO.
Quite right, as long as you are not specifically looking to build models that involve polyhedral tiling. This is certainly not a common use, but is why I have some experience with currently available kits like Polydron and JOVO.
Excellent! Could you find a way to do circles and balls that integrate with it? Perhaps of different sizes to choose from or that fit inside each other too??? There is a method to my madness.