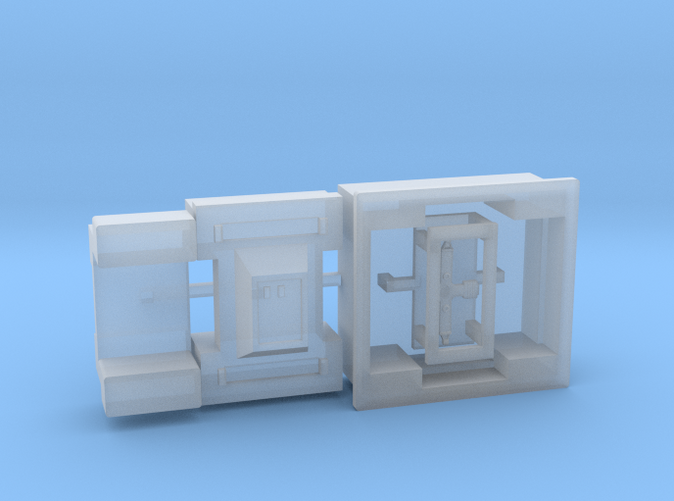
Smooth Fine Detail Plastic


Moebius EVA Pod: Red Box, Door Handle
Made by
Print With Shapeways
 Choose Your Material
 Choose your color and finish
$12.99
Have a question about this product?
contact the designerYou must be logged in and verified to contact the designer.
Product Description
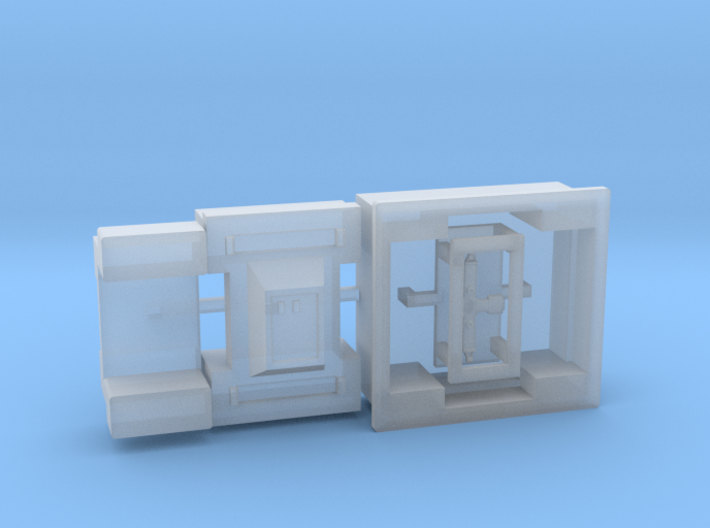
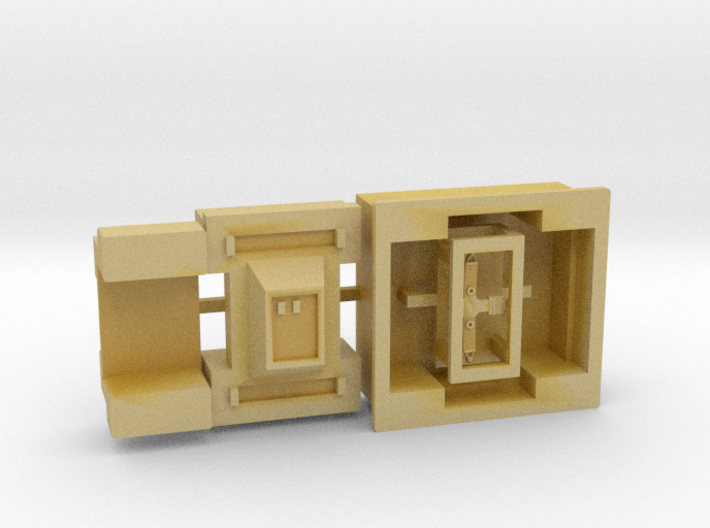
This is a detail set: more accurate replacement parts for the Moebius 1:8 EVA Pod kit. This set includes the pod's red box and access hatch handle. If you want a version which also includes the handwheel next to the red box, I have that available as well.
The red box
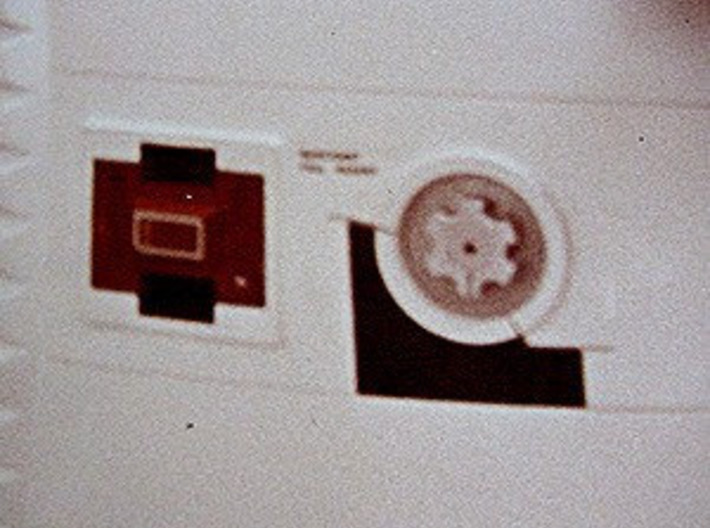
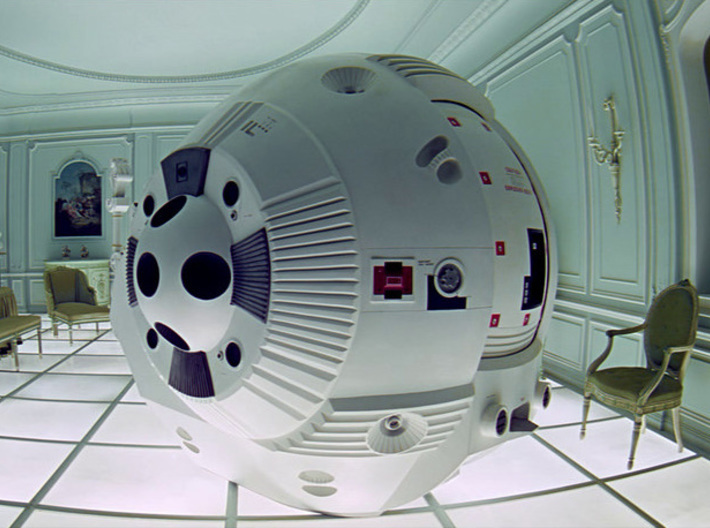
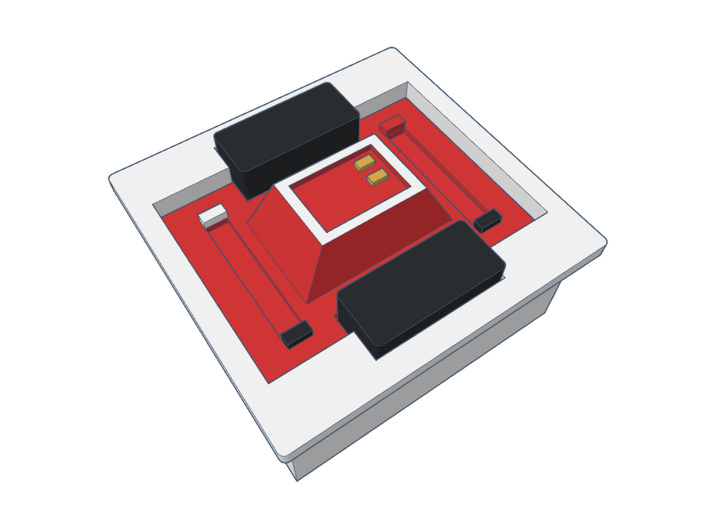
The back of the 2001 EVA pod had a mystery red box, with a sort of lopped-off rectangular pyramid, to the left side of the door. It’s not at all clear what this was intended to be. Some people theorize it was some kind of emergency release lever, with the handwheel next to it a kind of door opening device.
I have seen some high-resolution photos of the back of the pods, and I don’t think that’s what the designers had in mind. For one thing, printed next to the wheel was the text “REACTANT CELL INSERT". This text can also be made out in the 4K release of the film, incidentally. And in one pod bay scene (when the two astronauts retreat to the middle pod to discuss what to do about HAL) the red block was missing, revealing an empty black socket. The alien hotel scene has a red pyramid that's upside-down compared to the pod bay scene. So was it meant to be some sort of small rechargeable power cell? Who knows?
Anyway. Whatever it was meant to be, the Moebius red box is frankly really bad. The back half of the sphere was designed to be easily removed from an injection mould, and so details on the edge, such as the red box, are completely distorted. It’s also not deep enough, the pyramid is much too small, and is missing details.
Installing the red box
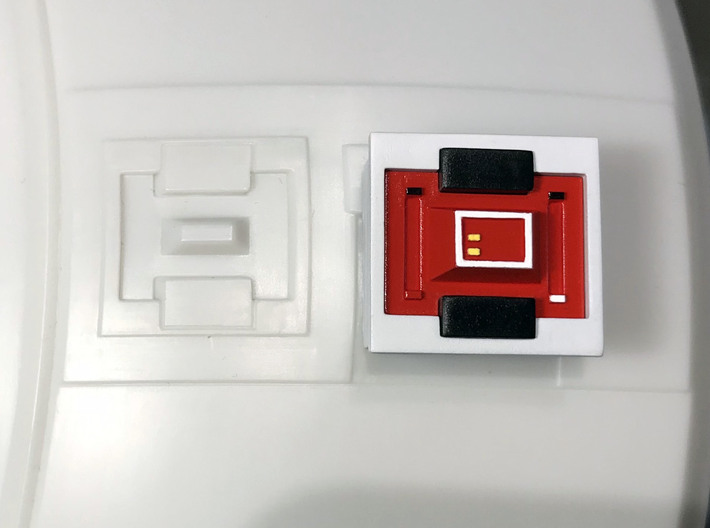
So here’s a superdetailed part to solve the problem. Unfortunately it isn’t a drop-in replacement because of the aforementioned moulding issues. It will take a little work to install cleanly.
- Carefully trim back the existing box frame using a sharp knife. Cut slowly and carefully. You don’t want to to cut too deeply, as then you’ll waste time filling it back in!
- Take a wide flat file, fine-toothed, and carefully file the surface flush.
- Once you’re down to the raised strip that runs from the doorframe to the earmuff, carefully cut a hole that is exactly 18mm tall by 19.5mm wide.
- The white frame fits into this hole, with a tiny lip to cover any roughness around the edge.
- Dry fit the three parts so you know how they fit.
- Install the outer frame, puttying any gaps. I would use epoxy, since superglue tends to be a bit messy. Paint it when you paint the whole back sphere.
- Paint the centre part bright red, and the U shaped piece matte black at the top.
- The red box had a number of painted details. However, these details appear one-way up in one scene and the other way-up in another. So you can take your pick which way round the box is!
- Be careful assembling the box once it's painted. If the parts are angled and aren't assembled straight-on you'll probably scratch the edges of the paintwork.
- The top of the pyramid was outlined in white. The two tiny raised rectangles on the top of the pyramid were dark yellow, and were on the right side of the pyramid in the hotel room scene and on the left side in the pod bay. There are four raised rectangles on the tops and bottom of the vertical grooves. In the hotel room the colours were white in the upper left, black for the bottom two, and red (ie: no colour) for the upper right. Rotate the rectangle colour positions by 180° for the pod bay.
Access hatch door handle
As a bonus, I've modelled the door handle to the small access hatch to the right of the back door. This was, on the full sized props, a piece from an Airfix SRN1 hovercraft model kit - you can see this part elsewhere in the film, such as on the moonbus landing gear and the greebly panel to the left side of the Discovery's emergency airlock. This detail goes on the left side of the hatch door and is represented by Moebius as a featureless strip.
It's a tiny bit thicker than it should be, to be printable, but it's close to scale. I housed the piece in a little cage to protect it in shipping, as it's crazy thin. To remove it, first use sprue cutters to snip off the cage supports. Then cut off the cylinder attached to the middle of the T-shaped door handle. Cut the cylinder off at the bottom, so it stays attached to the handle. Be really careful - it's an insanely thin and fragile part!
You can then glue in the handle, using the cylinder as a support. This will require drilling a hole about 1.25mm in diameter. The handle was centre-aligned vertically on the door panel. It was a medium grey in the film.
The red box
The back of the 2001 EVA pod had a mystery red box, with a sort of lopped-off rectangular pyramid, to the left side of the door. It’s not at all clear what this was intended to be. Some people theorize it was some kind of emergency release lever, with the handwheel next to it a kind of door opening device.
I have seen some high-resolution photos of the back of the pods, and I don’t think that’s what the designers had in mind. For one thing, printed next to the wheel was the text “REACTANT CELL INSERT". This text can also be made out in the 4K release of the film, incidentally. And in one pod bay scene (when the two astronauts retreat to the middle pod to discuss what to do about HAL) the red block was missing, revealing an empty black socket. The alien hotel scene has a red pyramid that's upside-down compared to the pod bay scene. So was it meant to be some sort of small rechargeable power cell? Who knows?
Anyway. Whatever it was meant to be, the Moebius red box is frankly really bad. The back half of the sphere was designed to be easily removed from an injection mould, and so details on the edge, such as the red box, are completely distorted. It’s also not deep enough, the pyramid is much too small, and is missing details.
Installing the red box
So here’s a superdetailed part to solve the problem. Unfortunately it isn’t a drop-in replacement because of the aforementioned moulding issues. It will take a little work to install cleanly.
- Carefully trim back the existing box frame using a sharp knife. Cut slowly and carefully. You don’t want to to cut too deeply, as then you’ll waste time filling it back in!
- Take a wide flat file, fine-toothed, and carefully file the surface flush.
- Once you’re down to the raised strip that runs from the doorframe to the earmuff, carefully cut a hole that is exactly 18mm tall by 19.5mm wide.
- The white frame fits into this hole, with a tiny lip to cover any roughness around the edge.
- Dry fit the three parts so you know how they fit.
- Install the outer frame, puttying any gaps. I would use epoxy, since superglue tends to be a bit messy. Paint it when you paint the whole back sphere.
- Paint the centre part bright red, and the U shaped piece matte black at the top.
- The red box had a number of painted details. However, these details appear one-way up in one scene and the other way-up in another. So you can take your pick which way round the box is!
- Be careful assembling the box once it's painted. If the parts are angled and aren't assembled straight-on you'll probably scratch the edges of the paintwork.
- The top of the pyramid was outlined in white. The two tiny raised rectangles on the top of the pyramid were dark yellow, and were on the right side of the pyramid in the hotel room scene and on the left side in the pod bay. There are four raised rectangles on the tops and bottom of the vertical grooves. In the hotel room the colours were white in the upper left, black for the bottom two, and red (ie: no colour) for the upper right. Rotate the rectangle colour positions by 180° for the pod bay.
Access hatch door handle
As a bonus, I've modelled the door handle to the small access hatch to the right of the back door. This was, on the full sized props, a piece from an Airfix SRN1 hovercraft model kit - you can see this part elsewhere in the film, such as on the moonbus landing gear and the greebly panel to the left side of the Discovery's emergency airlock. This detail goes on the left side of the hatch door and is represented by Moebius as a featureless strip.
It's a tiny bit thicker than it should be, to be printable, but it's close to scale. I housed the piece in a little cage to protect it in shipping, as it's crazy thin. To remove it, first use sprue cutters to snip off the cage supports. Then cut off the cylinder attached to the middle of the T-shaped door handle. Cut the cylinder off at the bottom, so it stays attached to the handle. Be really careful - it's an insanely thin and fragile part!
You can then glue in the handle, using the cylinder as a support. This will require drilling a hole about 1.25mm in diameter. The handle was centre-aligned vertically on the door panel. It was a medium grey in the film.
Details
What's in the box:
Moebius Pyramid only
Dimensions:
Success Rate:
First To try.
What's this?
Rating:
Mature audiences only.


