
Clear Ultra Fine Detail Plastic


Snow speeder, Closed Canopy and Flaps, 1:144
Made by
Print With Shapeways
 Choose Your Material
 Choose your color and finish
$12.00
Have a question about this product?
contact the designerYou must be logged in and verified to contact the designer.
Product Description
So. You've bought the Bandai 1:144 Vehicle Model 008, which includes a two-legged walker - and the snow speeder! Awesome. You've bought a Bandai 1:144 Falcon and some Vehicle Model fighters, and you're making your ice planet base diorama. Maybe a big walker too. The detailing and quality of the kits are amazing.
But. The Bandai 1:144 snow speeder has solid plastic windows. Argh.
You could spend ages drilling and cutting and shaving the plastic, and opening up the canopy. And then you'd have to figure out what cockpit detailing you're going to put inside.
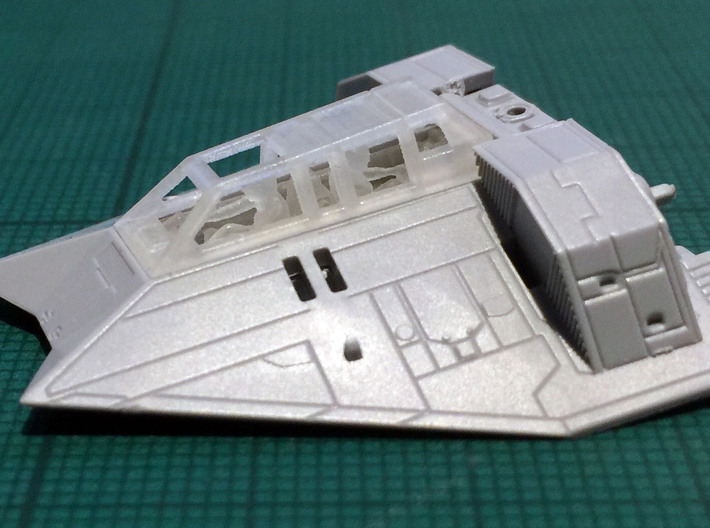
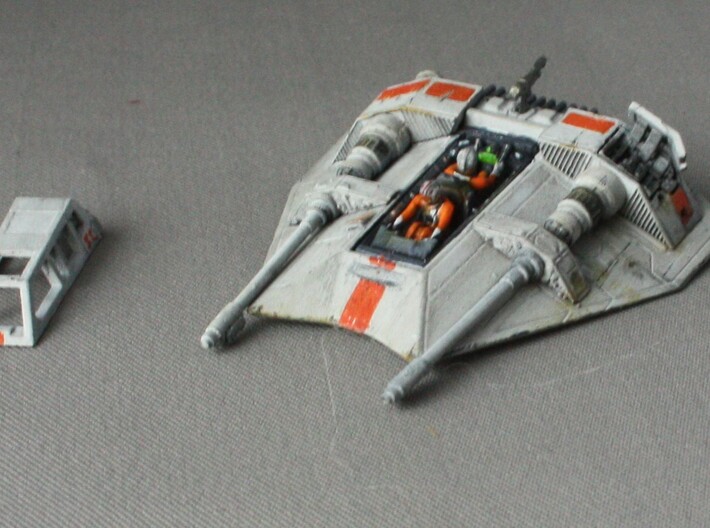
Or you could buy this! A complete interior detailing kit and replacement canopy for the 1:144 Bandai speeder. This version includes a full cockpit crewed with pilot and gunner, a closed canopy, and flap thingies. Perfect for that diorama you're making of the speeders attacking a walker. If you want to model parked speeders in the ice hangar I've also made a version with no crew, and an open canopy. If your diorama has two speeders, I've made a double closed canopy set with two different crews in different poses.
Installation
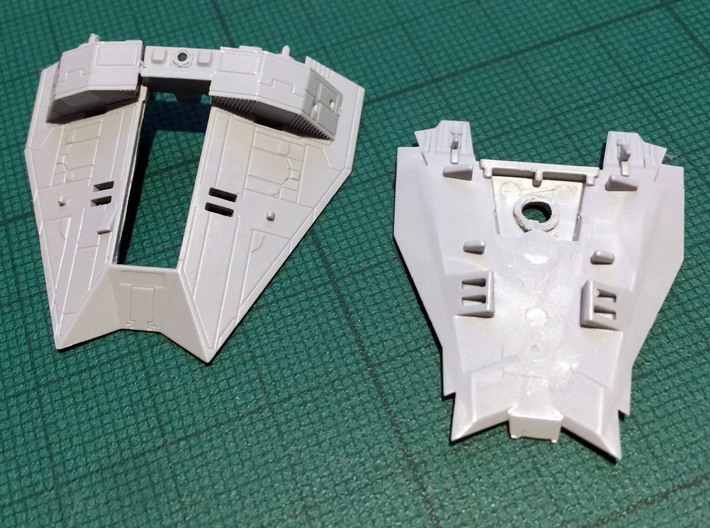
Now. There is a catch to this, and that's that it takes a bunch of work to fit these parts. You'll need to cut out a rectangular opening in the top of the speeder chassis, and file and trim very carefully until the cockpit fits into place. Err on the side of undercutting the plastic, then do a bunch of test fits of the cockpit assembly. I would also recommend using epoxy to glue the part in place, since that gives you a few minutes to reposition the height of the part while the glue hardens. You want the top of the cockpit to be in line with the top of the hole, basically. You'll also need to cut out the pegs that hold the bottom and top halves together, so you'll need to glue this model - no more snap together! Note one bonus - with the closed canopy version like this you don't cut to have a perfect hole as minor rough edges will be covered by the canopy edge.
Flaps
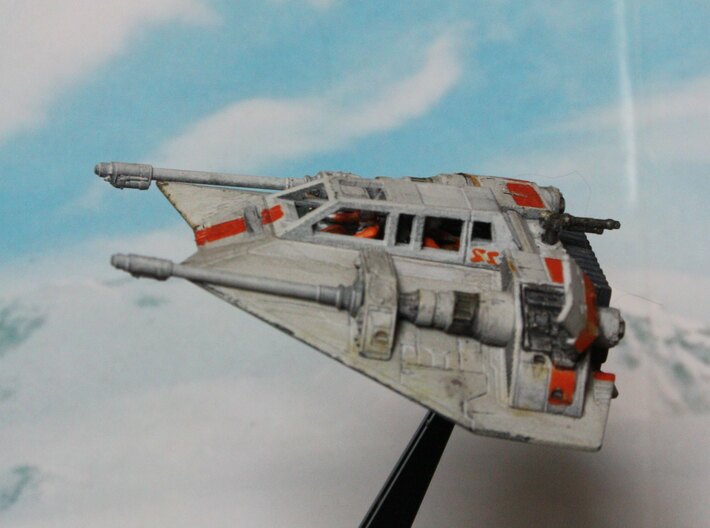
One notable thing about the speeder design are the four air-brake flap thingies that move up and down as the vehicle banks. Not terribly realistic, but very cool looking. The Bandai 144 speeder has the lower brakes in a fixed position, but the upper brakes are shut. This kit lets you open up the model and install a flap or two if you want.
However, installing the flaps is really very difficult. Let me say that again - you have to be extremely confident in your abilities to work with insanely tiny bits of plastic! You have to cut out a tiny L-shaped piece from the shoulders to whichever side you want the flap, and carefully slot in the piece. You also need to position the part correctly (ie: low down) so that if the flap were lowered it wouldn't stick out.
2019 update: I've sprued these two parts to save costs. You'll need to trim off those parts. I'd recommend a flush-cut sprue cutter. Hold the non-cutting side (the flat side) against the part, and let the sprue fly off. Do NOT use a side-shear sprue cutter such as those made by Xuron - the shearing action tends to split the plastic!
Painting
Painting is difficult, since the cockpit assembly is so tiny. It's probably best to paint the speeder exterior and cockpit interior separately, then glue them together. You could also make seatbelts and harnesses from thin wire - I couldn't make them printable - and glue them in.
You may ask why the figures are not separate parts, as that'd make it much easier to paint. The answer is because it's easier to 3D-print the models this way. The figures are permanently fixed inside the cockpit, which protects the delicate parts from handling and shipping damage. And it also means that the hands of each figure are permanently attached to a control or joystick or whatever. This means you don't have brittle overhanging parts. Sorry it makes it fiddlier to paint, but at least you should be getting your print all in one piece!
The feet of each pilot and gunner are missing, unfortunately, because otherwise they'd overhang and make the part more difficult to install. You can't tell from the outside of course.
And, in terms of not being able to tell from outside, this cockpit is not 100% accurate to the original sets, I'm sure. I made them close, given the photographic documentation that's available, and given the restrictions of 3D printing. (lots of parts such as the flap hinges are much bigger than they would be to scale, just to make them printable)
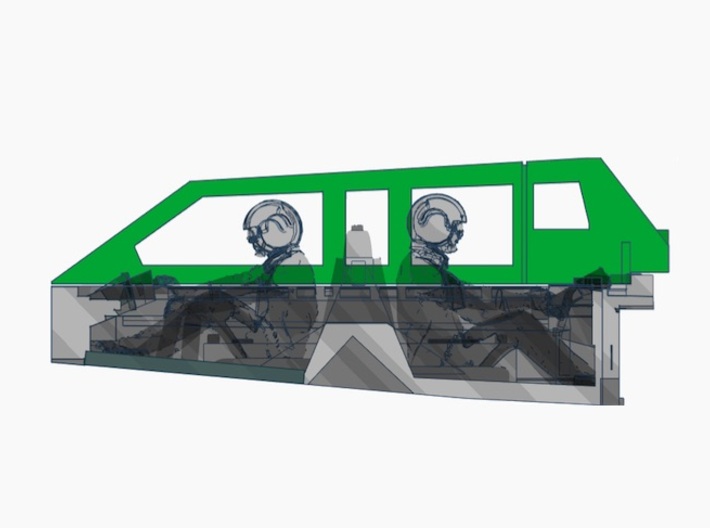
But basically the cockpit interiors are never really seen in the film - you mostly see shots of the pilots' heads and shoulders. So there is some creative licence involved in this design. Also, the cockpits are obviously modelled more after the full-size sets for the actors, rather than the shooting miniatures which were quite different. As you can see in the side rendering, the full-sized set wouldn't have really fit in the snowspeeder – I had to really squash and scrunch the figures to make them kind of fit. Frankly, though, at this tiny size nobody is going to be able to tell anyway!
Please read the following if you're interested in these items.
These accurizing parts are not mass-market commercial products. I made them for my own use, and have put them here in case they're of interest to someone else. Possibly you, since you’re reading this.
These are components for the serious model maker who wants to build a more accurate miniature. They require finishing. If you don't want to trim, file, sand, and glue, then these aren't the parts you're looking for!
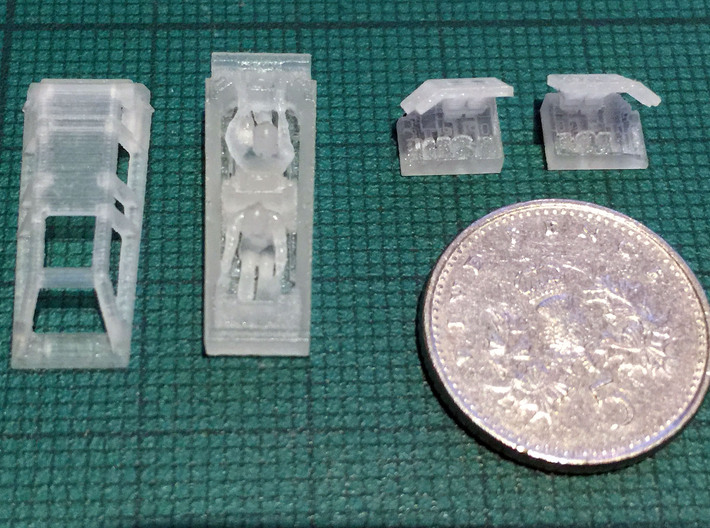
The parts are tiny, and easily broken. They push the limits of today's 3D printers. The detail in the digital previews is all there, but it won't always be visible at the miniscule sizes that this scale requires!
But. The Bandai 1:144 snow speeder has solid plastic windows. Argh.
You could spend ages drilling and cutting and shaving the plastic, and opening up the canopy. And then you'd have to figure out what cockpit detailing you're going to put inside.
Or you could buy this! A complete interior detailing kit and replacement canopy for the 1:144 Bandai speeder. This version includes a full cockpit crewed with pilot and gunner, a closed canopy, and flap thingies. Perfect for that diorama you're making of the speeders attacking a walker. If you want to model parked speeders in the ice hangar I've also made a version with no crew, and an open canopy. If your diorama has two speeders, I've made a double closed canopy set with two different crews in different poses.
Installation
Now. There is a catch to this, and that's that it takes a bunch of work to fit these parts. You'll need to cut out a rectangular opening in the top of the speeder chassis, and file and trim very carefully until the cockpit fits into place. Err on the side of undercutting the plastic, then do a bunch of test fits of the cockpit assembly. I would also recommend using epoxy to glue the part in place, since that gives you a few minutes to reposition the height of the part while the glue hardens. You want the top of the cockpit to be in line with the top of the hole, basically. You'll also need to cut out the pegs that hold the bottom and top halves together, so you'll need to glue this model - no more snap together! Note one bonus - with the closed canopy version like this you don't cut to have a perfect hole as minor rough edges will be covered by the canopy edge.
Flaps
One notable thing about the speeder design are the four air-brake flap thingies that move up and down as the vehicle banks. Not terribly realistic, but very cool looking. The Bandai 144 speeder has the lower brakes in a fixed position, but the upper brakes are shut. This kit lets you open up the model and install a flap or two if you want.
However, installing the flaps is really very difficult. Let me say that again - you have to be extremely confident in your abilities to work with insanely tiny bits of plastic! You have to cut out a tiny L-shaped piece from the shoulders to whichever side you want the flap, and carefully slot in the piece. You also need to position the part correctly (ie: low down) so that if the flap were lowered it wouldn't stick out.
2019 update: I've sprued these two parts to save costs. You'll need to trim off those parts. I'd recommend a flush-cut sprue cutter. Hold the non-cutting side (the flat side) against the part, and let the sprue fly off. Do NOT use a side-shear sprue cutter such as those made by Xuron - the shearing action tends to split the plastic!
Painting
Painting is difficult, since the cockpit assembly is so tiny. It's probably best to paint the speeder exterior and cockpit interior separately, then glue them together. You could also make seatbelts and harnesses from thin wire - I couldn't make them printable - and glue them in.
You may ask why the figures are not separate parts, as that'd make it much easier to paint. The answer is because it's easier to 3D-print the models this way. The figures are permanently fixed inside the cockpit, which protects the delicate parts from handling and shipping damage. And it also means that the hands of each figure are permanently attached to a control or joystick or whatever. This means you don't have brittle overhanging parts. Sorry it makes it fiddlier to paint, but at least you should be getting your print all in one piece!
The feet of each pilot and gunner are missing, unfortunately, because otherwise they'd overhang and make the part more difficult to install. You can't tell from the outside of course.
And, in terms of not being able to tell from outside, this cockpit is not 100% accurate to the original sets, I'm sure. I made them close, given the photographic documentation that's available, and given the restrictions of 3D printing. (lots of parts such as the flap hinges are much bigger than they would be to scale, just to make them printable)
But basically the cockpit interiors are never really seen in the film - you mostly see shots of the pilots' heads and shoulders. So there is some creative licence involved in this design. Also, the cockpits are obviously modelled more after the full-size sets for the actors, rather than the shooting miniatures which were quite different. As you can see in the side rendering, the full-sized set wouldn't have really fit in the snowspeeder – I had to really squash and scrunch the figures to make them kind of fit. Frankly, though, at this tiny size nobody is going to be able to tell anyway!
Please read the following if you're interested in these items.
These accurizing parts are not mass-market commercial products. I made them for my own use, and have put them here in case they're of interest to someone else. Possibly you, since you’re reading this.
These are components for the serious model maker who wants to build a more accurate miniature. They require finishing. If you don't want to trim, file, sand, and glue, then these aren't the parts you're looking for!
The parts are tiny, and easily broken. They push the limits of today's 3D printers. The detail in the digital previews is all there, but it won't always be visible at the miniscule sizes that this scale requires!
Details
What's in the box:
Snowspeeder, Closed Canopy, 1:144

Dimensions:
Success Rate:
First To try.
What's this?
Rating:
Mature audiences only.


