Tan Fine Detail Plastic


Moebius EVA Pod: Interior Details
Made by
Print With Shapeways
 Choose Your Material
 Choose your color and finish
$24.10
Have a question about this product?
contact the designerYou must be logged in and verified to contact the designer.
Product Description
The Moebius EVA pod model kit has a bunch of highly abbreviated and incorrect interior details. Most people aren't going to be too bothered by this, obviously, since these details aren't easy to see. And they weren't easy to see in the movie, as well.
Still, I thought it'd be fun to go and get more accurate renditions of these parts. I did a bunch of research, including a couple of visits to the Stanley Kubrick Archives, and was able to get reasonably good data on most of the various internal parts. There are some details for which there is no photographic evidence at all, but most of the stuff is there.
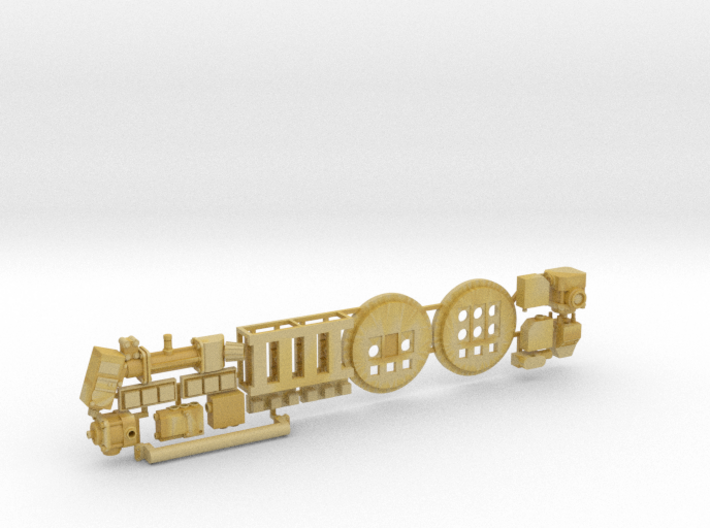
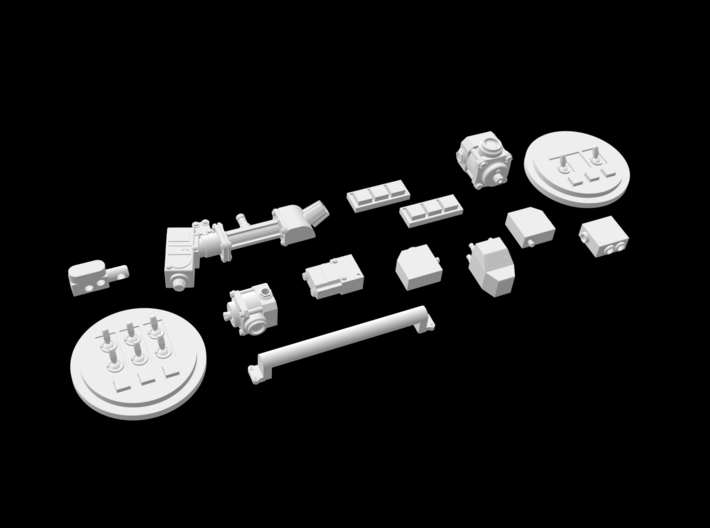
There are basically three types of internal details included in this set.
1) The upper-side discs.
They actually had flip switches, but Moebius portrayed them incorrectly with clear panels with a bunch of lights. The discs were also assymetrical. Each panel had 3 square illuminated pushbuttons at the bottom, but either 3 (port side) or 6 (starboard side) black plastic paddle switches.
Amusingly enough the panels change position from shot to shot in the movie. Sometimes the switches are at the top, sometimes they're at the bottom, and in one instance they're rotated 90 degrees! The correct orientation is with the three blue square pushbuttons at the bottom.
The orientation is known since they had text on them. If you're interested the starboard panel's buttons were light blue plastic, and they had the words "POWER ON", "DISPLAY", and "POWER OFF" written on them in white. I wasn't able to find high-rez enough photos of the port panel to know what its buttons read. I also wasn't able to confirm if the port panel buttons were pale green as they appear in the film.
I have supplied an extra set of three switches in case of breakage, since they're so fragile. That, incidentally, is why I built a protective cage around the switch components. Use a fine-tipped sprue cutter (the kind with blades that squeeze together, not the type that shear or cut across each other) to snip off the sprues. Be careful as the parts are insanely delicate!
The switches appear to have always been in the up position. Note that there was a tiny alignment notch on each switch, and it was always on the left side.
If you want the discs alone, without all the other greeblage, I've made those available separately.
2) The random red boxes
These things, like hydraulic components or maybe junction boxes, are all over the interior sphere of the pod. Moebius gets most of these very roughly okay in terms of shape and location, but very wrong in the details.
They're mostly joined by flexible pipes or hoses. You'll need some 1.5mm wire to join the various bits. You could reuse the Moebius plastic moulded parts, but wire would look better.
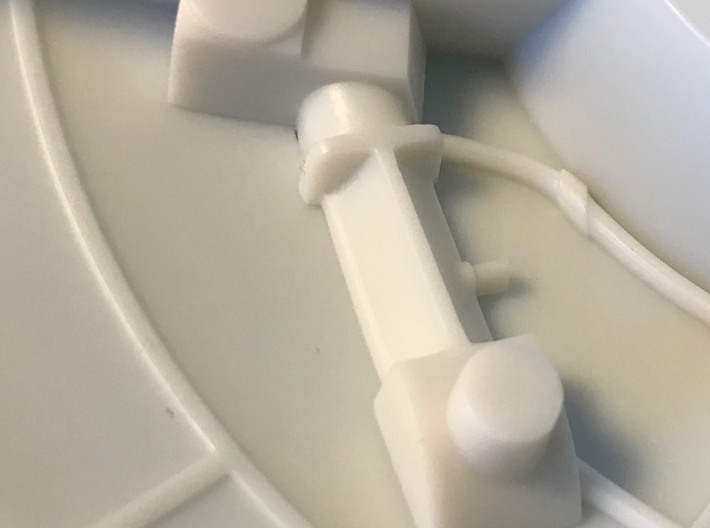
3) The overhead handlebar
This is presumably the one that actor Gary Lockwood, who played Frank Poole, mentions requesting. It's to the back of the ceiling area, and replaces the Moebius-supplied one. Note that it's 3D printed plastic, so it's going to be more brittle than the styrene one.
4) Armrest buttons.
Immediately next to the L-shaped detail on the sprues there is a pair of rectangles, each with three squares on them. These are pushbuttons which sit on the sort of armrest things inside the cockpit. They can be lit from below if you drill suitable holes.
Separate parts for painting
I produced the parts, especially the panels, as separate pieces to make it easier for you to light and paint. This lets you light-block the circular panels with silver and black paint, then install the squares for lighting.
The switches had shiny chrome rings and black centres and levers, and having them separate pieces makes it easier to paint them. I'd recommend using a fine-tipped silver pen to colour in the rings, having painted the switches black.
Tamiya blue and green clear acrylic paint is good for the groups of three square buttons, which appear to have been pale green on the port side and pale blue on the starboard side (maybe). The round panels as a whole were satin black, with white silkscreened rectangles drawn around the switch group and the button group.
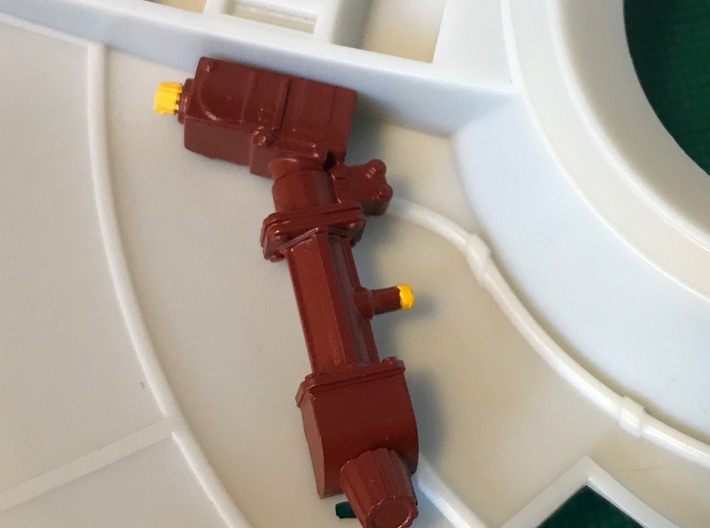
The wall boxes were all the same brick-red colour as the interior of the sphere. Note that they weren't scarlet red, as Moebius says to paint it. The exception was the long L-shaped box. The narrow protruding bit had a yellow tip, and the smaller of the two knurled knobs was also yellow.
This set is available in both "smooth" and "smoothest" detail plastic. I don't see a huge advantage in the more expensive option. It's slightly higher resolution, but since the parts are all interior details anyway, it won't really matter.
Still, I thought it'd be fun to go and get more accurate renditions of these parts. I did a bunch of research, including a couple of visits to the Stanley Kubrick Archives, and was able to get reasonably good data on most of the various internal parts. There are some details for which there is no photographic evidence at all, but most of the stuff is there.
There are basically three types of internal details included in this set.
1) The upper-side discs.
They actually had flip switches, but Moebius portrayed them incorrectly with clear panels with a bunch of lights. The discs were also assymetrical. Each panel had 3 square illuminated pushbuttons at the bottom, but either 3 (port side) or 6 (starboard side) black plastic paddle switches.
Amusingly enough the panels change position from shot to shot in the movie. Sometimes the switches are at the top, sometimes they're at the bottom, and in one instance they're rotated 90 degrees! The correct orientation is with the three blue square pushbuttons at the bottom.
The orientation is known since they had text on them. If you're interested the starboard panel's buttons were light blue plastic, and they had the words "POWER ON", "DISPLAY", and "POWER OFF" written on them in white. I wasn't able to find high-rez enough photos of the port panel to know what its buttons read. I also wasn't able to confirm if the port panel buttons were pale green as they appear in the film.
I have supplied an extra set of three switches in case of breakage, since they're so fragile. That, incidentally, is why I built a protective cage around the switch components. Use a fine-tipped sprue cutter (the kind with blades that squeeze together, not the type that shear or cut across each other) to snip off the sprues. Be careful as the parts are insanely delicate!
The switches appear to have always been in the up position. Note that there was a tiny alignment notch on each switch, and it was always on the left side.
If you want the discs alone, without all the other greeblage, I've made those available separately.
2) The random red boxes
These things, like hydraulic components or maybe junction boxes, are all over the interior sphere of the pod. Moebius gets most of these very roughly okay in terms of shape and location, but very wrong in the details.
They're mostly joined by flexible pipes or hoses. You'll need some 1.5mm wire to join the various bits. You could reuse the Moebius plastic moulded parts, but wire would look better.
3) The overhead handlebar
This is presumably the one that actor Gary Lockwood, who played Frank Poole, mentions requesting. It's to the back of the ceiling area, and replaces the Moebius-supplied one. Note that it's 3D printed plastic, so it's going to be more brittle than the styrene one.
4) Armrest buttons.
Immediately next to the L-shaped detail on the sprues there is a pair of rectangles, each with three squares on them. These are pushbuttons which sit on the sort of armrest things inside the cockpit. They can be lit from below if you drill suitable holes.
Separate parts for painting
I produced the parts, especially the panels, as separate pieces to make it easier for you to light and paint. This lets you light-block the circular panels with silver and black paint, then install the squares for lighting.
The switches had shiny chrome rings and black centres and levers, and having them separate pieces makes it easier to paint them. I'd recommend using a fine-tipped silver pen to colour in the rings, having painted the switches black.
Tamiya blue and green clear acrylic paint is good for the groups of three square buttons, which appear to have been pale green on the port side and pale blue on the starboard side (maybe). The round panels as a whole were satin black, with white silkscreened rectangles drawn around the switch group and the button group.
The wall boxes were all the same brick-red colour as the interior of the sphere. Note that they weren't scarlet red, as Moebius says to paint it. The exception was the long L-shaped box. The narrow protruding bit had a yellow tip, and the smaller of the two knurled knobs was also yellow.
This set is available in both "smooth" and "smoothest" detail plastic. I don't see a huge advantage in the more expensive option. It's slightly higher resolution, but since the parts are all interior details anyway, it won't really matter.
Details
What's in the box:
EVA Pod Interior Details

Dimensions:
Success Rate:
First To try.
What's this?
Rating:
Mature audiences only.


