

Today’s guest blog comes from Gabriel Guzman of 3D to the 3e. Gabriel, a professor of microbiology and a jewelry designer, has found a perfect way to combine his passion for science with a love of design. He lets us in on how his Crochet Pendant went from concept to reality — and helped him go from scientist to designer.
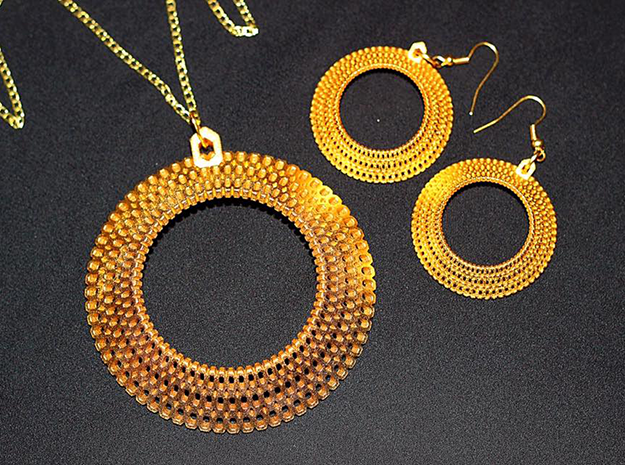
Designer Gabriel Guzman’s Crochet Pendant and Earrings
To me, a biochemist and a microbiologist, the design process for 3D printing has a lot in common with designing an experiment in the lab. First there is a general idea that generates a possible solution — a hypothesis. Then there is the use of design tools to shape that idea into something printable. And, of course, continuous prototyping to explore different versions of the design. Finally, one of the iterations will have the aesthetics, balance, and curiosity, if you will, that might make somebody ask, “How did you do that?”
When I first began to design the Crochet Pendant, I did have a pendant in mind, but the final design didn’t emerge until after I played with a number of different iterations. The name, however, came after looking at the final design — and a crochet piece that I saw on a table. My mother used to have a lot of doilies and other table covers made with crochet.
In terms of the technical design process, I was getting my hands wet with an experimental app from Autodesk called Project Shapeshifter, which allowed for the creation of generative designs. Generative design is a method in which the final model is generated by a computer program following a set of rules or an algorithm. I started with a general shape that I had in mind, but I didn’t know what I would end up with in terms of the final object. So, I tested different parameters in Shapeshifter, until one of the many iterations had everything I wanted to see in the pendant.
I began with the idea of a circular object, with details based on the repetitive pattern of a honeycomb. Shapeshifter only generated the file to be printed, but a pendant needs a loop, a bail, or something to pass a chain through. I chose Tinkercad for that purpose because the software was free and easy to use. I designed a very simple loop, which wasn’t circular but followed the shape of the pattern, and the end result was a piece that has generated a lot of comments, but more important, a piece that I was satisfied with. Perhaps the most important lesson for me is that none of my finished designs are exactly as I first imagine them, and they really don’t have to. Every finished design is a result of tweaking, and rethinking possibilities.
The reaction from people, especially if they don’t know anything about 3D printing, is of amazement that a machine can make jewelry. The metal version of the pendant didn’t happen until about three months after I printed the first version at home in a mint-colored plastic. My wife wore the pendant during that year’s commencement ceremony and my colleagues kept asking her about the piece, and then kept asking me about how it was made. I never imagined that a piece made in plastic could draw that much attention!
For those with experience designing jewelry the old-fashioned way (by sculpting wax), they recognize what 3D printing technology can do for their own creativity. It helps them go beyond the traditional wax sculpting into digital sculpting. But, for the novice, this technology is also a way to democratize art. Perhaps the most common question I get is, “How does a microbiologist turn into a jeweler?” If people consider me a jeweler, I take that as a big compliment! After all, I didn’t go to art school, although I do have some background in graphic design, but I never fancied myself a jeweler until I began experimenting with 3D printing.