
A couple of weeks ago we discussed how to make complex designs with simple Structure Synth code, but what we didn’t mention is that the resulting models can need a bit of cleanup before they are printable. Because of the way Structure Synth models are constructed, they often consist of a large number of overlapping objects, and this can lead to some pretty nasty geometry.
This week we’ll walk through the creation of a specific model with Structure Synth, and the steps needed to make it 3D printable in various materials.
Create Something with Structure Synth
For our example we’ll create a Tentacle Bowl, with 20 tentacles each made from a semi-random sequence of spheres that twist and turn:
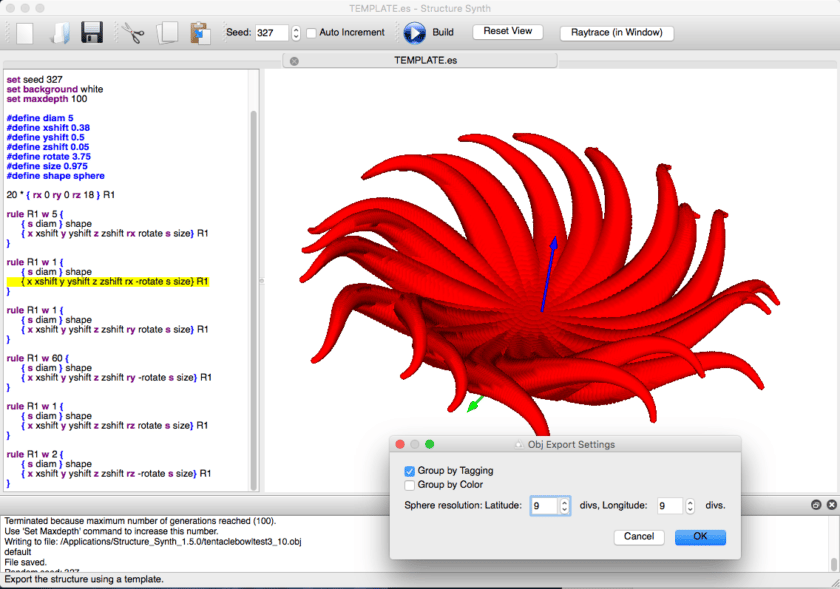
The line “20*{rx 0 ry 0 rz 18} R1” creates twenty tentacles, each rotated 18 degrees from the last. Each of the tentacles is created by iterating versions of rule R1 100 times. There are six different versions of R1, each with a different probability weight of being used; these variations allow the code to create a slightly different tentacle each time. To understand this code better, check out our post Tutorial Tuesday 27: Design for Complexity With Structure Synth.
After creating the model we exported to .obj, setting sphere resolution in the export step as shown in the pop-up window in the figure above. We made the resolution as rough as we could get away with, both to preserve the “ridging” on the model and to try to keep the complexity of our mesh in check.
Make it Solid
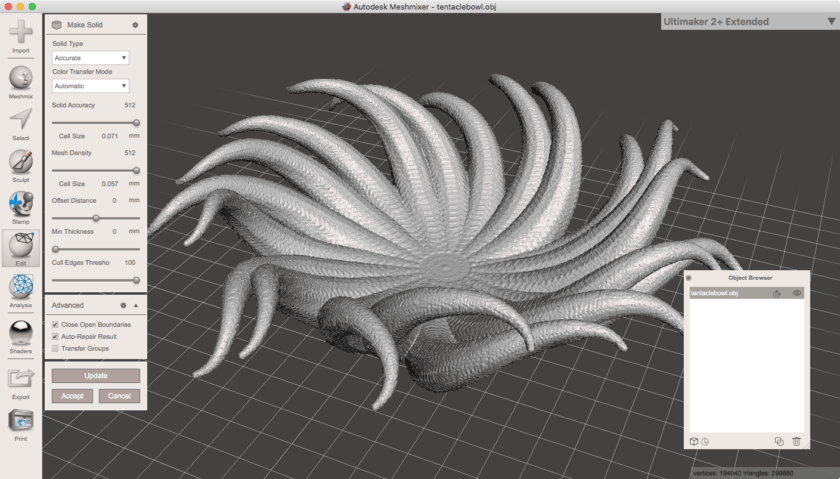
Our Tentacle Bowl model is made of many overlapping spheres. To make it printable we have to first make the object “solid” — that is, we to convert the geometry of this object so that its mesh is all on the exterior, with no extra geometry on the inside.
There are many ways you can take a 3D mesh with internal geometry and make it solid. For example, in MeshLab you can use the Screened Poisson Surface Reconstruction tool in the Filters < Remeshing, Simplification, and Reconstruction menu. Or you can try using Netfabb Basic (if you have an old copy on your Mac) or Netfabb Trial Version (if you have a Windows machine). I’m sure you can use Blender and Rhino to solidify internal geometry as well, but I don’t know how to do that yet; if you do, the please tell us about it in the comments!
If you want to have a lot of control of how your object is remeshed, a great free option is Meshmixer. Open Meshmixer and select the Make Solid tool from the left-column Edit menu. As with most operations in Meshmixer, it’s all about the settings. Note the ones in the figure: set Solid Type to Accurate and crank up Solid Accuracy and Mesh Density. We could also have used lower Mesh Density and obtained a somewhat smoother model, but we wanted to retain some of the ridging from the original overlapping spheres.
The next Meshmixer step after the screenshot above is to press “Accept”, which will add a new model to your build platform and Object Browser. After that, just delete the original model from the Object Browser so that you are left with only the newly reconstructed solid model.
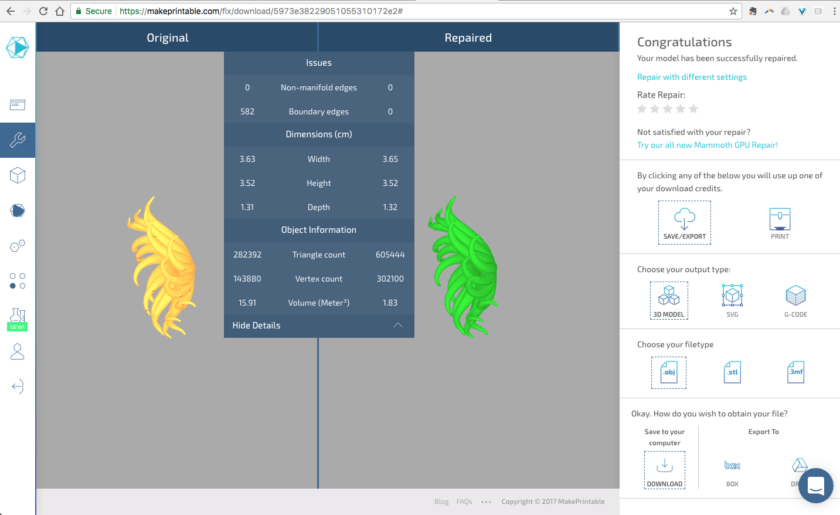
Alternately, if you sign up for the Free Plan on the online MakePrintable service, you can upload your model for repairs in the cloud. It takes longer than Meshmixer, but the results were even better! For more information on using this new cloud repair service, check out our article from last week, Tutorial Tuesday 29: Rescue Your 3D Models With MakePrintable.
Make it Simpler
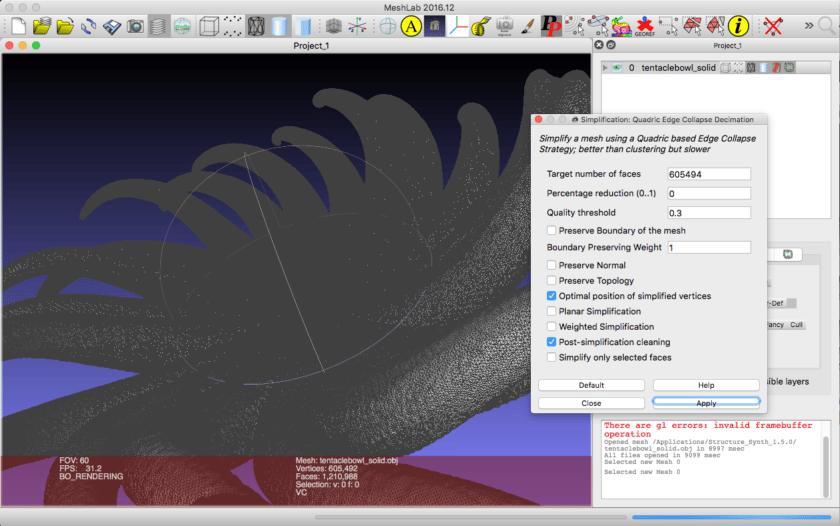
If you need to reduce the number of triangles in your mesh, then this is a good time to do so. Keep in mind that Shapeways can only accept models with fewer than one million triangles, and also that the rest of our model preparation steps will take less time if we work with a less complex mesh. My tool of choice for mesh reduction is MeshLab. After importing your model to MeshLab, select the Simplification: Quadric Edge Collapse Decimation from the Filters < Remeshing, Simplification, and Reconstruction menu, and apply the tool to cut the number of faces in half. If needed, you can re-apply Quadric Edge Collapse Decimation to reduce by half again.
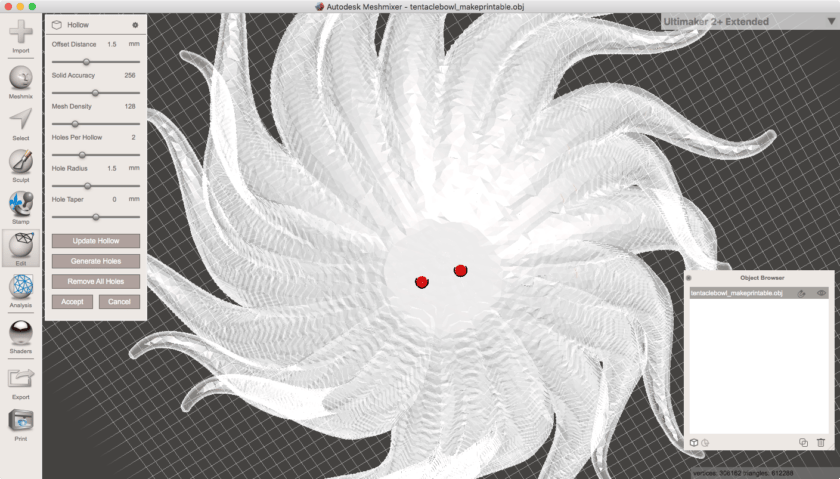
Make it Hollow
One way to make your model less expensive to print (in particular, with Shapeways Strong & Flexible Nylon or HP Jet Fusion) is to hollow out the inside. We’ll do this in Meshmixer, but first we have to scale our object to the desired final size — otherwise, later scaling would also change the width of the hollow shell. To print with HP Jet Fusion, we need our model to fit inside a maximum bounding box of 250 x 340 x 300mm, so we resized our to 249 x 258 x 93mm. We also used Edit < Plane Cut in Meshmixer to make a flat base for the hollowing holes in the next step.
Now use the Edit < Hollow tool and select settings as shown in the figure below or according to your needs, then press “Update Hollow”, “Generate Holes”, and “Accept” to perform the hollowing. We chose a thickness of 1.5 mm, well over the minimum wall thickness for HP Jet Fusion, but enough to make the model sturdy even when hollow inside.
If you want a completely open, hollow base, then apply an additional Edit < Plane Cut to remove the bottom of the model entirely, or use the Meshmix menu to pull in a shape and then Boolean Subtract it from your model.
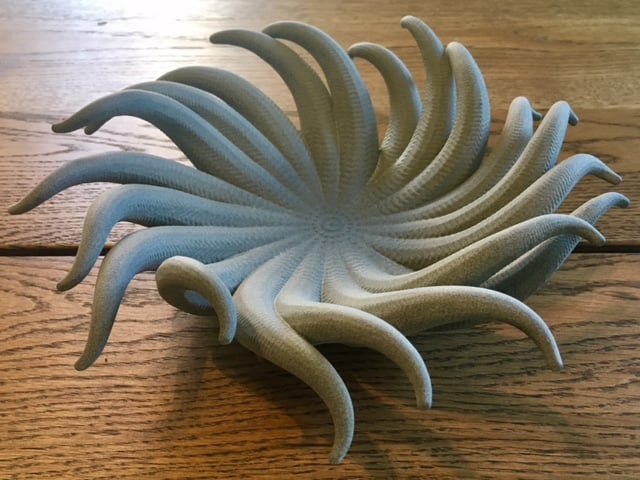
Print and enjoy!
Here’s how our Tentacle Bowl looks after printing in the new beta material HP Jet Fusion Strong & Flexible:
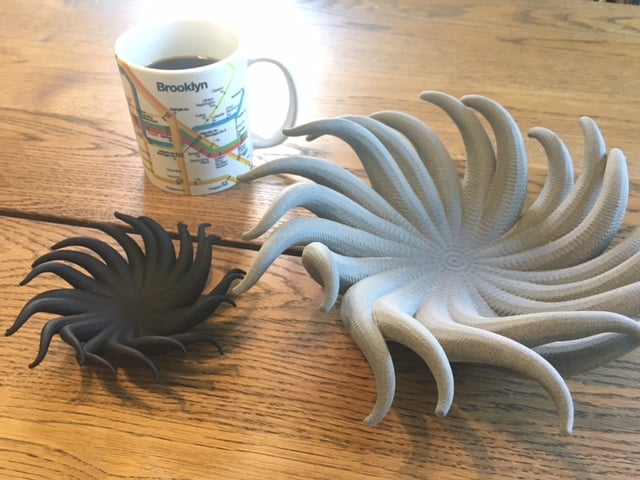
Our large-size model turned out to be fairly expensive, even when hollowed out, so we also made a fun-size 120 mm model with 1.2 mm thickness, for holding keys, jewelry, very small grapes, and whatnot. Here you can see both of them together:
Have you created anything with Structure Synth? Let us know and we can feature your work in a future post!