
What you can do with the Photoshaper.
It’s been a few weeks now since we have launched our latest Creator: the Photoshaper.
A lot of people have tried it out and ordered their very own Lightsculpture (= the print coming from the Photoshaper). I also had contact with some of you to get feedback on your experience with the Photoshaper. I was happy to hear that in general the feedback was positive and most of you are happy with the end result. Nevertheless there is always room for improvement and obviously that’s the challenge we take on daily.
One of the improvements I am currently working on is a way to use and display your Lightsculpture in your house… office… etc. Below you can see what came out of my tests. They are quite easy to make and it makes the Lightsculpture come out beautifully… if I may say so myself.
If you have any ideas or suggestions feel free to post them here or simply send me (peterpaul[at}Shapeways[dot]com) a mail.
Frame your Lightsculpture
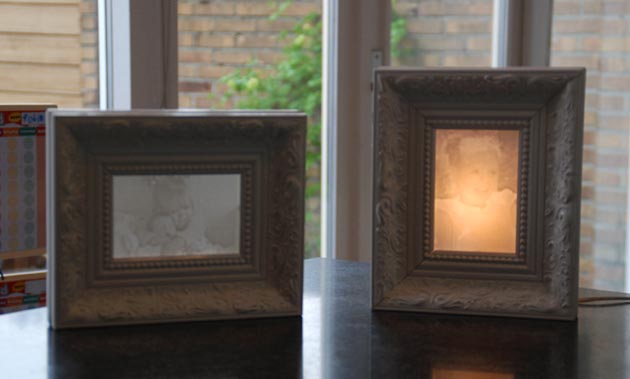
Get a picture frame of 13cm – 9cm (5,1in – 3,5in). The bigger the frame the better the result. A bigger frame size will give you the best light/dark contrast since the frame will block the light coming from the back and the Lightsculpture will allow it to go through.
Take out the glass and the back plate. Place your light sculpture in the frame and fix it.
Tadaaaaa….


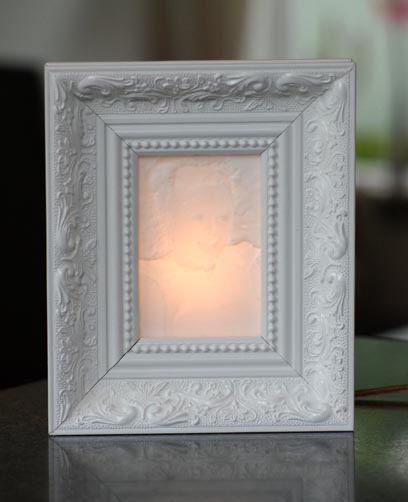
Backlight your Lightsculpture
The result above will work really well. However you could also take it 1 step future by mounting a backlight on the frame. You will need to buy a fitting with mounting bracket and a power cord.

Attach the power cord to the fitting, mount the fitting on the frame, put a lamp in it (not to strong for the best effect but also for the heat to keep the Lightsculpture from melting!!) and ….
Tadaaaaa…


If you have any other suggestions, applications, examples, feedback, etc …. Let me know
Peter Paul