Black Natural Versatile Plastic


Servo On Axle 4 Link for Redcat XR247 Axles
Made by
Print With Shapeways
 Choose Your Material
 Choose your color and finish
$22.18
Basic Materials Best Value
Shop Owner Recommendations
Have a question about this product?
contact the designerYou must be logged in and verified to contact the designer.
Product Description
Also available at 1tenth.com
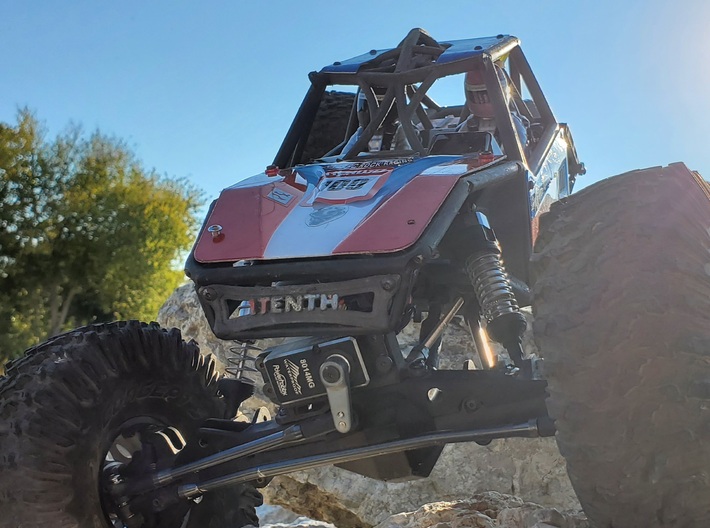
NOT INTENDED FOR USE ON A STOCK WENDIGO. XR247 and this SOA helped secure a 2nd Place Podium finish at Crawlapalooza 2020.
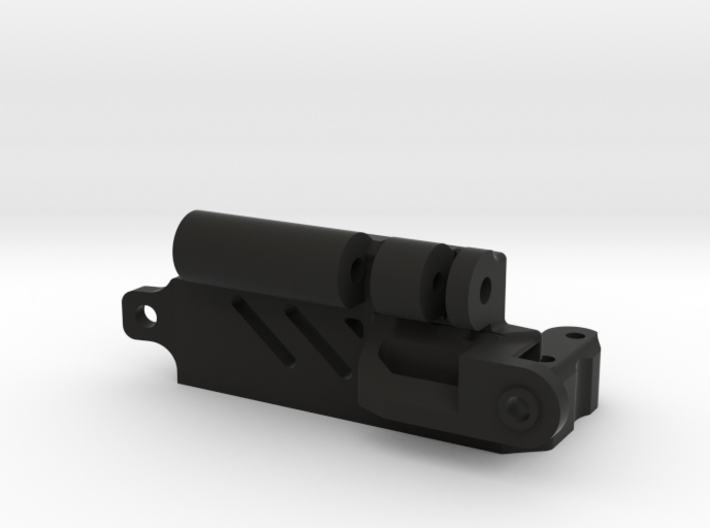
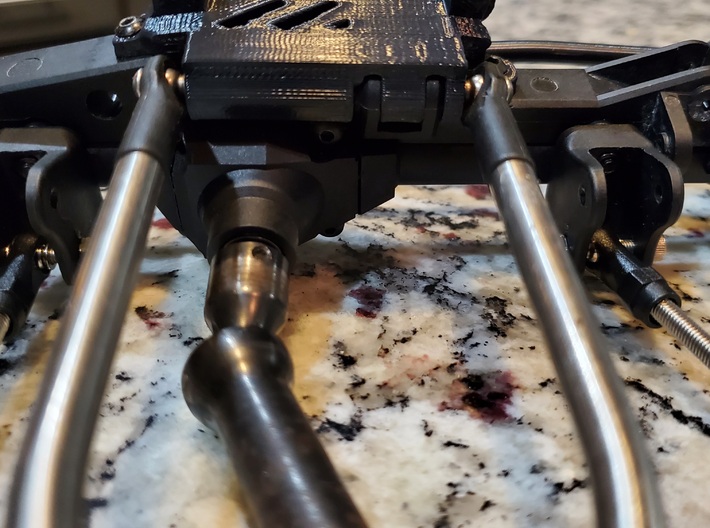
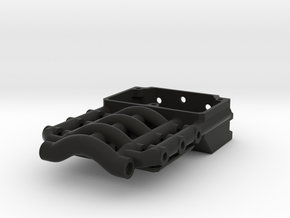
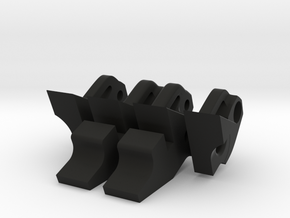
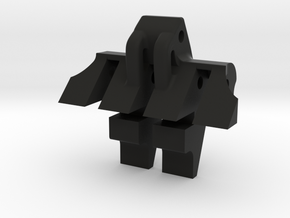
For those builders wanting a 4 link front with the new XR247 (Wendigo) axles this is another solution we have for you. This one utilizes the stock 3 link mount as a brace, pushes the link mount out a few mm and adds a mirrored mount on the opposite side.
If you're doing a monster truck build we highly suggest using the other version we have which puts the rear truss on the front. The Link geomtry will be better on a monster truck.
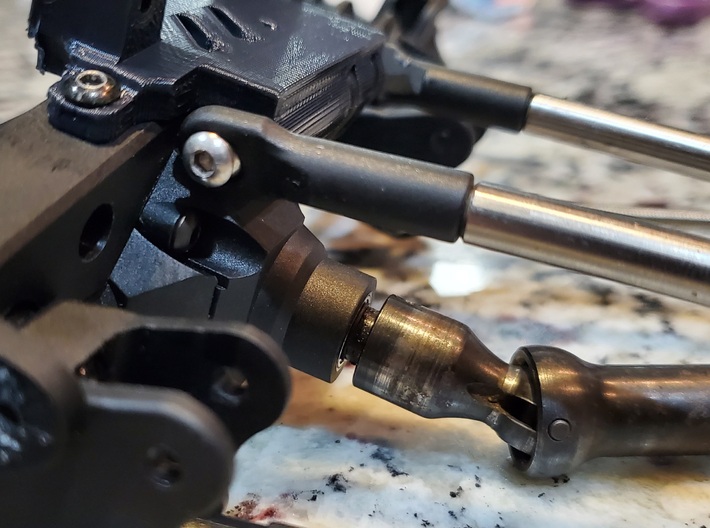
This slips onto the OEM front truss. You'll need a 2MM longer screw for the top of the truss and one M3x~60mm for the upper link mounts. Yeti hinge pins work great.
We also added a tab on the side for an additional screw to secure the drivers side. BUT... There is no hole in the truss.
What you'll need to do to use the side tab - Install mount, ensure it's aligned properly, drill (or melt) a 2.2-2.7MM hole in the truss (through the tab hole), then use proper screw to secure. I used a M2 hex head, heated till red with a little butane torce, then melted a hole and used a M3 self tapping screw. It's solid. Try to use .5mm smaller hole than the OD of the screw to ensure it grips good.
Custom parts made to order for customized rigs can occasionally need some minor tweaks for perfect fitment.
NOT INTENDED FOR USE ON A STOCK WENDIGO. XR247 and this SOA helped secure a 2nd Place Podium finish at Crawlapalooza 2020.
For those builders wanting a 4 link front with the new XR247 (Wendigo) axles this is another solution we have for you. This one utilizes the stock 3 link mount as a brace, pushes the link mount out a few mm and adds a mirrored mount on the opposite side.
If you're doing a monster truck build we highly suggest using the other version we have which puts the rear truss on the front. The Link geomtry will be better on a monster truck.
This slips onto the OEM front truss. You'll need a 2MM longer screw for the top of the truss and one M3x~60mm for the upper link mounts. Yeti hinge pins work great.
We also added a tab on the side for an additional screw to secure the drivers side. BUT... There is no hole in the truss.
What you'll need to do to use the side tab - Install mount, ensure it's aligned properly, drill (or melt) a 2.2-2.7MM hole in the truss (through the tab hole), then use proper screw to secure. I used a M2 hex head, heated till red with a little butane torce, then melted a hole and used a M3 self tapping screw. It's solid. Try to use .5mm smaller hole than the OD of the screw to ensure it grips good.
Custom parts made to order for customized rigs can occasionally need some minor tweaks for perfect fitment.
Details
What's in the box:
XR247 Front Truss SOA

Dimensions:
Success Rate:
First To try.
What's this?
Rating:
Mature audiences only.

