Clear Ultra Fine Detail Plastic


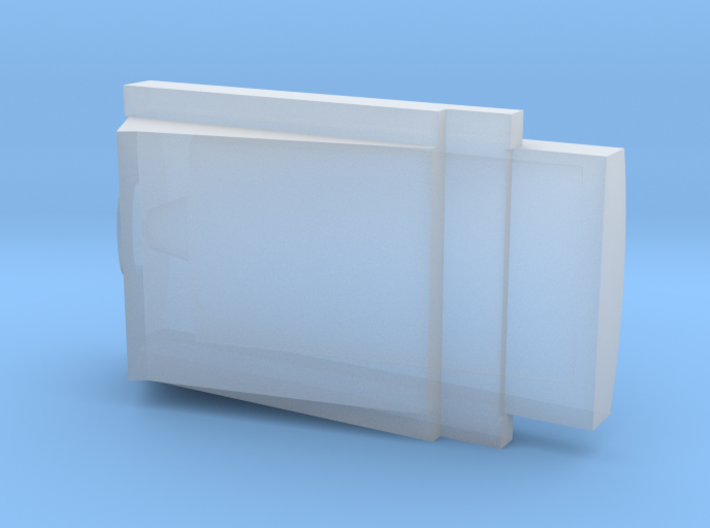
SR71 ARR (Airbourne Refuel Receptacle)
Made by
Print With Shapeways
 Choose Your Material
 Choose your color and finish
$16.59
Have a question about this product?
contact the designerYou must be logged in and verified to contact the designer.
Product Description
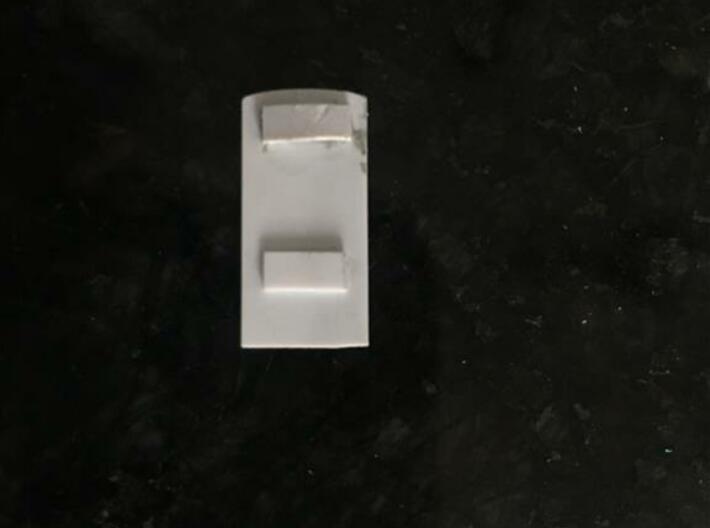
This is a replacement ARR (airbourne refuel receptacle) for the Testors/Italeri 1:48 SR-71 Blackbird (Habu) and A-12 Oxcart. It can also be used on the 1:48 YF-12.
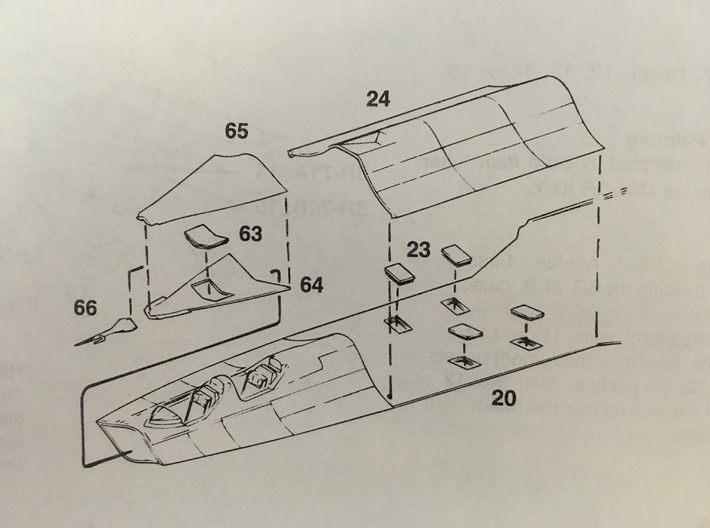
Installation is simple. Cut out the existing refuel receptacle from the kit (Part 25 for the Testors SR-71 -See image 3), and glue in the new part.
To do this you will need the following materials and tools:
Installation Instructions
OPTIONAL ADDITIONAL DETAIL (Refuel Door - See image 1)
Installation is simple. Cut out the existing refuel receptacle from the kit (Part 25 for the Testors SR-71 -See image 3), and glue in the new part.
To do this you will need the following materials and tools:
- Fine modelling saw
- Sharp craft knife
- Slow set superglue
- Masking Tape
- Fine tip marker pen
- Metric rule
- Fine modeling files
- Optional: 0.01-0.15", 0.2" and 0.03" Styrene (for door detail)
Installation Instructions
- Mark out on masking tape a 12mm x 25mm rectangle with a central line down the 25mm length.
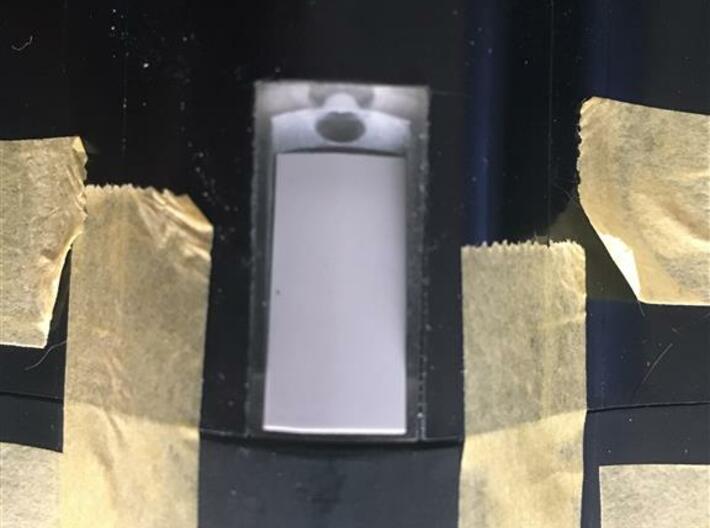
- Attach the marked tape to the outer surface of the fuselage section over the refuel moulding ensuring the short edge lines up withe the edge of the part and the central line runs along the central axis over the refuel moulding. DO NOT PUSH THE TAKE INTO THE CONTOURS OF THE MOULDING. (See image 5,6)
- Cut out the rectangluar shape and trial fit the new receptacle part.(See image 7)
- File and sand as required until you get a perfect. Tip - Focus on getting the side extrusions so the part aligns with the fuselage surface. (See image 8-10)
- Once you are happy with the fit, remove any masking tape and glue the part in. Its easiest to apply the glue to the inner edges of the fuselage and drop the part in from inside. (See image 11)
- Carry on with the kit build.
OPTIONAL ADDITIONAL DETAIL (Refuel Door - See image 1)
- Mark out a new rectangle 10mm x 20mm and cut from the 0.01 or 0.015" Styrene sheet (see image 12).
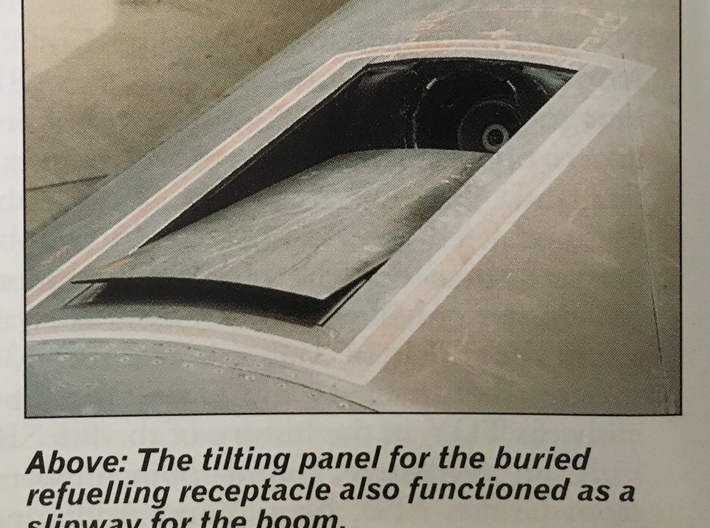
- Carefully shape one short edge to match the curvature of the receptacle part where the refuel nozzle is. This is the refuel door that lifts to close the receptacle during normal flight (see image 13).
- Cut out a second smaller rectangle 6mm x 3mm from the 0.02" and 0.03" styrene sheet. Glue this to the lower surface of the door, the 0.03" thick rectangle 1mm from the curved end of the door, and the 0.02" thick rectangle, 5mm from the opposite edge of the door. Ensure the styrene is curved over a cylindrical shape to conform to the curvature of the receptacle (see image 14).
- Using superglue, glue the door on to ARR ensuring the curved edge aligns with the nozzle end of the receptacle. **Recommend this part is done after the rest of the painting of the fuselage is completed.
- Carry on with the kit build.
Tags
1:48 - O Reconnaissance USA Cold War 1/48 A12 detail parts 1/48 Blackbird 1/48 Blackbird ARR 1/48 SR71 ARR 1/48 SR71 Detail Parts 1/48 YF12 detail parts 1:48 A-12 Detail Parts 1:48 A-12 Refuel 1:48 Blackbird 1:48 Habu Parts 1:48 Oxcart Parts 1:48 SR-71 Detail Parts 1:48 SR-71 Refuel 1:48 YF-12 1:48 YF-12 Detail PartsDetails
What's in the box:
SR71 ARR Refuel Receptacle

Dimensions:
Success Rate:
First To try.
What's this?
Rating:
Mature audiences only.

