Smooth Fine Detail Plastic


HO San Diego Electric Railway Class One
Made by
Print With Shapeways
 Choose Your Material
 Choose your color and finish
$113.07
Have a question about this product?
contact the designerYou must be logged in and verified to contact the designer.
Product Description
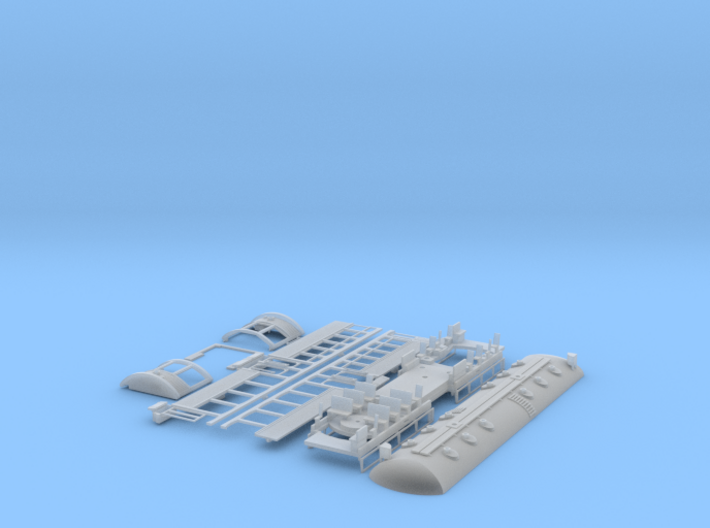
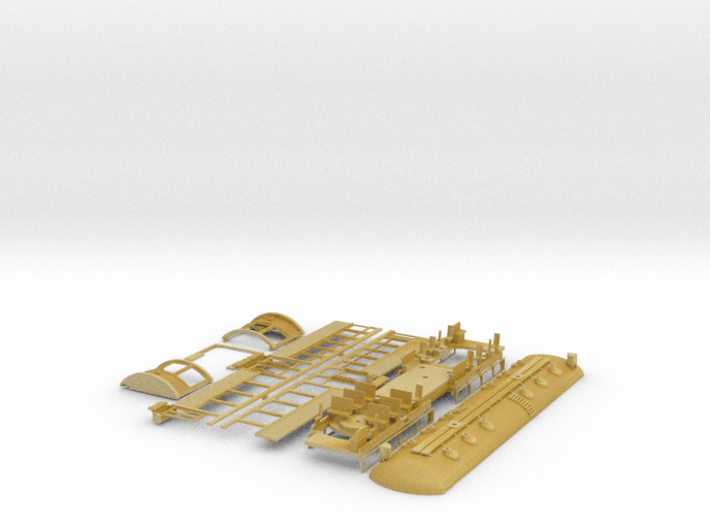
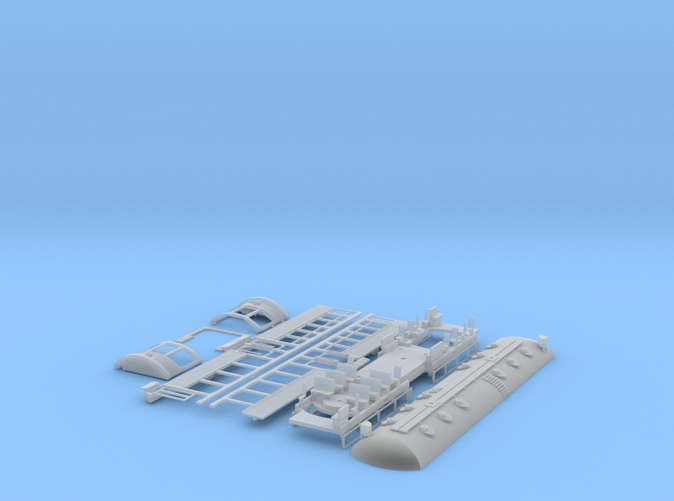
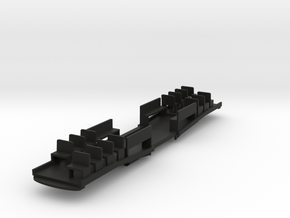
A kit for a SDERy Class One streetcar in HO scale.
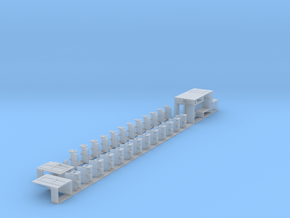
The floor portion of this kit is designed with the Bowser drive system in mind, kit 125130, available from Custom Traxx.
We are aware that these cars had Maximum Traction trucks, however none are currently manufactured in HO scale. One item of note, at some point in its life, car 141 was equipped with Brill 77E trucks, so this might not be all that un-prototypical.
The floor has some frames along the outer edge to hold skirting material, for which I recommend using tulle fabric, available from all fabric stores, glued on with some AC glue or Canopy Glue.
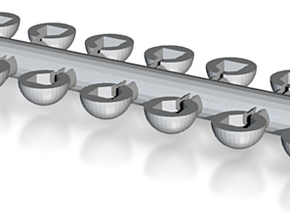
The proximity of these skirt frames to the trucks will limit the turning radius of this car greatly, especially if unmodified sideframes are put on the trucks. They will need to omitted or heavily sanded-down to prevent interference as the trucks pivot.
Don't forget to add a pair of brass pole bushings, part number 12508, and a pair of trolley poles, part number HT-P4. Unfortunately he does not offer the correct slider shoe on that pole base, so either you can file the wheel into a slider shape or replace it with the slider castings, part number HT-C4.
Decals are to be available from Custom Traxx
To assemble:
1. Scrub this model thoroughly with simple green, hot water, and an electric toothbrush before assembly. Pay particular attention to getting any trapped wax out of the peg holes in the roof and out of the peg holes in the bottom corners of the ends. Use a small drill bit to check and adjust the fit of the pegs in the holes. Allow to dry.
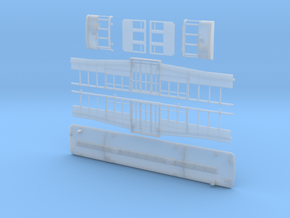
2. At this point you can either paint and add glass to your model in pieces, which I find very easy, or assemble it unpainted. Painting first leaves minor seams in the corners where the letterboards of the ends and sides meet, otherwise no other visible seams show up if properly assembled.
3. Gently press the ends into the roof after carefully lining up the locator pegs. To do this, press on the back side of the pegs from inside the model to apply direct pressure without risk of breaking them. A test-fit before glue up is highly recommended, as the peg fit is very tight and may require a little extra clearance by using a drill bit to widen the locator holes a little and clean out the paint and flash.
4. You'll find that there are locating tabs at the corners of the sides to align them with the ends.
5. Ensure everything is in alignment and use a toothpick to apply a small amount of superglue along the seams to ensure the parts stay together.
6. After all paint is dry, insert your brass 2mm trolley pole pivots which are available from custom traxx.
The floor portion of this kit is designed with the Bowser drive system in mind, kit 125130, available from Custom Traxx.
We are aware that these cars had Maximum Traction trucks, however none are currently manufactured in HO scale. One item of note, at some point in its life, car 141 was equipped with Brill 77E trucks, so this might not be all that un-prototypical.
The floor has some frames along the outer edge to hold skirting material, for which I recommend using tulle fabric, available from all fabric stores, glued on with some AC glue or Canopy Glue.
The proximity of these skirt frames to the trucks will limit the turning radius of this car greatly, especially if unmodified sideframes are put on the trucks. They will need to omitted or heavily sanded-down to prevent interference as the trucks pivot.
Don't forget to add a pair of brass pole bushings, part number 12508, and a pair of trolley poles, part number HT-P4. Unfortunately he does not offer the correct slider shoe on that pole base, so either you can file the wheel into a slider shape or replace it with the slider castings, part number HT-C4.
Decals are to be available from Custom Traxx
To assemble:
1. Scrub this model thoroughly with simple green, hot water, and an electric toothbrush before assembly. Pay particular attention to getting any trapped wax out of the peg holes in the roof and out of the peg holes in the bottom corners of the ends. Use a small drill bit to check and adjust the fit of the pegs in the holes. Allow to dry.
2. At this point you can either paint and add glass to your model in pieces, which I find very easy, or assemble it unpainted. Painting first leaves minor seams in the corners where the letterboards of the ends and sides meet, otherwise no other visible seams show up if properly assembled.
3. Gently press the ends into the roof after carefully lining up the locator pegs. To do this, press on the back side of the pegs from inside the model to apply direct pressure without risk of breaking them. A test-fit before glue up is highly recommended, as the peg fit is very tight and may require a little extra clearance by using a drill bit to widen the locator holes a little and clean out the paint and flash.
4. You'll find that there are locating tabs at the corners of the sides to align them with the ends.
5. Ensure everything is in alignment and use a toothpick to apply a small amount of superglue along the seams to ensure the parts stay together.
6. After all paint is dry, insert your brass 2mm trolley pole pivots which are available from custom traxx.
Details
What's in the box:
Copy of SDERy Class 1 7-18-22 (1)
Dimensions:
Success Rate:
First To try.
What's this?
Rating:
Mature audiences only.