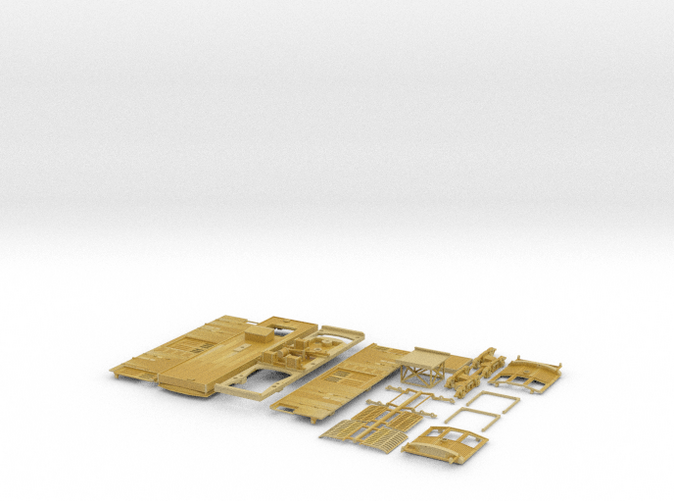
Tan Fine Detail Plastic


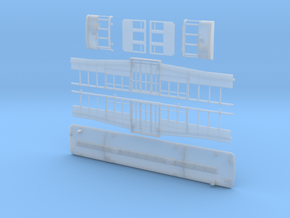
HO LATL LARy 9350 Tower Car
Made by
Print With Shapeways
 Choose Your Material
 Choose your color and finish
$90.76
Have a question about this product?
contact the designerYou must be logged in and verified to contact the designer.
Product Description
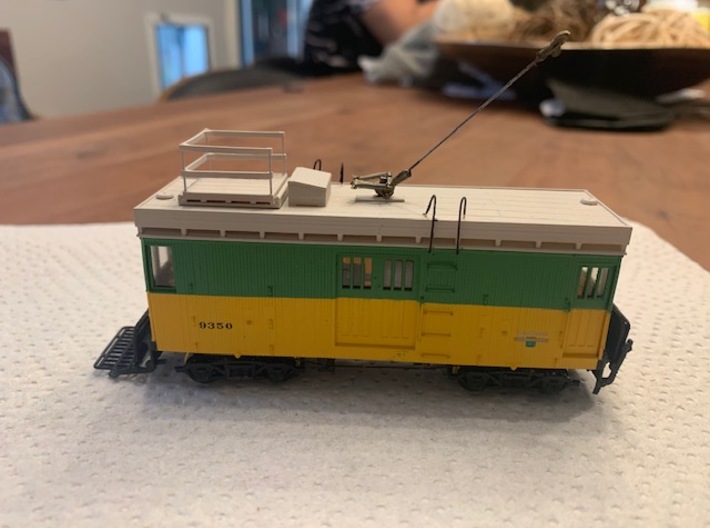
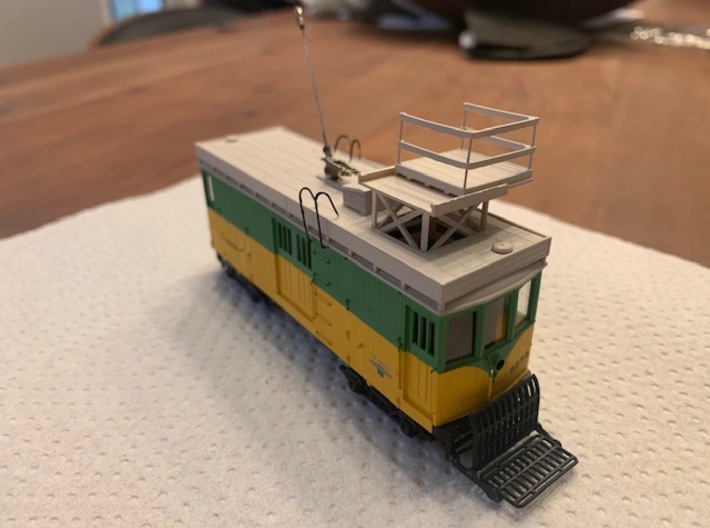
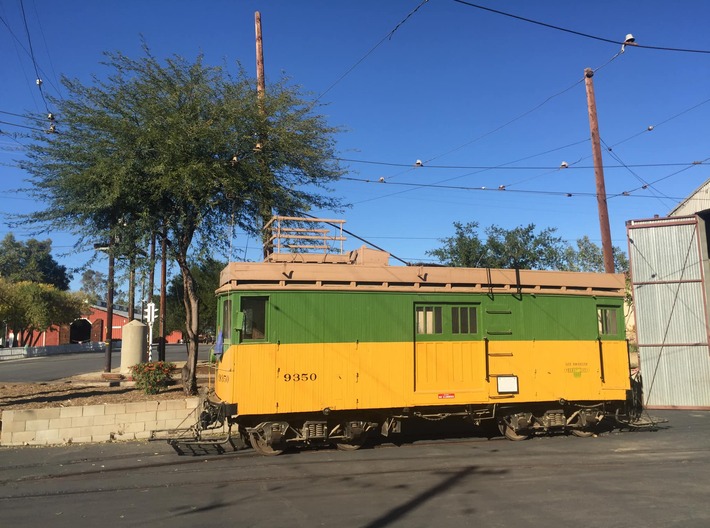
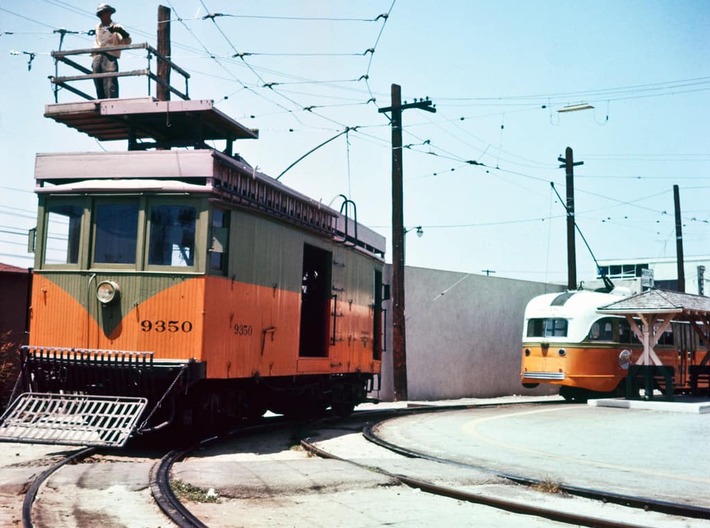
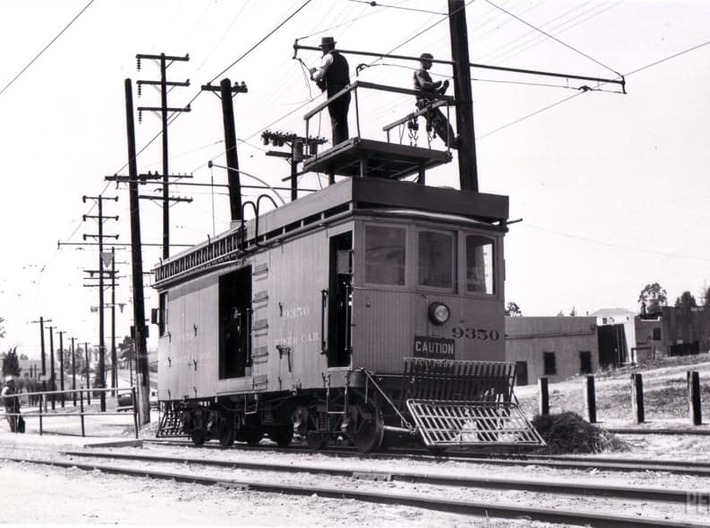
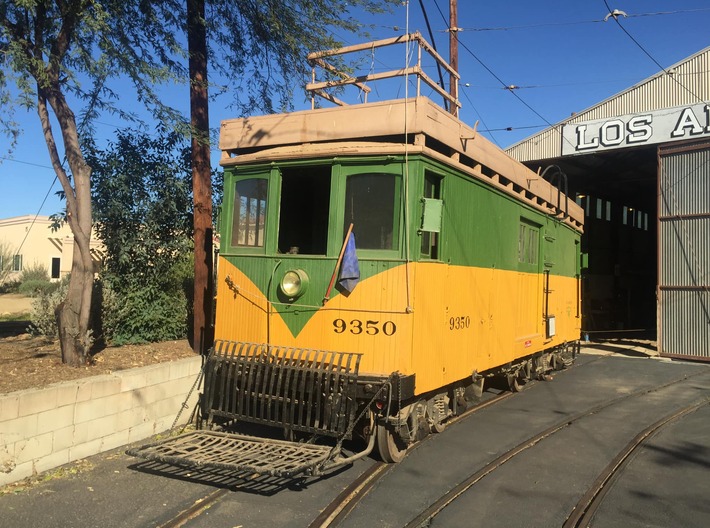
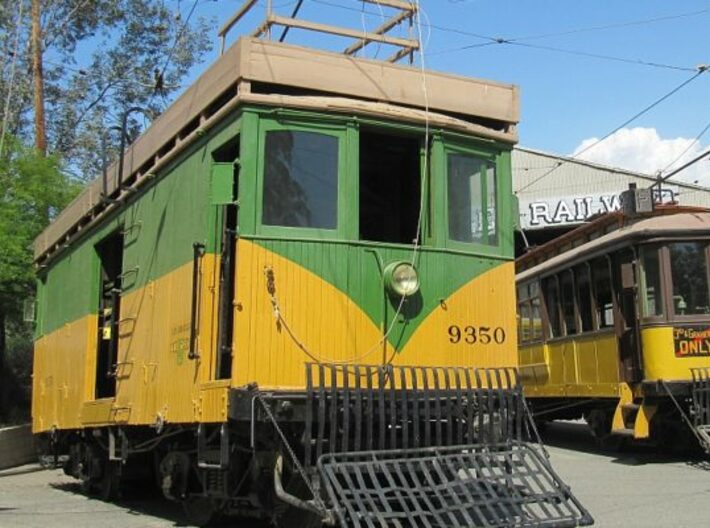
This kit will build a model of the Los Angeles Railway or Los Angeles Transit Lines tower car 9350. Tower Cars or Line Cars, as they were also called, were used to install and maintain the overhead contact wire that supplied power to power the streetcars. 9350 still survives today at the Southern California Railway Museum in operable condition.
Shopping list to complete this build:
Bowser 125130 traction drive mechanism. Be sure to specify 30" wheels when ordering from George at Custom Traxx.
.010 and .015 phospor bronze or brass wire for grab irons, platform railing supports, and truss rods.
Decal set CN3100 from custom traxx for LATL scheme.
Yellow paint - I use C&O/B&O yellow from trucolor.
Green paint - I mix a color that is close. Nobody makes an exact match since floquil stopped making paint. I used to use floquil light green.
Black paint for the floor and bumpers
Any color of tan for the roof.
LEDs for headlights and a decoder of your choice. Do not use incandescent bulbs to prevent melting parts.
6ea 2-56 1/4" screws to screw the floor to the body.
Trolley pole and brass pivot from custom traxx
Instructions:
Scrub all parts with un-diluted simple green and an electric toothbrush if you have one.
Rinse while scrubbing in hot water that is as hot as you can stand to keep your hands in. Don't burn yourself!
Tap holes in the mounting pads on the side walls, the powered truck bolster mounts, and the trailing truck pivot with a 2-56 tap. Be gentle!
Bend and install grab irons, don't forget the ones to the left of the operator doors. Leave the top pair of grab iron holes unused at this time. They will be used for vertical handholds that connect to the roof after body assembly. A micro mark grab iron bending tool makes quick work of this with precise results. A vertical headlight guard goes in the holes in the top of the bumper and above and left of the headlight. I used a small paintbrush's radius to bend the wire for these. Holes are pre-drilled for all these wires. Use CA/superglue to hold them in
Bend some .015 wire to create truss rods. You'll find some holes adjacent to the truck areas to insert the ends into. Lay them into the notches on the vertical queen posts and superglue into place.
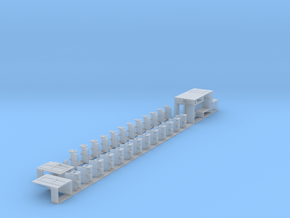
Assemble the C-shaped railings on the work platform with some .015 wire to make the verticals. The holes are pre-drilled in all parts. Use CA/Superglue to hold these together. Note that the sliding work platform is designed to be a friction fit into the lattice tower assembly so it can be raised and moved vertically and side to side while in use. Do not glue these sliding parts together or you will loose that functionality.
I prefer to paint parts before body assembly, just take care to ensure the paint division lines meet up on the ends.
Once the parts are primed and painted with plastic-compatible paint, decaled, and sealed, install some clear styrene for the windows. Paint the inside and backside of the headlight area with black paint to prevent light bleed and glue your headlights into the backs of the ends. Canopy glue makes an excellent "lens" if you fill the headlight with it and allow it to fully dry before applying power.
Test fit the ends and sides to the roof and make sure the pegs fit neatly into their alignment holes both on the roofline and where the ends meet the side walls. Note that one end has one window which is squared off, and not arched at the top. This is absolutely prototypical. The shop apparently had to fabricate a new window sash for this car at some point in the 1940s and did not bother to replicate the arch. It is faithfully recreated here. In-service, the non-arched window was on the tower end of the car, but when the museum restored the car they inadvertently put this window into the wrong end, so choose accordingly which era you wish to model in terms of end placement. Either end will fit on either end of the roof.
Hold the parts together one at a time and apply CA/Superglue to the seams with a toothpick or similar. I assemble both ends and one side to the roof before pausing to install a decoder and some lead into the roof, then install the other side wall. It makes easy work of wiring to do it this way.
Bend some .015 wire to form the upper side to roof grabs. I bent the curve into this wire using the radius of a bamboo skewer or similar, then bent the 90 into the bottom of it and trimmed it to lenth to hit the holes in the roof and side.
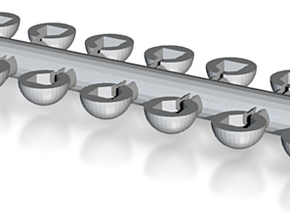
Assemble the "eclipse" lifeguard fenders. To ease this process, gently twirl your exacto blade in the pivot holes before inserting the corresponding parts. gentle pressure will allow the parts to snap together, making a functional folding fender. See photos for the way the parts fit together.
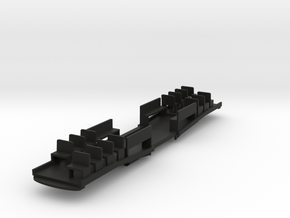
Wire and Install the geared truck without sideframes into the floor by inserting it from the bottom. You'll find the bolster will pivot back and forth to make it through the hole without having to remove it from the truck. Screw it to the floor with 2-56 screws supplied in the truck kit. Sand the bolster ends so they do not overlap the mounting pads and interfere with the sides or the mounting pads where screws will hold the sides to the floor.
Add the motor to the floor after adjusting the drive shaft length to an optimal length that allows the truck to pivot without detatching. You may have to trim the metal rod in the shaft to accomplish this.
Wire and install the trailing truck with the provided shouldered screw.
Apply the sideframes to the trucks with a little canopy glue to keep them from falling off.
Enjoy your model!
Shopping list to complete this build:
Bowser 125130 traction drive mechanism. Be sure to specify 30" wheels when ordering from George at Custom Traxx.
.010 and .015 phospor bronze or brass wire for grab irons, platform railing supports, and truss rods.
Decal set CN3100 from custom traxx for LATL scheme.
Yellow paint - I use C&O/B&O yellow from trucolor.
Green paint - I mix a color that is close. Nobody makes an exact match since floquil stopped making paint. I used to use floquil light green.
Black paint for the floor and bumpers
Any color of tan for the roof.
LEDs for headlights and a decoder of your choice. Do not use incandescent bulbs to prevent melting parts.
6ea 2-56 1/4" screws to screw the floor to the body.
Trolley pole and brass pivot from custom traxx
Instructions:
Scrub all parts with un-diluted simple green and an electric toothbrush if you have one.
Rinse while scrubbing in hot water that is as hot as you can stand to keep your hands in. Don't burn yourself!
Tap holes in the mounting pads on the side walls, the powered truck bolster mounts, and the trailing truck pivot with a 2-56 tap. Be gentle!
Bend and install grab irons, don't forget the ones to the left of the operator doors. Leave the top pair of grab iron holes unused at this time. They will be used for vertical handholds that connect to the roof after body assembly. A micro mark grab iron bending tool makes quick work of this with precise results. A vertical headlight guard goes in the holes in the top of the bumper and above and left of the headlight. I used a small paintbrush's radius to bend the wire for these. Holes are pre-drilled for all these wires. Use CA/superglue to hold them in
Bend some .015 wire to create truss rods. You'll find some holes adjacent to the truck areas to insert the ends into. Lay them into the notches on the vertical queen posts and superglue into place.
Assemble the C-shaped railings on the work platform with some .015 wire to make the verticals. The holes are pre-drilled in all parts. Use CA/Superglue to hold these together. Note that the sliding work platform is designed to be a friction fit into the lattice tower assembly so it can be raised and moved vertically and side to side while in use. Do not glue these sliding parts together or you will loose that functionality.
I prefer to paint parts before body assembly, just take care to ensure the paint division lines meet up on the ends.
Once the parts are primed and painted with plastic-compatible paint, decaled, and sealed, install some clear styrene for the windows. Paint the inside and backside of the headlight area with black paint to prevent light bleed and glue your headlights into the backs of the ends. Canopy glue makes an excellent "lens" if you fill the headlight with it and allow it to fully dry before applying power.
Test fit the ends and sides to the roof and make sure the pegs fit neatly into their alignment holes both on the roofline and where the ends meet the side walls. Note that one end has one window which is squared off, and not arched at the top. This is absolutely prototypical. The shop apparently had to fabricate a new window sash for this car at some point in the 1940s and did not bother to replicate the arch. It is faithfully recreated here. In-service, the non-arched window was on the tower end of the car, but when the museum restored the car they inadvertently put this window into the wrong end, so choose accordingly which era you wish to model in terms of end placement. Either end will fit on either end of the roof.
Hold the parts together one at a time and apply CA/Superglue to the seams with a toothpick or similar. I assemble both ends and one side to the roof before pausing to install a decoder and some lead into the roof, then install the other side wall. It makes easy work of wiring to do it this way.
Bend some .015 wire to form the upper side to roof grabs. I bent the curve into this wire using the radius of a bamboo skewer or similar, then bent the 90 into the bottom of it and trimmed it to lenth to hit the holes in the roof and side.
Assemble the "eclipse" lifeguard fenders. To ease this process, gently twirl your exacto blade in the pivot holes before inserting the corresponding parts. gentle pressure will allow the parts to snap together, making a functional folding fender. See photos for the way the parts fit together.
Wire and Install the geared truck without sideframes into the floor by inserting it from the bottom. You'll find the bolster will pivot back and forth to make it through the hole without having to remove it from the truck. Screw it to the floor with 2-56 screws supplied in the truck kit. Sand the bolster ends so they do not overlap the mounting pads and interfere with the sides or the mounting pads where screws will hold the sides to the floor.
Add the motor to the floor after adjusting the drive shaft length to an optimal length that allows the truck to pivot without detatching. You may have to trim the metal rod in the shaft to accomplish this.
Wire and install the trailing truck with the provided shouldered screw.
Apply the sideframes to the trucks with a little canopy glue to keep them from falling off.
Enjoy your model!
Details
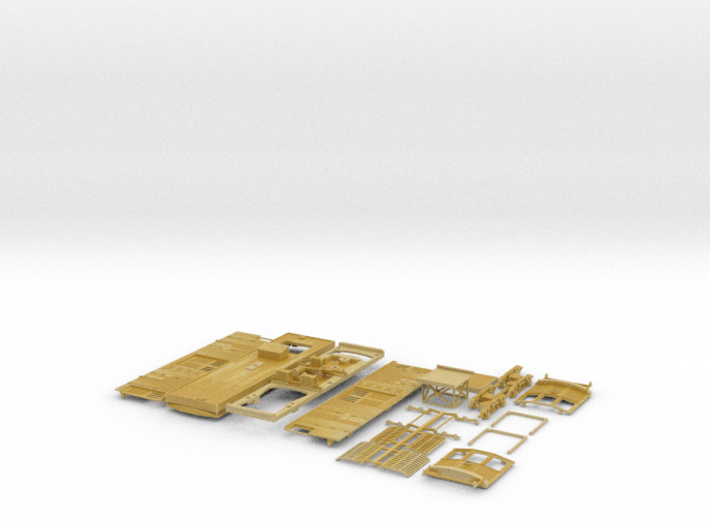
What's in the box:
Flat LARY 9350 complete v2
Dimensions:
Success Rate:
First To try.
What's this?
Rating:
Mature audiences only.
