
Eaglemoss Ecto-1 - Propello Ray
Made by
Print With Shapeways
 Choose Your Material
 Choose your color and finish
$27.38
Have a question about this product?
contact the designerYou must be logged in and verified to contact the designer.
Product Description
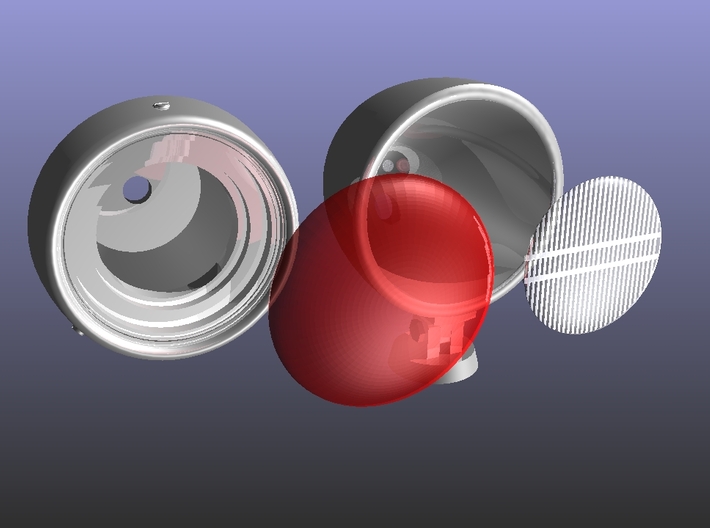
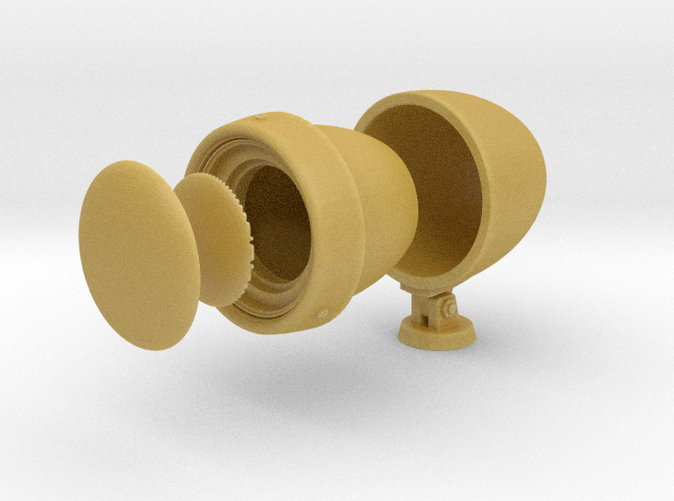
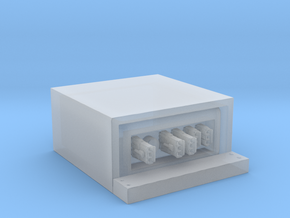
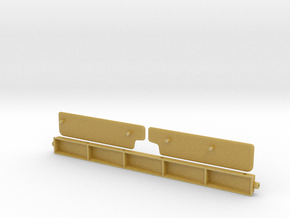
Here's the Propello Ray light that sits on the front driver's side of the roof rack. It can be lit up easily. It comes in 4 parts. The Main Body and the Insert should be completely painted Black first for light leakage and then painted Silver/Chrome (I suggest Molotow Mirror for this). The Lenses can be made alot clearer by dipping in Future or a Clear Laquer and allowed to fully cure. The Large Lens should be tinted Red. The Small Lens should remain Clear. And LED can be placed inside the insert and the wire can be fed thru the hole in the back. Then the Small Lens can be placed in the opening and the Large Lens should be placed in front of it. Feed the LED wire thru the hole in the back of the Main Body and glue in place.
A good source for Flashing LED light that I used that can just replace the LED that came with the kit is this: https://www.amazon.com/dp/B09TN9GX5V?psc=1
You can download this file to print on your home printer but this cannot be resold or modified. Enjoy!
What you get (4 pieces):
This is part of the Complete Roof Rack kit available for Free to the GB Community. You can download the STL for this object directly on this page or get all the latest updated files here Satyr's Models Facebook Group. I'm providing them here for anyone that does not have a printer. Shapeways will print them for you and mail them directly to you. You can find the other parts for the Entire Rack in the following links:
Long Green Tube
Top Heat Sink
Freon Tanks
Fan Box
Sniffer Assembly
Main Tub with Insert
Tub Insert Alone
Main Tub Alone
Hosebox
Clear Dome Static
Clear Dome Articulated
Radome and Tower
Main Rack Cage
Top Vents
Propello Ray
Federal Siren
Strobe Light
Ladder - no Tabs
Misc Hardware
A good source for Flashing LED light that I used that can just replace the LED that came with the kit is this: https://www.amazon.com/dp/B09TN9GX5V?psc=1
You can download this file to print on your home printer but this cannot be resold or modified. Enjoy!
What you get (4 pieces):
- 1 - Main Body
- 1 - Insert
- 1 - Large Lens
- 1 - Small Lens
This is part of the Complete Roof Rack kit available for Free to the GB Community. You can download the STL for this object directly on this page or get all the latest updated files here Satyr's Models Facebook Group. I'm providing them here for anyone that does not have a printer. Shapeways will print them for you and mail them directly to you. You can find the other parts for the Entire Rack in the following links:
Long Green Tube
Top Heat Sink
Freon Tanks
Fan Box
Sniffer Assembly
Main Tub with Insert
Tub Insert Alone
Main Tub Alone
Hosebox
Clear Dome Static
Clear Dome Articulated
Radome and Tower
Main Rack Cage
Top Vents
Propello Ray
Federal Siren
Strobe Light
Ladder - no Tabs
Misc Hardware
Details
What's in the box:
Propello Ray - SW
Dimensions:
Success Rate:
First To try.
What's this?
Rating:
Mature audiences only.
