


SOG PowerPint Multi-Tool Scalpel Holder
Made by
Print With Shapeways
 Choose Your Material
 Choose your color and finish
$35.00
Have a question about this product?
contact the designerYou must be logged in and verified to contact the designer.
Product Description
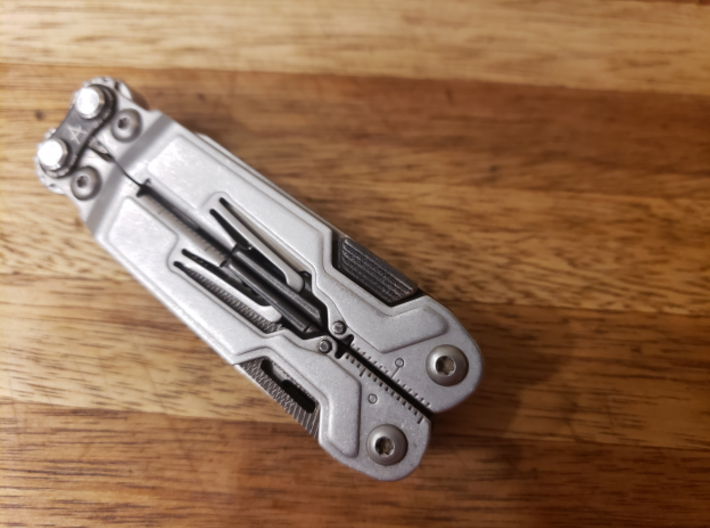
This is a #4 Scalpel holder for fitting a scalpel blade to the SOG PowerPint or PowerLitre Multi-Tool.
This modification allows a #23 scalpel blade (not included) to be added to the multi-tool. It can replace either the main straight blade or the serrated blade and 1 additional implement (bottle opener or can opener).
Scalpel blades can be purchased cheaply and replaced easily so you always have a razor sharp blade ready to go.
This holder will fit any scalpel blade that is designed to fit a #4 scalpel handle but I recommend the #23 scalpel blade because it allows the tool to close fully and retail all normal functionality.
The thumb pad allows for one handed opening.
Available in three finishes:
This is a user installed modification
Required tools
Installation instructions
This modification allows a #23 scalpel blade (not included) to be added to the multi-tool. It can replace either the main straight blade or the serrated blade and 1 additional implement (bottle opener or can opener).
Scalpel blades can be purchased cheaply and replaced easily so you always have a razor sharp blade ready to go.
This holder will fit any scalpel blade that is designed to fit a #4 scalpel handle but I recommend the #23 scalpel blade because it allows the tool to close fully and retail all normal functionality.
The thumb pad allows for one handed opening.
Available in three finishes:
- Select "Polished and Bronzed Black Steel" for a black finish that matches the handle latch (Pictured)
- Select "Polished Bronze steel" for a fully bronze color
- Select "Polished Bronzed Silver Steel" for a silver look
This is a user installed modification
Required tools
- T8 Torx screwdriver for disassembly (2 is preferred)
- 3.5mm or 9/64 drill bit
- small needle file for adjusting fit
Installation instructions
- Unfold all of the tools on the handle you want to install the scalpel holder on.
- Unscrew the pivot using the two T8 torx screwdrivers being careful not to lose the screw.
- Push out the pivot pin using a small screwdriver or similar.
- Carefully remove the screwreiver and remove all of the tools. Try to retain all of the washers in the correct spacing.
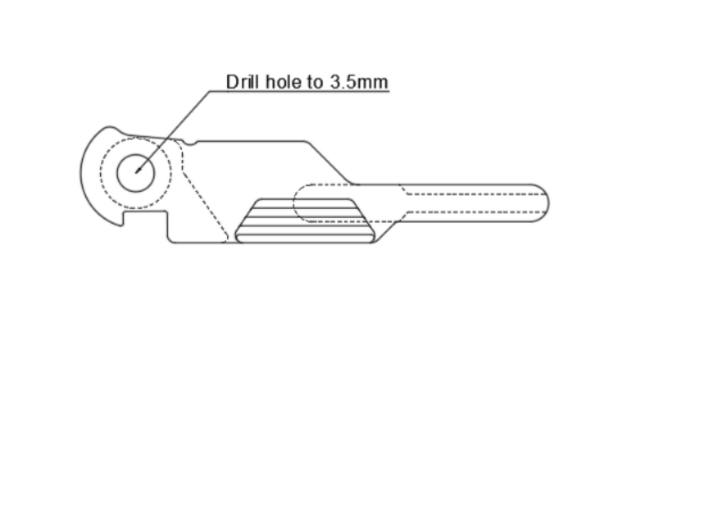
- Drill out the pivot hole in the scalpel holder to 3.5mm and make sure it fits on the pivot. (Figure 1)
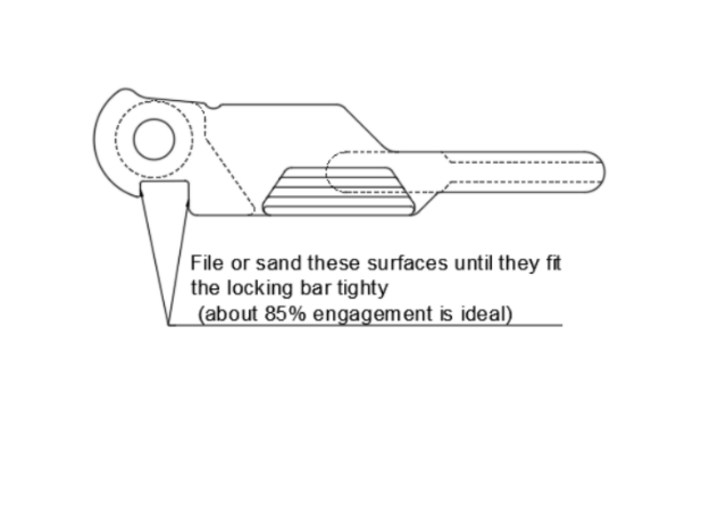
- Lightly file or sand the two mating surfaces until the locking bar fits into the gap. (Figure 2)
- Test fit the scalpel holder. Replace the pivot and put the scalpel holder and 1 other implement back on the pivot. close both tools and take note of how flush the tool closes to the hande.
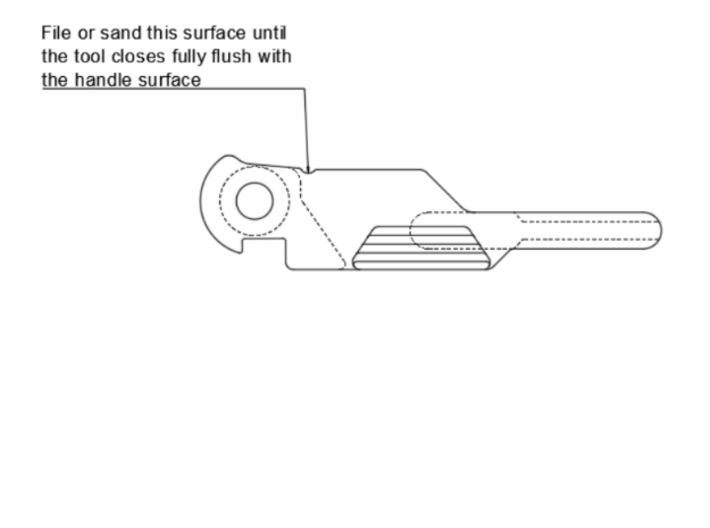
- Extra material is provided for fitment. you will need to file or sand the mating surface (figure 3) until the tool closes flush with the handle. Repeat step 7 until you are happy with the fit.
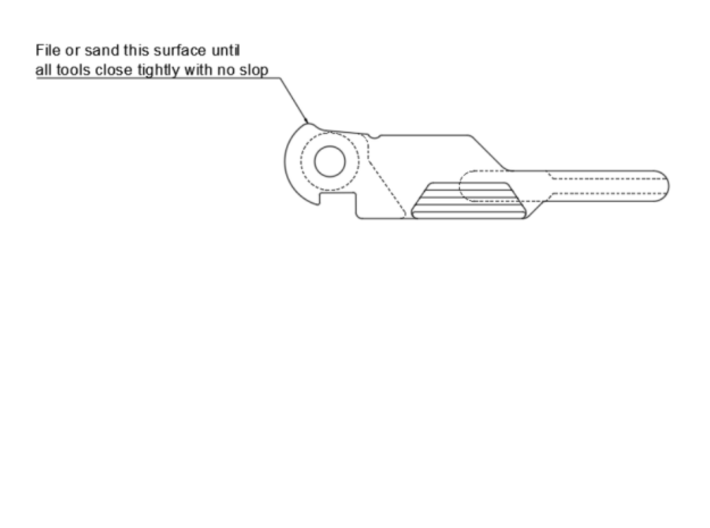
- You may notice from test fitting that the other implement you put on the tool with the scalpel holder is now loose in the closed position. If this is the case, lightly file or sand the mating surface (figure 4) until both tools are held firm in the closed position.
- The scalpel holder has a built in washer but you may need to file this down slightly or remove some of the small brash washers that came with the tool originally in order to maintain the same thickness for all of the tools together.
- Stack all of the tools together with the washers in the tool handle and insert the pivot.
- Use the Torx screwdriver to screw the pivot and the pivot screw together to reassemble the tool.
Details
What's in the box:
PowerPintScalpel v15

Dimensions:
Success Rate:
First To try.
What's this?
Rating:
Mature audiences only.
