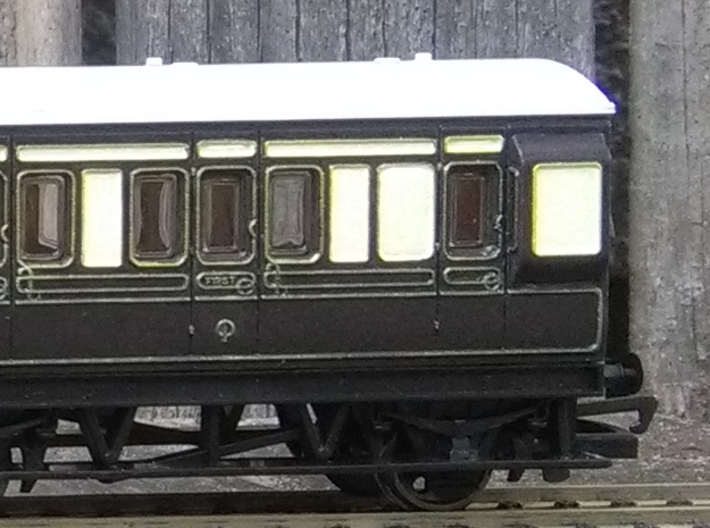
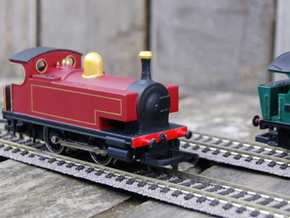
Finished example. The coach is from Hornby - only the ducket is for sale here!


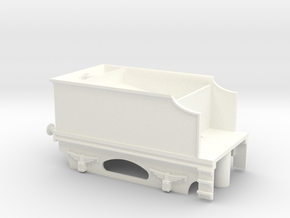
4-Wheel Coach Ducket
Made by
Print With Shapeways
 Choose Your Material
 Choose your color and finish
$16.07
Have a question about this product?
contact the designerYou must be logged in and verified to contact the designer.
Product Description
This is a set of four look-out duckets for converting Hornby 4-wheel coaches into brake coaches. Each coach requires two - one each side - so these four are enough for two coaches.
The duckets are designed to plug into the end window apertures, and this should hold them correctly in place.
The picture above shows one of these duckets fitted in place on a coach (previously an "Annie") that has been re-painted in a GWR-like livery using Vallejo "German Camoflage Black Brown".
Basic instructions:
You may also wish to turn one of the windows into a blank panel, as in the example above. This can be done simply by painting the glazing, but for a better result:
Painting suggestions.
If you find a good colour match, you may be able to preserve the original livery and only paint the ducket. However, the example shown above was completely repainted, as follows:
The duckets are designed to plug into the end window apertures, and this should hold them correctly in place.
The picture above shows one of these duckets fitted in place on a coach (previously an "Annie") that has been re-painted in a GWR-like livery using Vallejo "German Camoflage Black Brown".
Basic instructions:
- Before doing anything else, wash the duckets with warm soapy water (an old toothbrush helps).
- Remove the roof and glazing. It's also helps if you remove the coach body from the chassis.
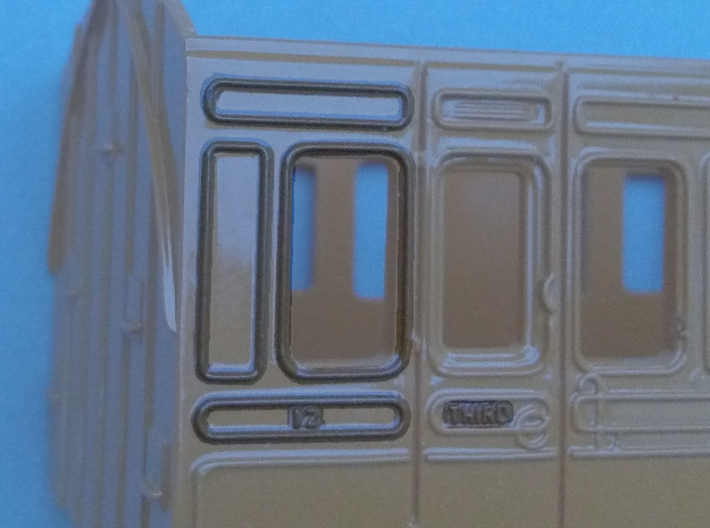
- It is necessary to trim away some beading, as shown in the picture above, in order for the ducket to sit flush against the side of the coach. Use a small chisel or a craft knife, and be careful! Lightly sand where the ducket will go with 600 grit paper or finer. You can also trim away the "THIRD" lettering on the door.
- Before attaching the duckets, paint the inside surfaces with a muted colour (dark brown is good).
- Glue the duckets into the window apertures, one each side. A very small amount of expoxy glue works well. Don't use superglue - it will cause the glazing to fog.
- Before refitting the roof and glazing, use a junior hacksaw or something similar to cut away the glazing for the last window, where the ducket now is.
You may also wish to turn one of the windows into a blank panel, as in the example above. This can be done simply by painting the glazing, but for a better result:
- Fill the window aperture with a rectangle of plastic card approximately 9.5mm X 5mm, with rounded corners.
- Cut the rectangle slightly oversize, then sand down the edges until it fits well. 1mm (40 thou) plastic card isn't quite thick enough. A piece of 0.25mm (10 thou) plastic card glued to a 1mm piece is about right.
- Once you have a good fit, make sure that the filler is flush against the inside wall of the coach, then apply glue on the inside.
- It will also be necessary to remove the glazing where the blank panel now is.
Painting suggestions.
If you find a good colour match, you may be able to preserve the original livery and only paint the ducket. However, the example shown above was completely repainted, as follows:
- Spray the coach body with primer.
- Paint the inside dark brown. Use several coats (3 or more) of well-thinned paint. This is easy with acrylic paints, because you can thin them with water. A tiny drop of dish soap also helps.
- Paint the outside with the appropriate livery colours, again using several thin coats. If the paint is a good consistency you can make it flow into the panels without spilling out (of course, if you're using a single colour, this doesn't matter).
- Once you are happy with the basic colours, spray on a protective layer of gloss varnish.
- As best you can, mask the large flat areas with masking tape.
- Dry-brush the beading using gold paint. This means: dip your brush in gold paint then wipe most of the paint off before brushing lightly over the beading. This will leave a small amount of paint behind. Repeat the operation several times (allowing the paint to dry each time).
- Remove the masking tape, the touch-up the basic livery colours wherever there is unwanted gold.
- Spray on a coat or two of matt or semi-gloss varnish.
Details
What's in the box:
4-Wheel Coach Ducket

Dimensions:
Success Rate:
First To try.
What's this?
Rating:
Mature audiences only.

More From This Shop

$33.17
$39.29

$38.83