Black Natural Versatile Plastic


RASPBERRY UMPC PROJECT
Made by
Print With Shapeways
 Choose Your Material
 Choose your color and finish
$56.31
Have a question about this product?
contact the designerYou must be logged in and verified to contact the designer.
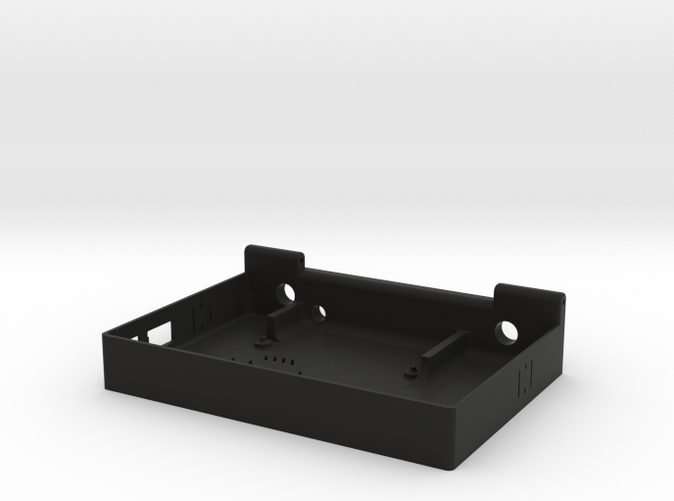
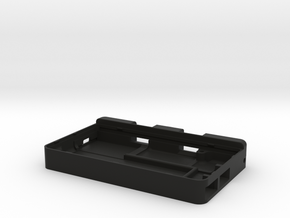
Product Description
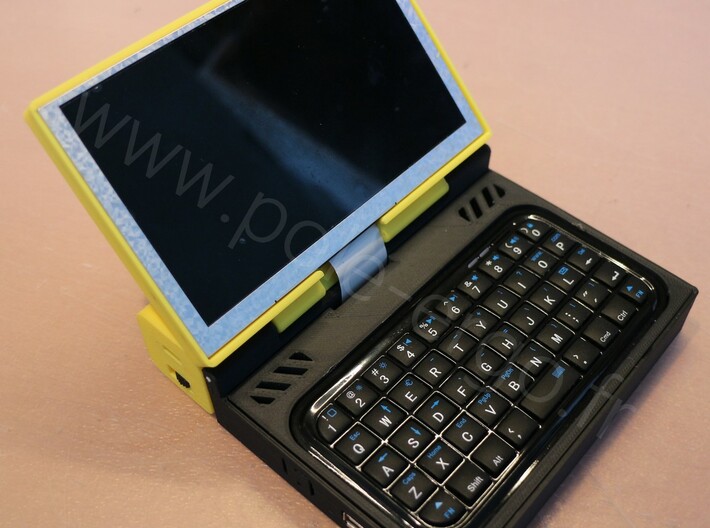
Raspberry Pi is a miniature computer allowing the realization of numerous projects, available in several shops in its barest shape, it lends itself to the integration in every type of cases. So, the objective of this project, consists in realizing a nano computer of the range UMPC (Ultra-mobile PC) integrating various components.
This is an exercise of integration of components allowing an advanced exercise of conception of technical case.
This project and all the modifications of parts are under your own responsability. This project is provided "as is" with no operation guarantee.
To realize this project, it will be necessary the following components:
Preparation of Raspberry:
To make before any modification of Raspberry : Prepare the SD card of Raspberry by following the instructions proposed by Adafruit for the use of the deck Kippah. Paired the bluetooth keyboard, parametrize the WIFI connection. Verify that everything works.
( Watch out, this intervention cancels the guarantee and can destroy Raspberry in case of errors)
To integrate Raspberry into the case, it is necessary to deprive it of practically all the connectors with which it is provided. To do it, it is possible to follow the advice proposed by Adafruit: https://learn.adafruit.com/diet-raspberry-pi/steps.
Instructions :
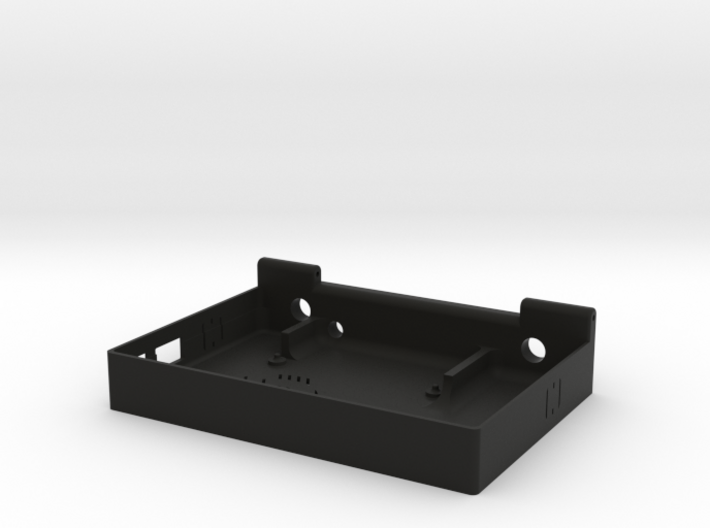
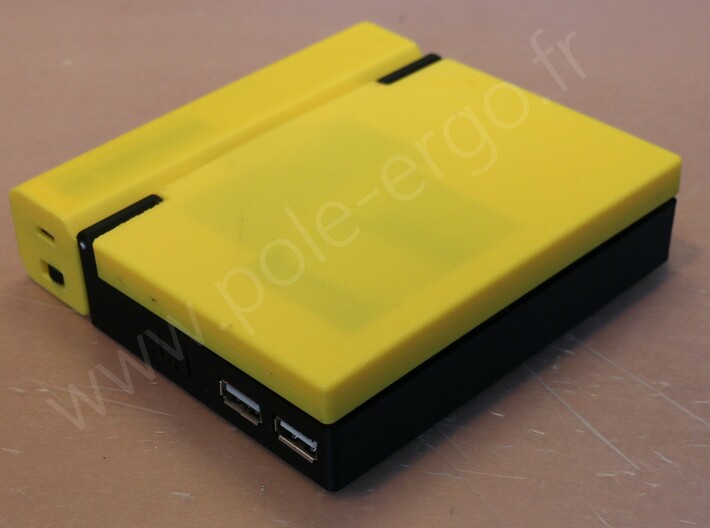
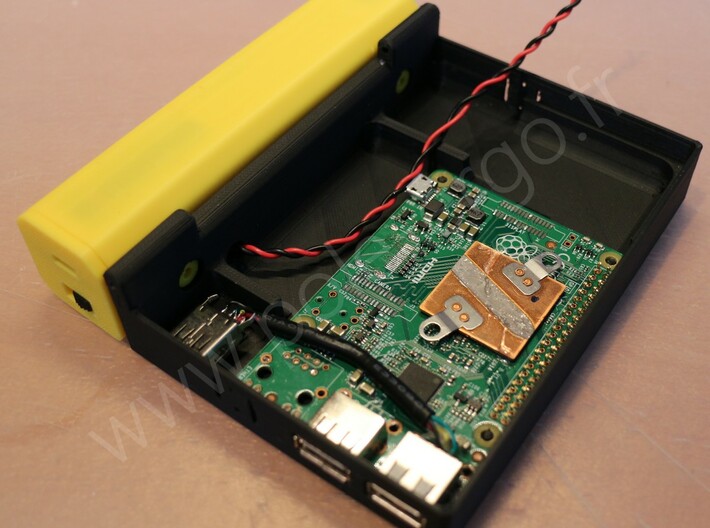
It is then necessary to shorten the legs of the port GPIO so that, during the assembly of the deck Adafruit Kippah, the set does not exceed 8,5 mm of thickness. It is also necessary to add two USB port A instead of the double models present of origin.
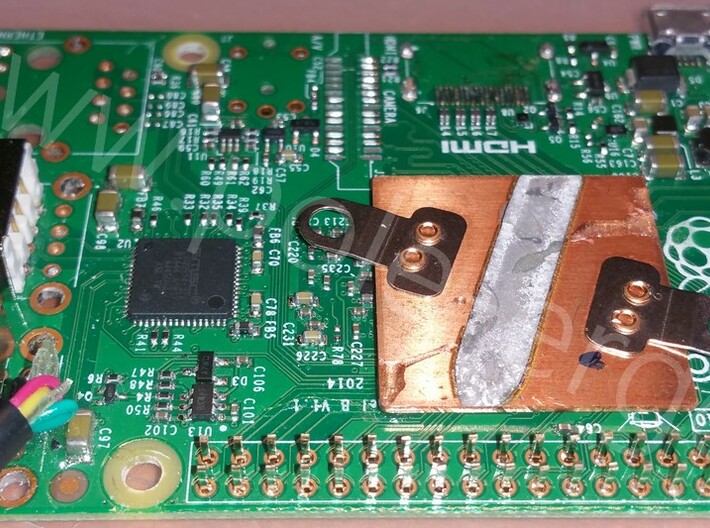
It's better to add a radiator on the processors of the card for a better cooling.
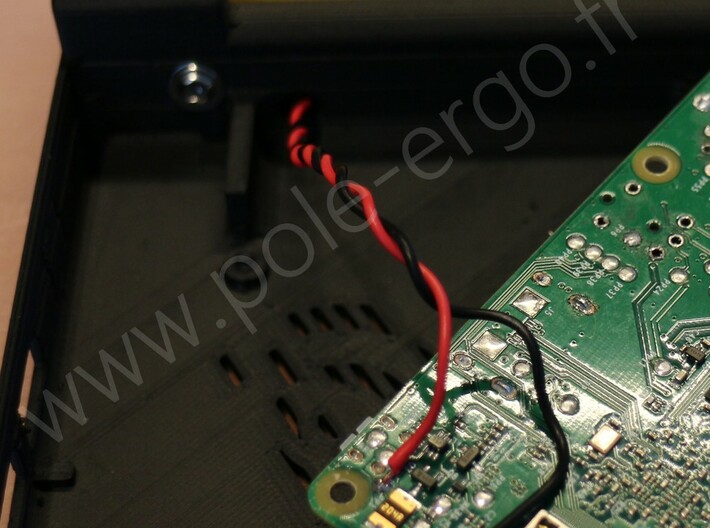
Install the battery box on the case, cross the wire of power supply by crosse cable. Weld the wires of battery on pad 5V and GND of Raspberry.
Weld the power supply of the keyboard on the pad of supply proposed by the deck Adafruit : GND and 3,3v.
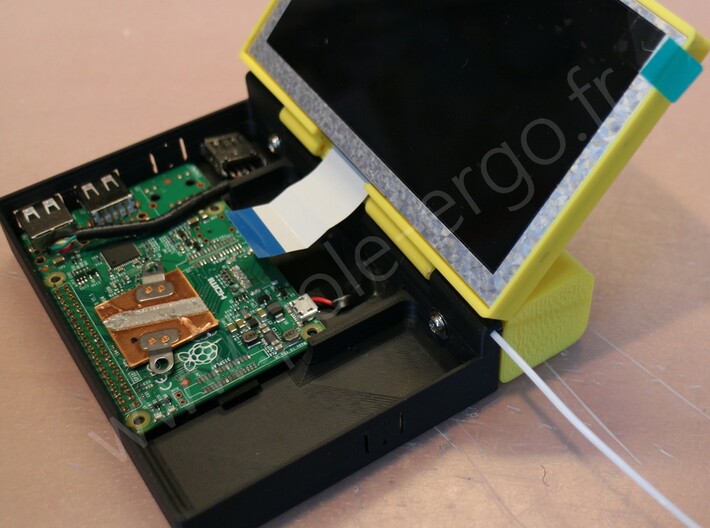
Install the deck Adafruit on Raspberry. Install the SD card, connect the screen and Install the set in the planned housing.
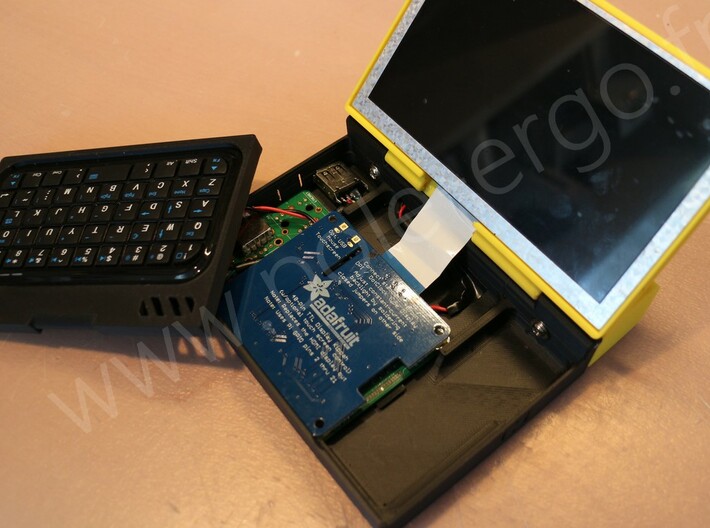
Install the LCD screen: the pivot of the hinge consists of a plastic filament to be printed. Install the support of keyboard in force.
Everything has to work during the switched on.
This is an exercise of integration of components allowing an advanced exercise of conception of technical case.
This project and all the modifications of parts are under your own responsability. This project is provided "as is" with no operation guarantee.
To realize this project, it will be necessary the following components:
- Raspberry PI from B+ model, better with model 3,
- ADK-100 Micro bluetooth Keyboard,
- Adafruit Kippah without touch control : https://www.adafruit.com/product/2454,
- Ribbon and connector : https://www.adafruit.com/product/2098,
- 5" LCD without touch control for Kippah : https://www.adafruit.com/product/1680,
- Battery charger and booster : https://www.adafruit.com/product/2465,
- Li-ion 26650 5000mah with protection,
- switch for panel with a long connector,
- Plastic parts : see under profil Pole-Ergo
Preparation of Raspberry:
To make before any modification of Raspberry : Prepare the SD card of Raspberry by following the instructions proposed by Adafruit for the use of the deck Kippah. Paired the bluetooth keyboard, parametrize the WIFI connection. Verify that everything works.
( Watch out, this intervention cancels the guarantee and can destroy Raspberry in case of errors)
To integrate Raspberry into the case, it is necessary to deprive it of practically all the connectors with which it is provided. To do it, it is possible to follow the advice proposed by Adafruit: https://learn.adafruit.com/diet-raspberry-pi/steps.
Instructions :
It is then necessary to shorten the legs of the port GPIO so that, during the assembly of the deck Adafruit Kippah, the set does not exceed 8,5 mm of thickness. It is also necessary to add two USB port A instead of the double models present of origin.
It's better to add a radiator on the processors of the card for a better cooling.
Install the battery box on the case, cross the wire of power supply by crosse cable. Weld the wires of battery on pad 5V and GND of Raspberry.
Weld the power supply of the keyboard on the pad of supply proposed by the deck Adafruit : GND and 3,3v.
Install the deck Adafruit on Raspberry. Install the SD card, connect the screen and Install the set in the planned housing.
Install the LCD screen: the pivot of the hinge consists of a plastic filament to be printed. Install the support of keyboard in force.
Everything has to work during the switched on.

Details
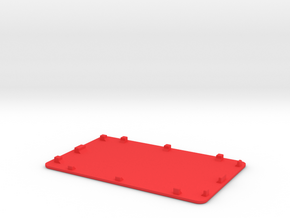
What's in the box:
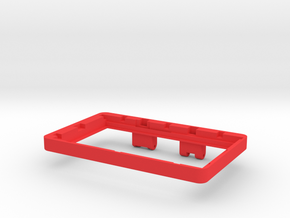
RASPBERRY UMPC BEZEL
Dimensions:
Success Rate:
First To try.
What's this?
Rating:
Mature audiences only.

More From This Shop
$45.33
$27.17
$22.80

$16.21