White Natural Versatile Plastic


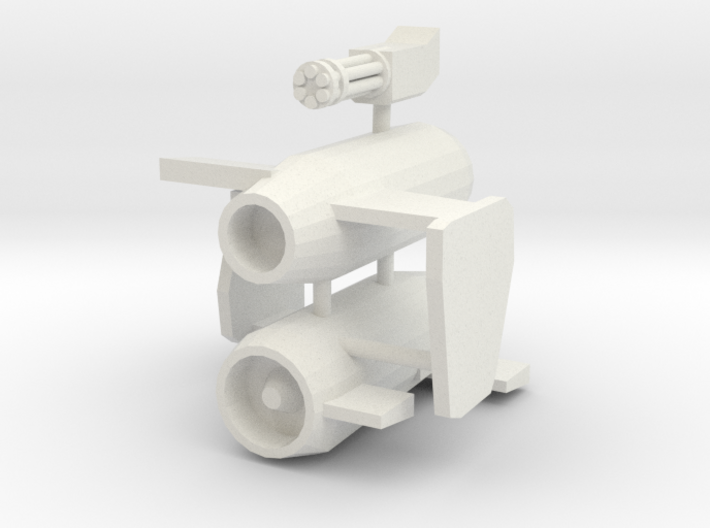
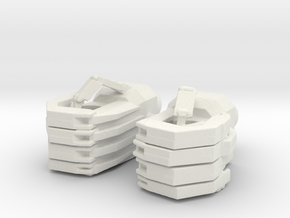
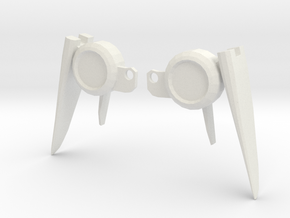
Shadow upgrade engines and minigun
Made by
Print With Shapeways
 Choose Your Material
 Choose your color and finish
$29.14
Have a question about this product?
contact the designerYou must be logged in and verified to contact the designer.
Product Description
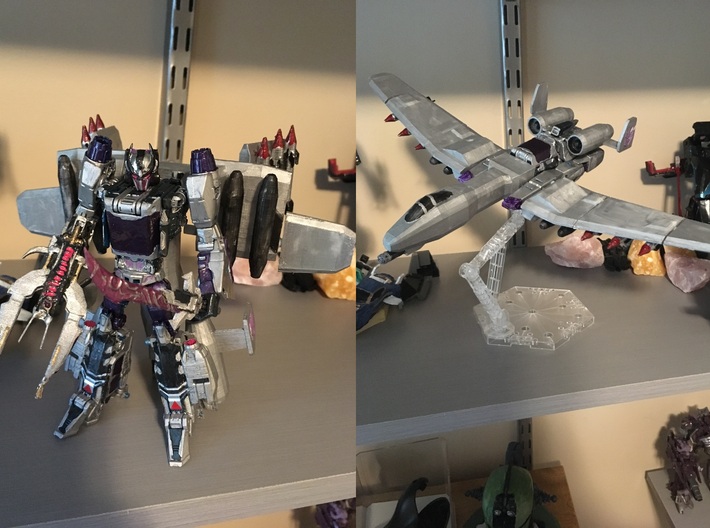
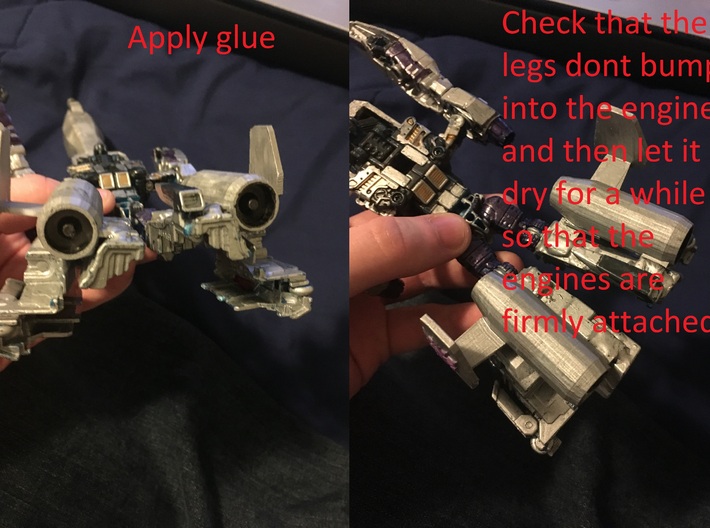
This is the final part of my most recent custom, Shadow. This kit is designed to convert the Titans Return Blurr into an A-10 Warthog. Note: This kit will require gluing on parts that once properly glued will be very hard to remove so if you are not willing to commit to this kind of upgrade don't buy it. Now I've only used the parts that I printed from my own Dremel 3d45 printer so the plastic characteristics such as friction and stuff may be different. Another note this is a partsforming kit so you may need to do a bit of sanding to make parts fit snug and not get stuck to the extent that they could break. Now to mount the engines I storngly recommend that your start to transform Blurr's legs but don't fold them up, instead just fold out the front parts and fold out the spoiler piece and make sure the front parts of the legs are at a 90 degree angle or as far out as they will go. This is important because you want to make sure that the engines are securely glued to the legs and that they won't get broken off during transformation which happened to me a lot. By gluing them on with the legs in mid transformation you can ensure that the engines won't get broken off by the legs when transforming blurr. I also recomend putting the glue on the engine mounts and not the figure that way if they do break off the glue will stay with the engine and can be scraped off with an exacto knife. You may need to practice it a few times before you get it right. Also I'm sorry that this kit cost so much but thats because its a very large upgrade which requires a lot of material so I can't do much to reduce the price because I don't want to risk compromising the strength of the parts :(. At least this way if there is a problem with a part I don't have to feel guilty that someone bought something I made for over a hundred dollars and it didn't work. The minigun just fits into the cockpit via friction. You may need to do some sanding to make it fit. With the gun attached in robot mode it will extend past the figures feet so you will need to angle the backpack a bit so that the figure can stand properly but it does help to support the weight of the wings in robot mode. Now mine has a Decepticon logo on the engines but because that was a modified model I downloaded I didn't want to risk getting in trouble for selling something that used another persons model in it so I just removed it and also now it can be used for Bots or Cons.
Details
What's in the box:
Shadow upgrade engines and minigun

Dimensions:
Success Rate:
First To try.
What's this?
Rating:
Mature audiences only.

More From This Shop
$25.78

$15.27