
Aluminum

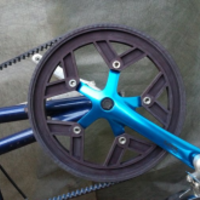
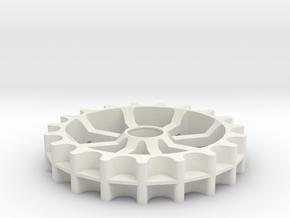
Cog: 23 teeth, 8 mm pitch, hyperglide interface
Made by
Print With Shapeways
 Choose Your Material
 Choose your color and finish
$178.31
Have a question about this product?
contact the designerYou must be logged in and verified to contact the designer.
Product Description
This cog works with a standard Gates belt (centertrack or not), and mounts on standard hyperglide splines.
The cog should be printed in stainless steel. Because the dimensional accuracy of the stainless steel process is not precise, it appeared to be impossible to get a good fit to a hyperglide spline. (Even printing it slightly undersized, and then filing it out very carefully to fit the hub splines resulted in annoying rattling within a day or two of riding.)
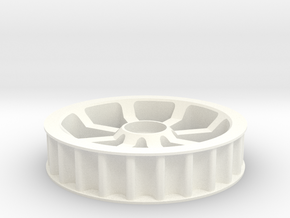
The plastic cog (here) worked well -- good fit, no rattling, and sufficiently robust -- but was quite worn within a year-and-a-half of use. (See more at https://dkprojects.net/belt_drive_brompton).
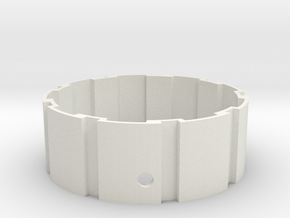
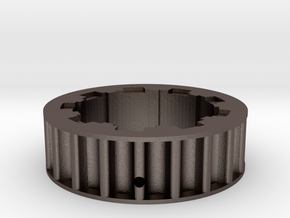
This stainless steel cog has a companion plastic "interface" (note: be sure to get the interface that goes with this cog (23T-8P -- it's slightly different than the other interface) that fits between the cog and the hyperglide spline. Since the plastic is slightly deformable, it accommodates the dimensional inaccuracy of the stainless steel part.
It's a little difficult to assemble on the hub, but it works beautifully! No skipping. No rattling. My experience with other stainless steel cogs indicates it should last quite a few years -- I've got at least five years on one now; it looks like it will need to be replaced in another year or three...
The cog includes printed-threaded holes for three M3 (diameter) x 0.5 mm (pitch) x 4 mm (length) set screws, which engage the groove on the hub and keep the cog from sliding axially along the splines. Again, the threads are not fully accurate (and their size is rather small for the print resolution). I ran a tap through the holes; it took off surprisingly-little metal, but did shine up/sharpen up the threads, which then worked fine.
To mount on the hub, first put the plastic interface onto the hub -- but not quite all the way. Leave a couple of millimeters overhanging the edge of the splines. This gives a little bit of the interface that can be squeezed inside the cog splines (make sure the set-screw holes line up!). Then you can use the axle bolt with some washers/spacers to slowly press the cog and interface onto the hub splines. Insert and tighten the set screws, and you're done! (Again, some details are at https://dkprojects.net/belt_drive_brompton).
The cog should be printed in stainless steel. Because the dimensional accuracy of the stainless steel process is not precise, it appeared to be impossible to get a good fit to a hyperglide spline. (Even printing it slightly undersized, and then filing it out very carefully to fit the hub splines resulted in annoying rattling within a day or two of riding.)
The plastic cog (here) worked well -- good fit, no rattling, and sufficiently robust -- but was quite worn within a year-and-a-half of use. (See more at https://dkprojects.net/belt_drive_brompton).
This stainless steel cog has a companion plastic "interface" (note: be sure to get the interface that goes with this cog (23T-8P -- it's slightly different than the other interface) that fits between the cog and the hyperglide spline. Since the plastic is slightly deformable, it accommodates the dimensional inaccuracy of the stainless steel part.
It's a little difficult to assemble on the hub, but it works beautifully! No skipping. No rattling. My experience with other stainless steel cogs indicates it should last quite a few years -- I've got at least five years on one now; it looks like it will need to be replaced in another year or three...
The cog includes printed-threaded holes for three M3 (diameter) x 0.5 mm (pitch) x 4 mm (length) set screws, which engage the groove on the hub and keep the cog from sliding axially along the splines. Again, the threads are not fully accurate (and their size is rather small for the print resolution). I ran a tap through the holes; it took off surprisingly-little metal, but did shine up/sharpen up the threads, which then worked fine.
To mount on the hub, first put the plastic interface onto the hub -- but not quite all the way. Leave a couple of millimeters overhanging the edge of the splines. This gives a little bit of the interface that can be squeezed inside the cog splines (make sure the set-screw holes line up!). Then you can use the axle bolt with some washers/spacers to slowly press the cog and interface onto the hub splines. Insert and tighten the set screws, and you're done! (Again, some details are at https://dkprojects.net/belt_drive_brompton).
Details
What's in the box:
cog-23T-8P_w_interface

Dimensions:
Success Rate:
First To try.
What's this?
Rating:
Mature audiences only.