Clear Ultra Fine Detail Plastic


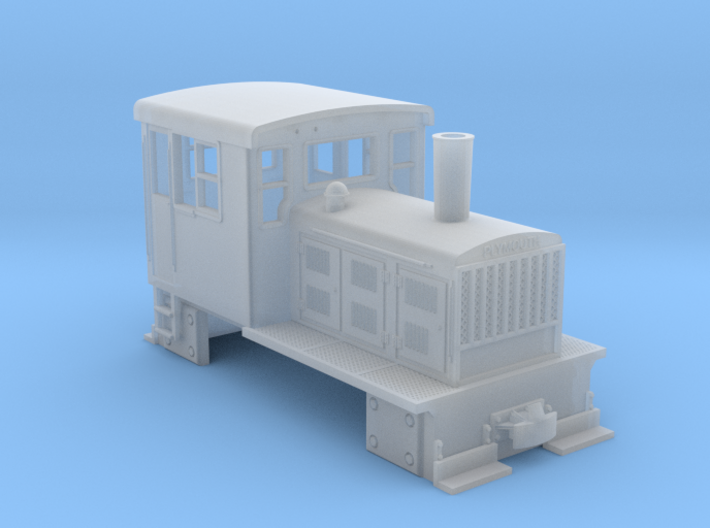
HOn30 Plymouth - Hook and Loop coupler version
Made by
Print With Shapeways
 Choose Your Material
 Choose your color and finish
$44.41
Have a question about this product?
contact the designerYou must be logged in and verified to contact the designer.
Product Description
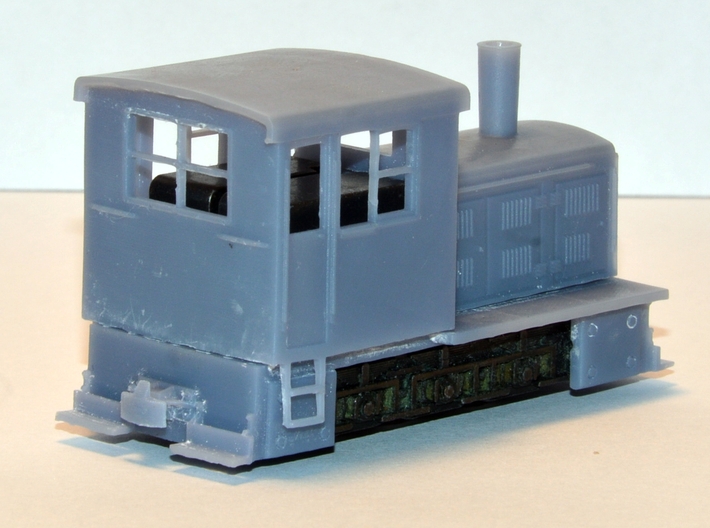
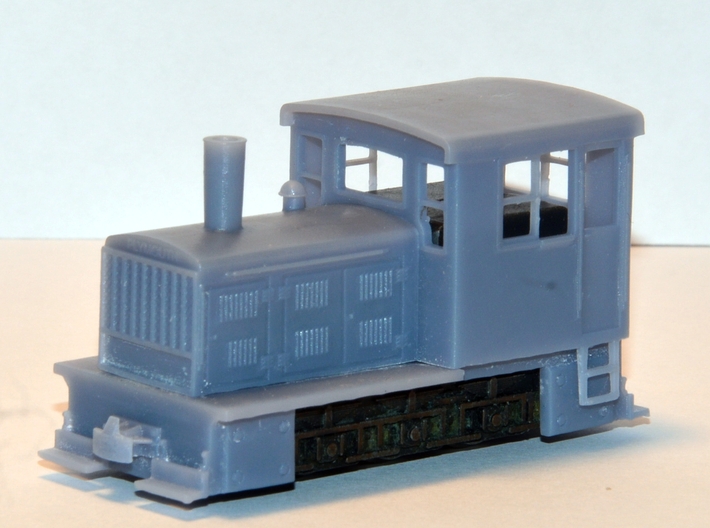
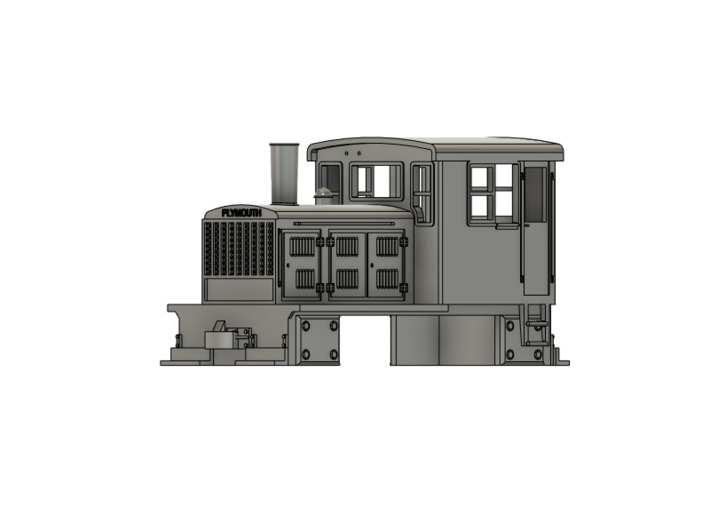
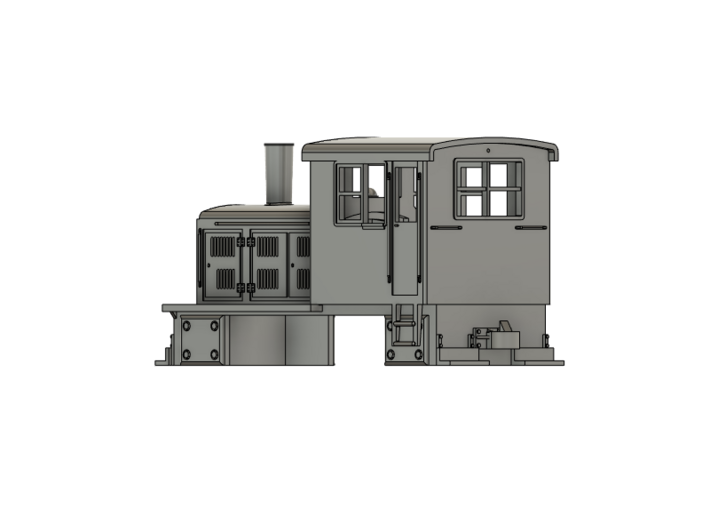
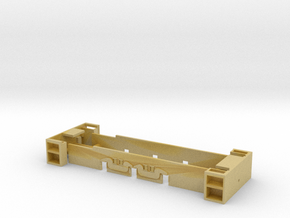
This is a body kit for a HOn30 scale Plymouth locomotive designed to fit the Bachmann N scale MDT locomotive chassis. This version is fitted with hook and loop couplers compatible with Roco, Minitrains, Bemo, Greenwich, etc... The Bachmann chassis will need to be slightly modified – see instructions below.
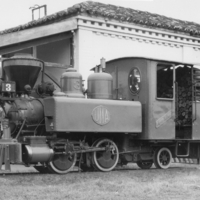
The model is freelanced, but it based on extensive research of Plymouth Locomotive Company practices. As such the locomotive resembles Plymouth models JDTW or JCDW (J: series type; D: Detroit Diesel motor; C: Caterpillar motor; T: Torque converter (hydraulic) drive; D: Direct (mechanical) drive; W: 6-wheel locomotive) but with some modifications to fit the intended chassis. The small “skirts” on the underside of the chassis are one variation from Plymouth practice – they represent cast-iron weights which were bolted on after purchase by a hypothetical purchaser to increase adhesive weight and tractive effort (in fact they are there to hide some greebles present on the chassis side frames which would require milling out for correctness).
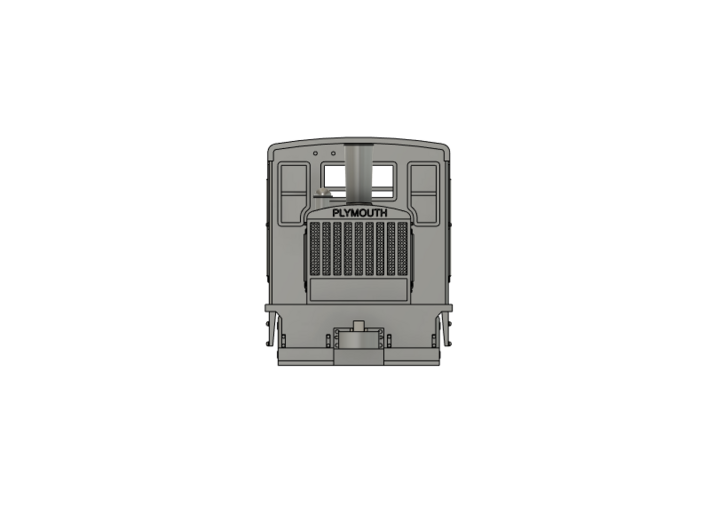
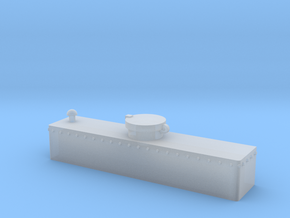
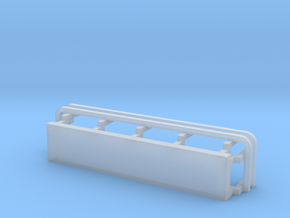
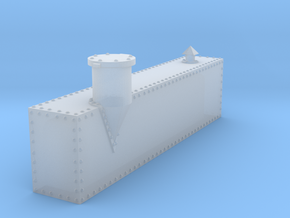
The body kit is composed of the complete locomotive body, two (dummy) headlights and one horn. The headlights and horn are sprued inside the body and need to be cut out and cleaned before use.
Tools and supplies needed:
(items in parenthesis are for the can motored version of the chassis)
- Motor tool with grinding disc and/or burrs;
- Jeweller’s saw;
- Files;
- Sandpaper;
- Screwdrivers;
- Sprue cutter;
- Small drill bits (0.5mm and/or 0.7mm);
- 0.4 or 0.5mm brass wire;
(- 1mm drill but and 1.2mm tap)
(- 2x ring terminals)
Instructions:
1- Open the package and inspect the parts. In case of defects or missing parts, please contact Shapeways Customer Service ASAP;
2- Using a sprue cutter, carefully remove the reinforcements located inside the body. Please notice that the sprue containing horn and headlight sits atop one of the sprues inside the cab – please cut carefully!
3- The body has 3 small dimples in the cab walls (one located in the back between the window and the roof and two in front between the left front window and the roof) which can be used to fit the provided headlights and horn – these can be opened with a 0.5mm drill then either reamed open or enlarged with a 0.7mm drill. Once these are opened the headlights and horn can be fitted (on the front wal, the horn goes on the right hole with the hood facing the modeller.);
4- Paint and weather to choice.
Chassis modifications:
1- The Bachmann chassis will need to be slightly chopped to fit inside the body. Start by dismantling the chassis completely;
2- Using either a jewellers saw or a motor tool, CAREFULLY remove the cast dimple which presses over the motor brush cap, making sure the body slips past the area without hanging up. Newer versions of the Bachmann chassis (equipped with a can motor) come with an area of square metal in front of the motor - this also needs to be removed by cutting, then dressed. Please note that this operation will void the warranty of a new locomotive, so please proceed with utmost care.
3- Remove the mounting lugs using a motor tool. Test fit the body to see if it sits properly in the chassis.
4- On the open-frame motored chassis, removal of the cast brush lugs means that the motor is no longer in contact with the chassis. To remedy this, cut a bit of brass wire (0.4 or 0.5mm diameter will do) and run it through the brass loop present behind the brush cap. Crimp the loop (and/or solder the wire), then test-fit motor onto chassis to see that the wire touches it. Trim the excess wire, then reassemble and test run the chassis. Alternatively this is the time to wire a DCC decoder in, for those who want one. In the case of the can motor chassis, the motor will have to be hardwired onto new connections – one suggestion is to drill 2x 1mm holes (one on each half), tap 1.2mm and then screw the motor leads using small ring terminals.
5 - Reassemble and test-run the chassis.
6 - Cut the original coupler mounting pads on the nds on the chassis and file/sand them flush with the chassis ends.
- Test-fit body to chassis, making sure that it enters unhindered and sits squarely. Use double-faced tape to fix body to chassis.
Your locomotive should be ready by now. Enjoy!
If you have any questions or need help, please feel free to contact the designer.
The model is freelanced, but it based on extensive research of Plymouth Locomotive Company practices. As such the locomotive resembles Plymouth models JDTW or JCDW (J: series type; D: Detroit Diesel motor; C: Caterpillar motor; T: Torque converter (hydraulic) drive; D: Direct (mechanical) drive; W: 6-wheel locomotive) but with some modifications to fit the intended chassis. The small “skirts” on the underside of the chassis are one variation from Plymouth practice – they represent cast-iron weights which were bolted on after purchase by a hypothetical purchaser to increase adhesive weight and tractive effort (in fact they are there to hide some greebles present on the chassis side frames which would require milling out for correctness).
The body kit is composed of the complete locomotive body, two (dummy) headlights and one horn. The headlights and horn are sprued inside the body and need to be cut out and cleaned before use.
Tools and supplies needed:
(items in parenthesis are for the can motored version of the chassis)
- Motor tool with grinding disc and/or burrs;
- Jeweller’s saw;
- Files;
- Sandpaper;
- Screwdrivers;
- Sprue cutter;
- Small drill bits (0.5mm and/or 0.7mm);
- 0.4 or 0.5mm brass wire;
(- 1mm drill but and 1.2mm tap)
(- 2x ring terminals)
Instructions:
1- Open the package and inspect the parts. In case of defects or missing parts, please contact Shapeways Customer Service ASAP;
2- Using a sprue cutter, carefully remove the reinforcements located inside the body. Please notice that the sprue containing horn and headlight sits atop one of the sprues inside the cab – please cut carefully!
3- The body has 3 small dimples in the cab walls (one located in the back between the window and the roof and two in front between the left front window and the roof) which can be used to fit the provided headlights and horn – these can be opened with a 0.5mm drill then either reamed open or enlarged with a 0.7mm drill. Once these are opened the headlights and horn can be fitted (on the front wal, the horn goes on the right hole with the hood facing the modeller.);
4- Paint and weather to choice.
Chassis modifications:
1- The Bachmann chassis will need to be slightly chopped to fit inside the body. Start by dismantling the chassis completely;
2- Using either a jewellers saw or a motor tool, CAREFULLY remove the cast dimple which presses over the motor brush cap, making sure the body slips past the area without hanging up. Newer versions of the Bachmann chassis (equipped with a can motor) come with an area of square metal in front of the motor - this also needs to be removed by cutting, then dressed. Please note that this operation will void the warranty of a new locomotive, so please proceed with utmost care.
3- Remove the mounting lugs using a motor tool. Test fit the body to see if it sits properly in the chassis.
4- On the open-frame motored chassis, removal of the cast brush lugs means that the motor is no longer in contact with the chassis. To remedy this, cut a bit of brass wire (0.4 or 0.5mm diameter will do) and run it through the brass loop present behind the brush cap. Crimp the loop (and/or solder the wire), then test-fit motor onto chassis to see that the wire touches it. Trim the excess wire, then reassemble and test run the chassis. Alternatively this is the time to wire a DCC decoder in, for those who want one. In the case of the can motor chassis, the motor will have to be hardwired onto new connections – one suggestion is to drill 2x 1mm holes (one on each half), tap 1.2mm and then screw the motor leads using small ring terminals.
5 - Reassemble and test-run the chassis.
6 - Cut the original coupler mounting pads on the nds on the chassis and file/sand them flush with the chassis ends.
- Test-fit body to chassis, making sure that it enters unhindered and sits squarely. Use double-faced tape to fix body to chassis.
Your locomotive should be ready by now. Enjoy!
If you have any questions or need help, please feel free to contact the designer.
Details
What's in the box:
Plymouth_Complete_Deluxe_Retail v1

Dimensions:
Success Rate:
First To try.
What's this?
Rating:
Mature audiences only.