Black Natural Versatile Plastic

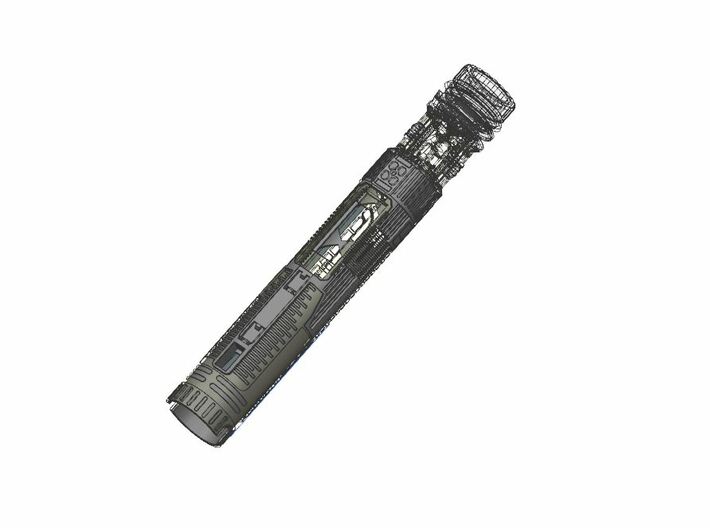

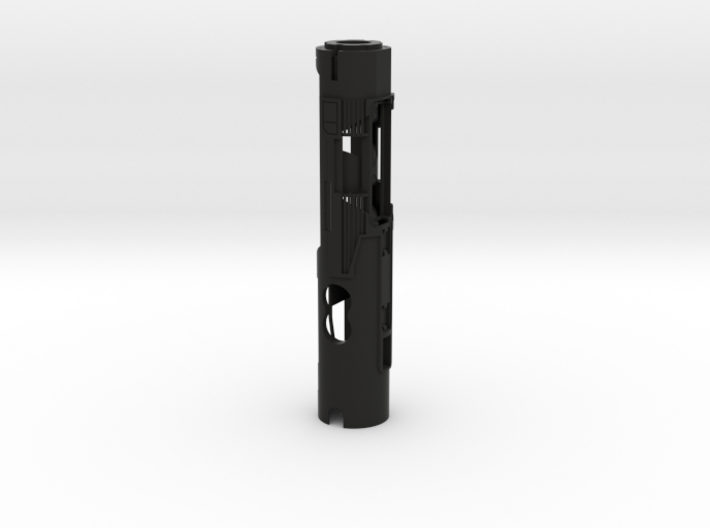
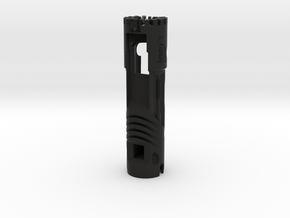
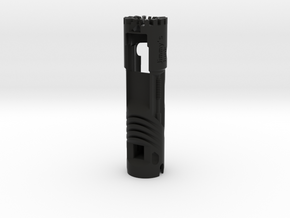
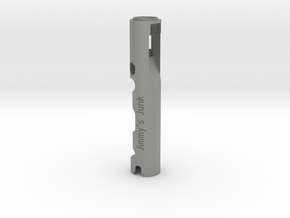
Korbanth MW1 Ultimate Chassis U1 Proffie
Made by
Print With Shapeways
 Choose Your Material
 Choose your color and finish
$38.73
Have a question about this product?
contact the designerYou must be logged in and verified to contact the designer.
Product Description
Chassis for the Korbanth MW1 hilts.
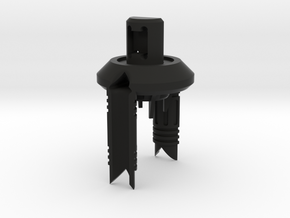
For this chassis you will also require P2, P3, U4, U5, U6, U7, U8 & U9 of the design.
This is a removable battery design. The battery tabs required are the type shown in the link below:
https://www.ebay.co.uk/itm/20Pairs-18650-Battery-Negative-to-Positive-Conversion-Spring-Contact-16-5mmx16mm/362591431441?ssPageName=STRK%3AMEBIDX%3AIT&_trksid=p2057872.m2749.l2649
This chassis is designed for use with:
-Proffie Board
-KR Sabers 28mm Bass speaker
-18650 Lithium Ion Battery
-High Amp kill switch
-Shtok Short Pin Hilt side LED PCB (most likely requires sanding down on the outside diameter)
-Crystal or my generic chassis crystal (found on shapeways) and single neo pixel
-Two single pixels for the accent lights
-Two 4x4x1.5mm SMD micro tactile switches
-(Optional) four lengths of 1.5mm dia rod
This design allows for the board to slide into place once wired up and tested.
The kill switch requires gluing in to place once everything is wired up and tested. We recommend a dab of hot glue to secure it.
The crystal neopixel requires gluing into the crystal once everything is wired up and tested, and then the crystal requires gluing in to the chassis along with the accent pixels before fully assembling and gluing the chassis.
If you struggle inserting the battery tabs, I suggest carefully warming the tabs with a clean soldering iron as inserting them. It will help for the plastic surrounding the tabs to grip them.
If you have the chamber parts printed in metal, you will more than likey need to open up the holes for the rods by carefully using a 1.5/1.6mm drill bit.
Handle with care.
Any damage occurred during installation is the responsibility of the individual installer.
Details
What's in the box:
Jimmy's Lightsaber Junk Korbanth MW1 Ultimate Crys

Dimensions:
Success Rate:
First To try.
What's this?
Rating:
Mature audiences only.
