
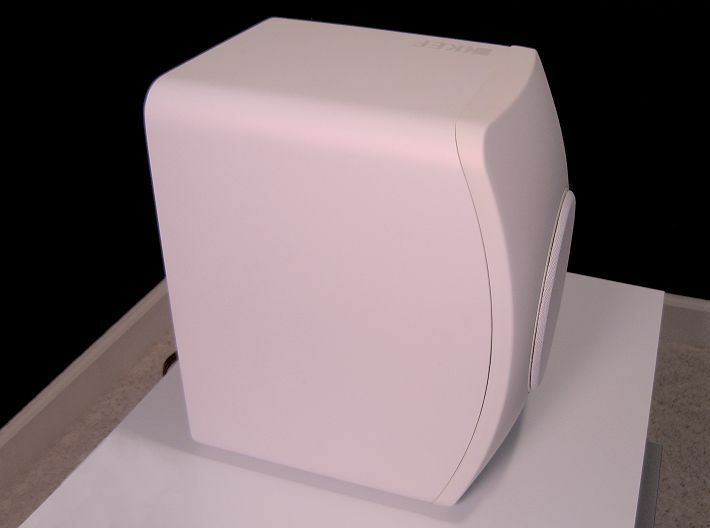
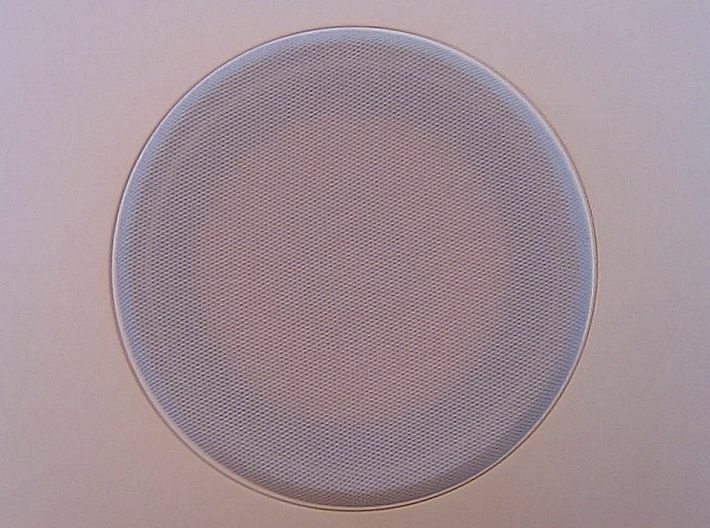
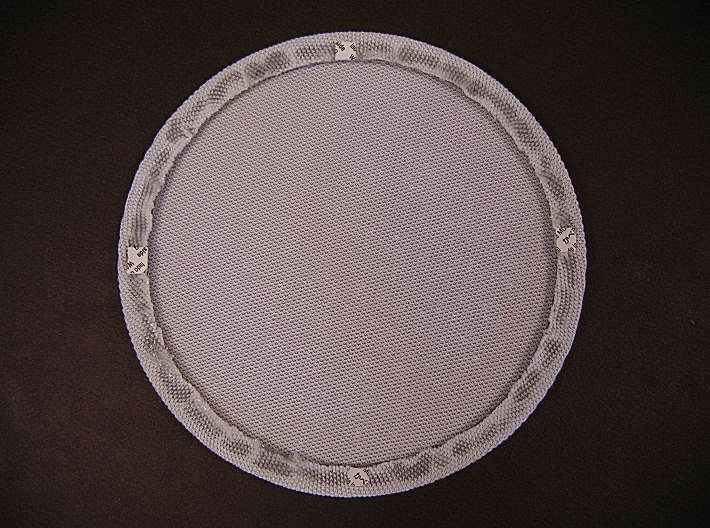
Finished grille on mineral white LS50. This image contains things not included in listing. Please read carefully.


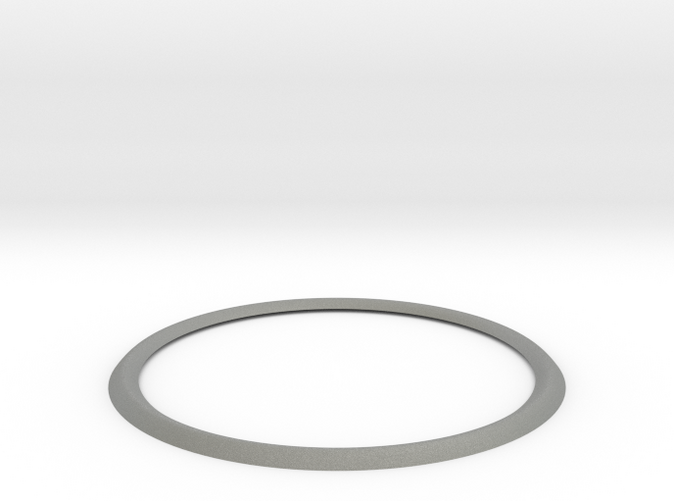
Grille frame that fits KEF LS50 Meta
Made by
Print With Shapeways
 Choose Your Material
 Choose your color and finish
$20.75
Have a question about this product?
contact the designerYou must be logged in and verified to contact the designer.
Product Description
This listing is for a single grille frame only (the gray plastic ring). Please order two if you are doing a pair.
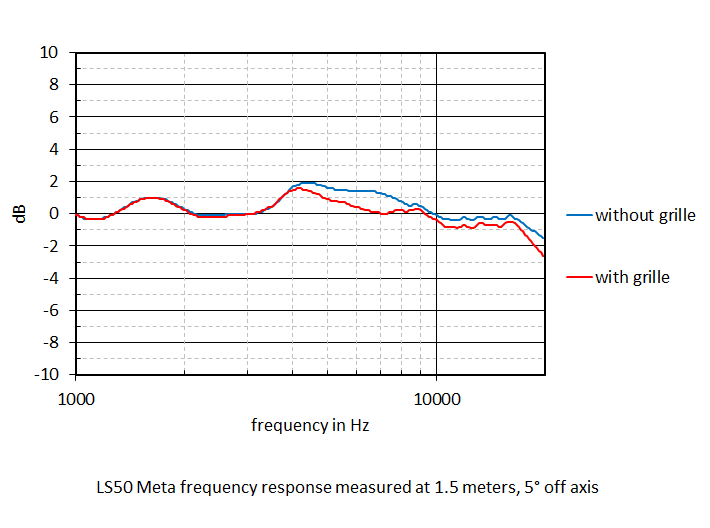
This is a minimalist design. There's just enough structure to space the cloth away from the cone and surround at high excursion. The geometry of the ring was also adjusted to minimize frequency response disturbances (see images for before/after frequency response).
This frame will block the IR sensor of the LS50 Wireless. I don't have access to that model, so can't say if you can successfully modify the frame to miss the sensor.
To complete each grille, you will also need:
Directions to complete your grilles:
1) Wet a paper towel with rubbing alcohol, and wipe down the frames to remove any residual 3D printing dust. Let them dry.
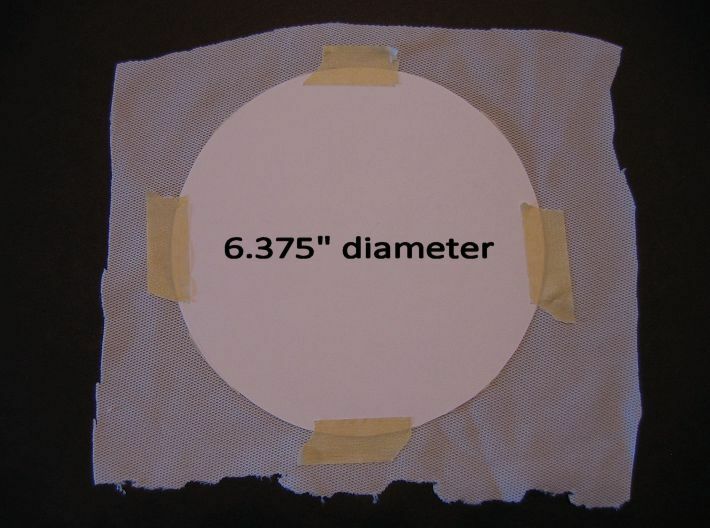
2) Cut a 6.375" diameter circle of grille cloth. One way to do this is with a circle template of card stock (please review the pictures for this and other assembly examples). Lay the cloth down on a flat surface and smooth it out. Place the template on top of the fabric, and then tape over the edge of the template at four points to attach the cloth. Do NOT tension the cloth while doing this. Flip it over (cloth side up), hold the cloth/template near its center, and cut the cloth at the template edge with sharp scissors. Don't stretch the cloth while cutting it.
Attaching cloth - tape method:
3) Carefully apply the 9485PC tape only to the 0.25" wide inner step on the rear of the frame. Small wrinkles in the release liner are normal, but try to keep things as smooth as you can. Remove the release liner. If any of the tape extends beyond the inner edge of the frame, smooth it down toward the front of the frame.
4) Center the frame over the cloth circle. Wrap the cloth around the edge of the frame and gently stick down one small spot to the 9485PC. Make sure the cloth covers all of the 9485PC to the inner frame edge. It's a very aggressive adhesive, and you don't want it sticking to your speaker by accident. 180° across from that location, tension the cloth and stick down another spot. If your cloth has the same stretch as mine, the edge of the cloth should line up with the inner edge of the frame and give you the proper tension. If you come up short or loose you'll need to adjust the cloth size or your method.
5) Between the two adhered spots (90° away), tension the cloth and stick down another small spot so the cloth lines up with the inner edge again, then do one 180° across from it. Continue splitting the distance between the spots and you'll have the whole perimeter down in short order. Try to keep the initial spots you stick down small and keep significant winkles out of the cloth. As long as you stuck things down lightly, you can peel up the cloth and re-stick it to smooth out wrinkles.
6) Once you're happy with the cloth application, press it firmly into the adhesive, and then trim away any excess cloth so it ends at the inner edge of the frame.
Attaching cloth - hot glue method:
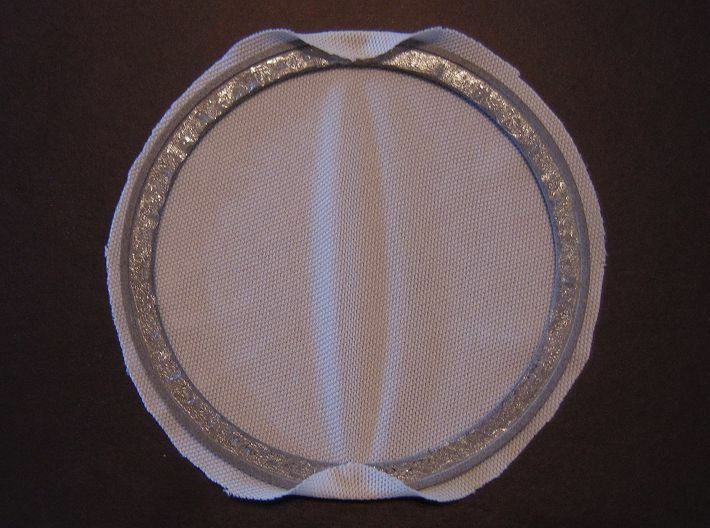
3) Center the frame over the cloth circle (rounded side toward cloth). Wrap the cloth around the edge of the frame toward the back (flat side with step). Apply one small spot of hot glue near the step (see images) and stick the cloth down smoothly. Glue tip: when removing the glue gun, move it to the side so any drips stay on the rear of the frame. Small strings of glue are removable and not an issue, but if you drip a blob of glue on the free span of the cloth (over the cone area), it will show on the front side. If hot glue generally gets messy for you, you may want to put a temporary card stock circle in the center to protect the cloth (remove the card stock when done gluing, obviously).
4) 180° across from that location, tension the cloth and stick down another spot. If your cloth has the same stretch as mine, the edge of the cloth should line up with the inner edge of the frame and give you the proper tension. If you come up short or loose, you'll need to adjust the cloth size or your method.
5) Between the two adhered spots (90° away), tension the cloth and stick down another small spot so the cloth lines up with the inner edge again, then do one 180° across from it. Continue splitting the distance between the spots until you've done 16 of them.
The gaps between the spots can now be glued in strips (see picture). Make sure the cloth is smooth where it's glued. If you have any high spots, run the glue gun over them briefly to smooth them down. Again, avoid drips in the center.
6) Once you're happy with the cloth application, trim away any excess cloth or glue so it ends at the inner edge of the frame.
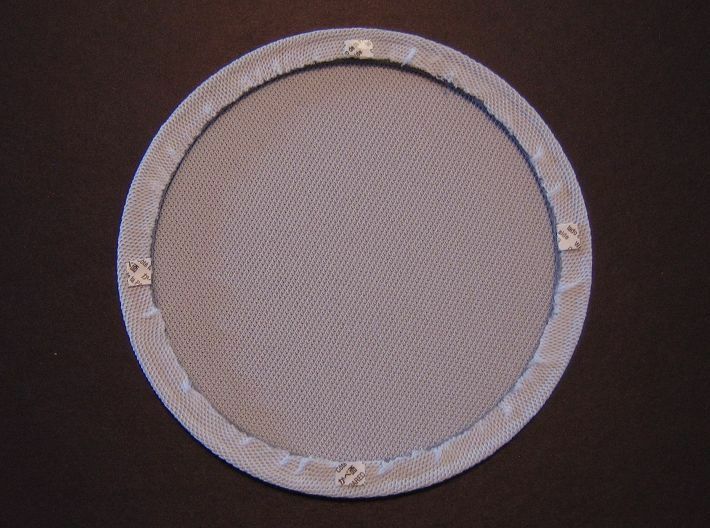
7) Apply the four Command Strip squares to the stepped down area of the frame/cloth assembly. I faced the "wall side" toward the speaker's trim ring, so I removed the red side release liner to adhere the strips to the frame. Space the squares equally around the frame; this lets you avoid adhesive on the writing of the LS50 trim ring. The exact location of the Command Strips isn't critical, so you can move them a bit if you need to avoid wrinkles. If the Command Strip extends beyond the frame's inner edge, trim it with scissors.
8) Remove the release liner from the Command Strip squares. Carefully center the grille over the stock trim ring on the LS50 while lining up the adhesive squares to avoid the writing. There should be a small area of ring visible around the grille. Make sure that's consistent around the whole perimeter, then stick the grille to the speaker.
Some random bits:
To remove the grille, get a fingernail under its edge and pry gently at one of the Command Strip locations. The adhesive should gradually release. If it's stubborn, use a hair dryer to heat up the adhesive and pry gently again. Continue the process at the other 3 locations.
If you overstretch the cloth using the tape method, the cloth may peel away from the adhesive in some spots over time. This isn't typically noticeable unless you look between the grille and the LS50 trim ring. You can typically remove the grille and stick down the cloth again exactly where it is (if the face still looks good, don't try to apply more tension - just press the cloth firmly into the tape again). It's normally stable after this.
This is a minimalist design. There's just enough structure to space the cloth away from the cone and surround at high excursion. The geometry of the ring was also adjusted to minimize frequency response disturbances (see images for before/after frequency response).
This frame will block the IR sensor of the LS50 Wireless. I don't have access to that model, so can't say if you can successfully modify the frame to miss the sensor.
To complete each grille, you will also need:
- A 6.375" diameter circle of standard stretchy open-weave polyester speaker grille cloth (Parts Express #260-334 or an equivalent). White is shown here because it's the hardest to handle cosmetically. Any other cloth color should work as well or better with the gray ring.
- Hot glue gun or 18 inches of 0.25" wide by 0.005" thick double sided tape to adhere the cloth. I used 3M 9485PC. Other adhesion methods or tapes may work, but I haven't tried them.
- Four 0.25" by 0.25" pieces of 3M Command Strip 17021P to stick the cloth-covered grille to the speaker. The step in the rear of the grille frame is made for this precise thickness adhesive (0.04"). If you use something else, the fit may be affected and you may have difficulty removing the grille.
Directions to complete your grilles:
1) Wet a paper towel with rubbing alcohol, and wipe down the frames to remove any residual 3D printing dust. Let them dry.
2) Cut a 6.375" diameter circle of grille cloth. One way to do this is with a circle template of card stock (please review the pictures for this and other assembly examples). Lay the cloth down on a flat surface and smooth it out. Place the template on top of the fabric, and then tape over the edge of the template at four points to attach the cloth. Do NOT tension the cloth while doing this. Flip it over (cloth side up), hold the cloth/template near its center, and cut the cloth at the template edge with sharp scissors. Don't stretch the cloth while cutting it.
Attaching cloth - tape method:
3) Carefully apply the 9485PC tape only to the 0.25" wide inner step on the rear of the frame. Small wrinkles in the release liner are normal, but try to keep things as smooth as you can. Remove the release liner. If any of the tape extends beyond the inner edge of the frame, smooth it down toward the front of the frame.
4) Center the frame over the cloth circle. Wrap the cloth around the edge of the frame and gently stick down one small spot to the 9485PC. Make sure the cloth covers all of the 9485PC to the inner frame edge. It's a very aggressive adhesive, and you don't want it sticking to your speaker by accident. 180° across from that location, tension the cloth and stick down another spot. If your cloth has the same stretch as mine, the edge of the cloth should line up with the inner edge of the frame and give you the proper tension. If you come up short or loose you'll need to adjust the cloth size or your method.
5) Between the two adhered spots (90° away), tension the cloth and stick down another small spot so the cloth lines up with the inner edge again, then do one 180° across from it. Continue splitting the distance between the spots and you'll have the whole perimeter down in short order. Try to keep the initial spots you stick down small and keep significant winkles out of the cloth. As long as you stuck things down lightly, you can peel up the cloth and re-stick it to smooth out wrinkles.
6) Once you're happy with the cloth application, press it firmly into the adhesive, and then trim away any excess cloth so it ends at the inner edge of the frame.
Attaching cloth - hot glue method:
3) Center the frame over the cloth circle (rounded side toward cloth). Wrap the cloth around the edge of the frame toward the back (flat side with step). Apply one small spot of hot glue near the step (see images) and stick the cloth down smoothly. Glue tip: when removing the glue gun, move it to the side so any drips stay on the rear of the frame. Small strings of glue are removable and not an issue, but if you drip a blob of glue on the free span of the cloth (over the cone area), it will show on the front side. If hot glue generally gets messy for you, you may want to put a temporary card stock circle in the center to protect the cloth (remove the card stock when done gluing, obviously).
4) 180° across from that location, tension the cloth and stick down another spot. If your cloth has the same stretch as mine, the edge of the cloth should line up with the inner edge of the frame and give you the proper tension. If you come up short or loose, you'll need to adjust the cloth size or your method.
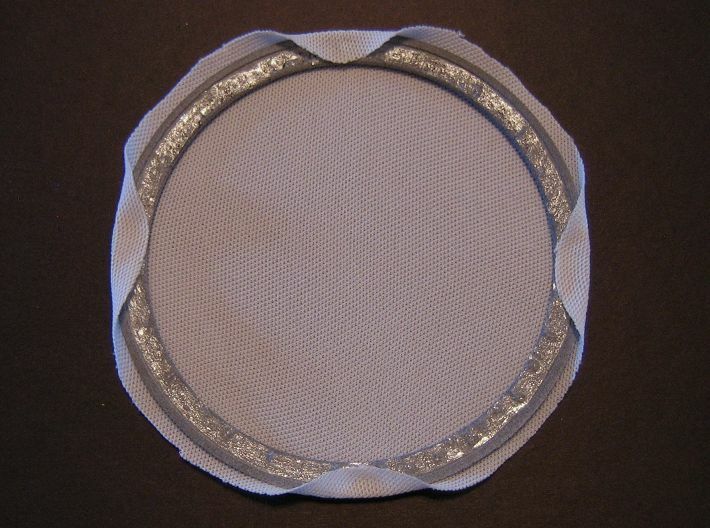
5) Between the two adhered spots (90° away), tension the cloth and stick down another small spot so the cloth lines up with the inner edge again, then do one 180° across from it. Continue splitting the distance between the spots until you've done 16 of them.
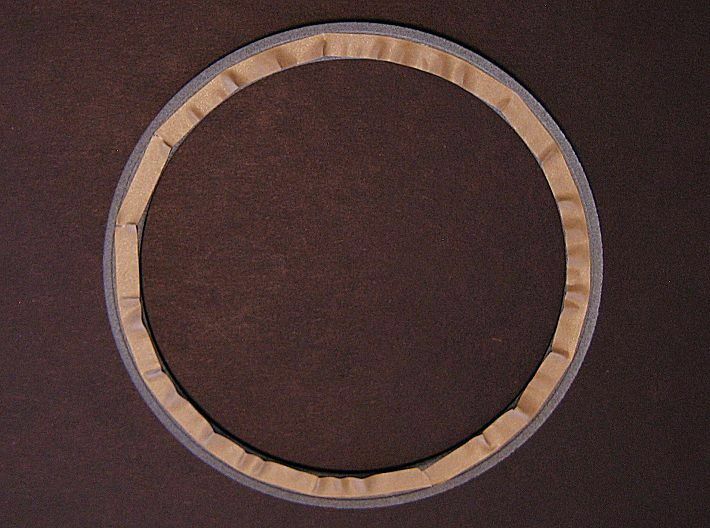
The gaps between the spots can now be glued in strips (see picture). Make sure the cloth is smooth where it's glued. If you have any high spots, run the glue gun over them briefly to smooth them down. Again, avoid drips in the center.
6) Once you're happy with the cloth application, trim away any excess cloth or glue so it ends at the inner edge of the frame.
7) Apply the four Command Strip squares to the stepped down area of the frame/cloth assembly. I faced the "wall side" toward the speaker's trim ring, so I removed the red side release liner to adhere the strips to the frame. Space the squares equally around the frame; this lets you avoid adhesive on the writing of the LS50 trim ring. The exact location of the Command Strips isn't critical, so you can move them a bit if you need to avoid wrinkles. If the Command Strip extends beyond the frame's inner edge, trim it with scissors.
8) Remove the release liner from the Command Strip squares. Carefully center the grille over the stock trim ring on the LS50 while lining up the adhesive squares to avoid the writing. There should be a small area of ring visible around the grille. Make sure that's consistent around the whole perimeter, then stick the grille to the speaker.
Some random bits:
To remove the grille, get a fingernail under its edge and pry gently at one of the Command Strip locations. The adhesive should gradually release. If it's stubborn, use a hair dryer to heat up the adhesive and pry gently again. Continue the process at the other 3 locations.
If you overstretch the cloth using the tape method, the cloth may peel away from the adhesive in some spots over time. This isn't typically noticeable unless you look between the grille and the LS50 trim ring. You can typically remove the grille and stick down the cloth again exactly where it is (if the face still looks good, don't try to apply more tension - just press the cloth firmly into the tape again). It's normally stable after this.
Details
What's in the box:
KEF LS50 grille ring 210626-2-3
Dimensions:
Success Rate:
First To try.
What's this?
Rating:
Mature audiences only.

More From This Shop

$13.71

$13.74

$13.44

$13.40