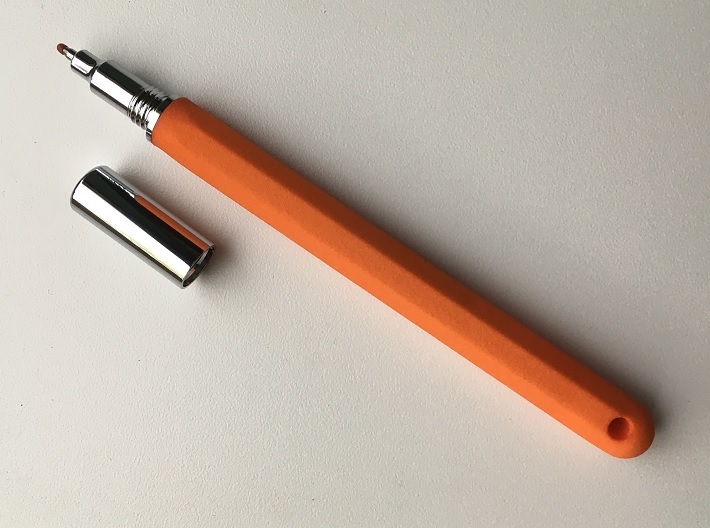
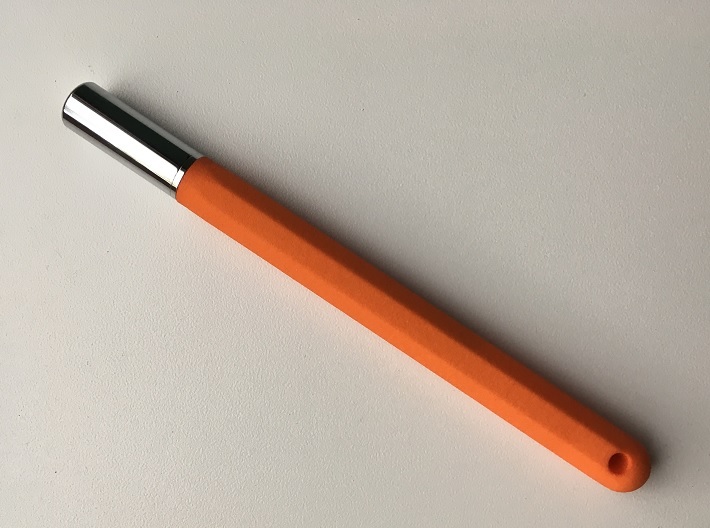
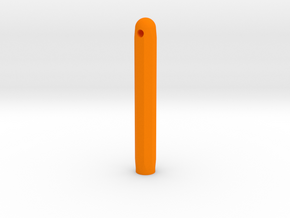
Varita chrome pen kit using orange versatile plastic tube (uncapped)


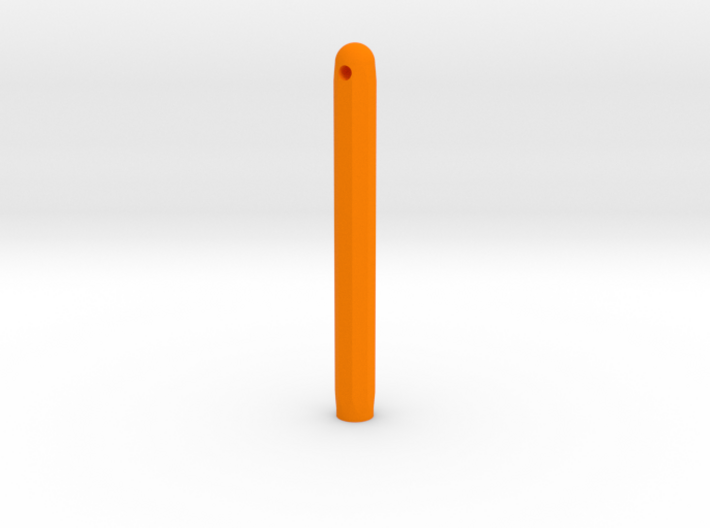
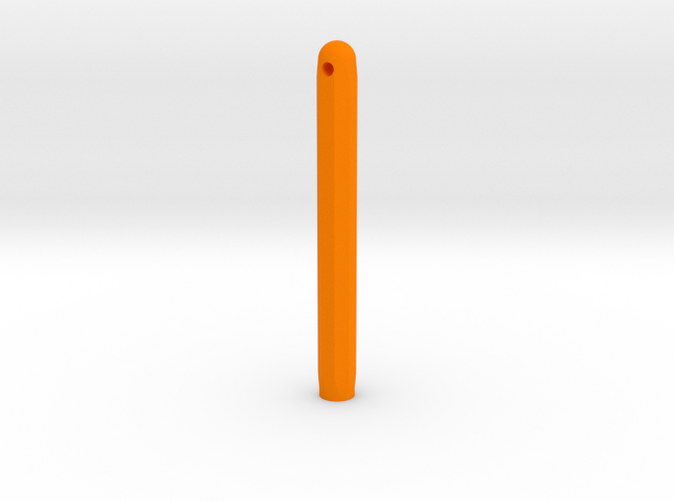
Varita Pen Body 8 sides
Made by
Print With Shapeways
 Choose Your Material
 Choose your color and finish
$18.26
Have a question about this product?
contact the designerYou must be logged in and verified to contact the designer.
Product Description
This product is a pre-formed pen tube designed for the commercially available Varita pen kit available from the following source with various metal finish options:
https://www.exoticblanks.com/Varita-Ballpoint-Pen-Kit-Chrome.html
This is a closed end pen kit which means there is a hole on only one side of the tube to accept the assembled pen mechanism. The pen should be rather easy to put together although a small amount of prepartion work is required.
1) When you get the pen tube back from Shapeways there's a good chance there will be a small amount of compacted plastic powder material deep inside the large hole. This can be removed using water and a long thin wire or small diameter bristle brush. In addition there is a smaller internal vent hole that leads from the large internal hole to the lanyard hole at the rounded ended of the pen tube. Be sure this hole is also cleaned out. The vent hole serves to allow air to escape the pen cavity when the pen mechanism is inserted.
2) The internal hole should be large enough (10mm diameter) to accept the assembled pen mechanism. I prefer the fit to be just loose enough so the mechanism can fall out of the tube previous to gluing it in place, although it's a personal preference and depends on the type of glue or epoxy used. If the fit is too tight the hole can be enlarged through the careful use of a round file or sandpaper rolled on a dowel rod.
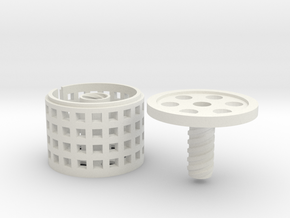
3) Assemble the pen internals. Unfortunately the pen kit does not appear to have instructions included with the kit, and none are available from the pen kit retailer. Fortunately the kit is rather easy to assemble. Using a pen press a small round cylinder gets pressed into one end of the tube and the cap/nib assembly gets pressed into the other end. Lightly sand the brass tube prior to pressing the parts together to remove oxidation and roughen the surface for a stronger glue bond.
4) Glue the pen mechanicals and 3D printed pen tube together. Again make sure your 3D pen blank is very dry at this point since moisture can adversely affect glue/resin adhesive performance. I prefer using thick CA glue since it sets slower than thin or medium CA glue blends. If you work too slow any type of super glue can set before you insert the pen mechanism all the way and your project will be ruined. Two part mixed epoxy resins will have longer set times ranging from minutes to hours. Apply a small amount of glue to the inside of the 3D printed tube to avoid messing up the outside of the 3D printed tube or the pen cap assembly. Apply the glue deep enough into the hole away from the rim so you don't accidentally end up gluing the nib to the 3d printed pen tube. Rotate the pen assembly as it is inserted to better spread the glue around the brass tube. This step is best performed in 2 or 3 seconds at most if using CA glue. Set the pen aside and don't fiddle with it so the glue or resin can cure properly.
5) Once everything has cured the last step is to unscrew the cap and the pen nib, insert the ink cartridge with the spring into the hole, and screw the pen nib back onto the pen body. Your pen is now ready for use. The pen cap screws onto the nib portion of the pen when not in use.
Other issues: I'm recommending purchase of this product in only basic versatile plastic options (plain and dyed). I have not yet tried the fancier premium versions of versatile plastic or multi jet fusion plastics. Fine detail plastics are a bit too stinky with unreliable surface finishes for my taste. Metal options should be possible although they are much more expensive.
The 3D printed versatile plastic tubes can be sealed using spray or brush lacquers if that is your preference to obtain a shiny surface coat. There's a lot of room for experimentation with available materials and as new materials become available and 3D print technology improves over time.
https://www.exoticblanks.com/Varita-Ballpoint-Pen-Kit-Chrome.html
This is a closed end pen kit which means there is a hole on only one side of the tube to accept the assembled pen mechanism. The pen should be rather easy to put together although a small amount of prepartion work is required.
1) When you get the pen tube back from Shapeways there's a good chance there will be a small amount of compacted plastic powder material deep inside the large hole. This can be removed using water and a long thin wire or small diameter bristle brush. In addition there is a smaller internal vent hole that leads from the large internal hole to the lanyard hole at the rounded ended of the pen tube. Be sure this hole is also cleaned out. The vent hole serves to allow air to escape the pen cavity when the pen mechanism is inserted.
2) The internal hole should be large enough (10mm diameter) to accept the assembled pen mechanism. I prefer the fit to be just loose enough so the mechanism can fall out of the tube previous to gluing it in place, although it's a personal preference and depends on the type of glue or epoxy used. If the fit is too tight the hole can be enlarged through the careful use of a round file or sandpaper rolled on a dowel rod.
3) Assemble the pen internals. Unfortunately the pen kit does not appear to have instructions included with the kit, and none are available from the pen kit retailer. Fortunately the kit is rather easy to assemble. Using a pen press a small round cylinder gets pressed into one end of the tube and the cap/nib assembly gets pressed into the other end. Lightly sand the brass tube prior to pressing the parts together to remove oxidation and roughen the surface for a stronger glue bond.
4) Glue the pen mechanicals and 3D printed pen tube together. Again make sure your 3D pen blank is very dry at this point since moisture can adversely affect glue/resin adhesive performance. I prefer using thick CA glue since it sets slower than thin or medium CA glue blends. If you work too slow any type of super glue can set before you insert the pen mechanism all the way and your project will be ruined. Two part mixed epoxy resins will have longer set times ranging from minutes to hours. Apply a small amount of glue to the inside of the 3D printed tube to avoid messing up the outside of the 3D printed tube or the pen cap assembly. Apply the glue deep enough into the hole away from the rim so you don't accidentally end up gluing the nib to the 3d printed pen tube. Rotate the pen assembly as it is inserted to better spread the glue around the brass tube. This step is best performed in 2 or 3 seconds at most if using CA glue. Set the pen aside and don't fiddle with it so the glue or resin can cure properly.
5) Once everything has cured the last step is to unscrew the cap and the pen nib, insert the ink cartridge with the spring into the hole, and screw the pen nib back onto the pen body. Your pen is now ready for use. The pen cap screws onto the nib portion of the pen when not in use.
Other issues: I'm recommending purchase of this product in only basic versatile plastic options (plain and dyed). I have not yet tried the fancier premium versions of versatile plastic or multi jet fusion plastics. Fine detail plastics are a bit too stinky with unreliable surface finishes for my taste. Metal options should be possible although they are much more expensive.
The 3D printed versatile plastic tubes can be sealed using spray or brush lacquers if that is your preference to obtain a shiny surface coat. There's a lot of room for experimentation with available materials and as new materials become available and 3D print technology improves over time.
Details
What's in the box:
hxPuz4FxFBQ-Varita Pen 8 sides 4p74
Dimensions:
Success Rate:
First To try.
What's this?
Rating:
Mature audiences only.

