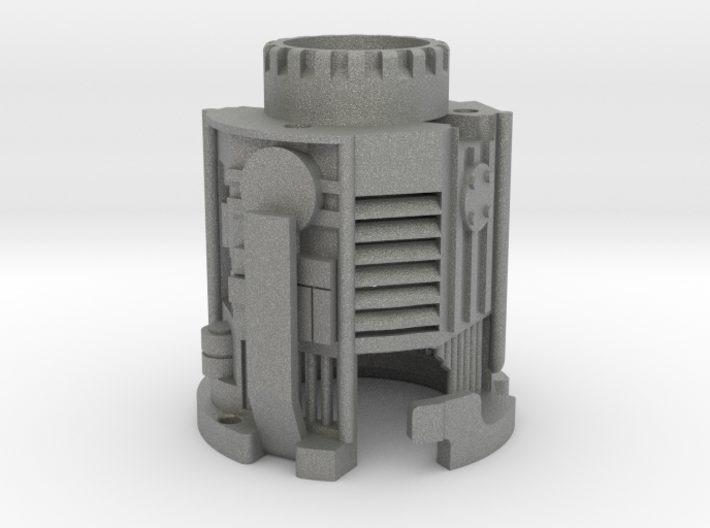
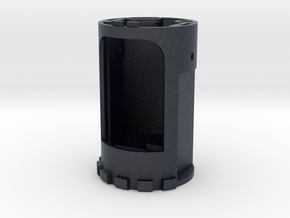
Gray PA12


Krorssguard Ultimate Chassis P1
Made by
Print With Shapeways
 Choose Your Material
 Choose your color and finish
$24.42
Have a question about this product?
contact the designerYou must be logged in and verified to contact the designer.
Product Description
Read the decription fully!
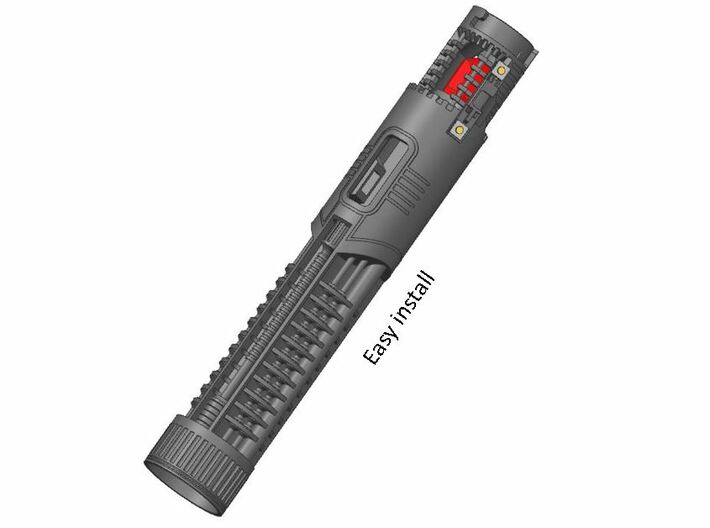
Easy Install twist and click listings have been released for purchase.
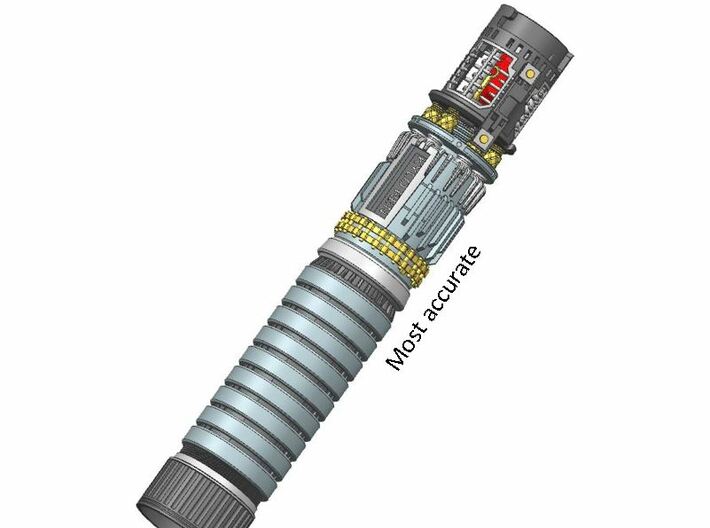
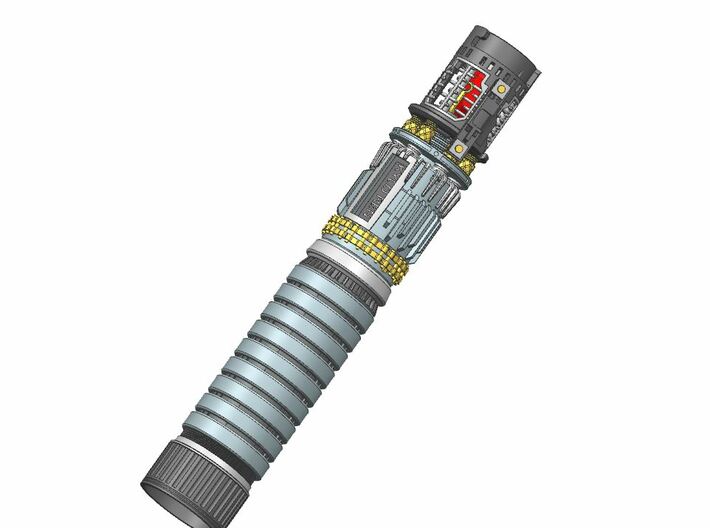
The most accurate twist and click chassis will be released 26th-28th of April.
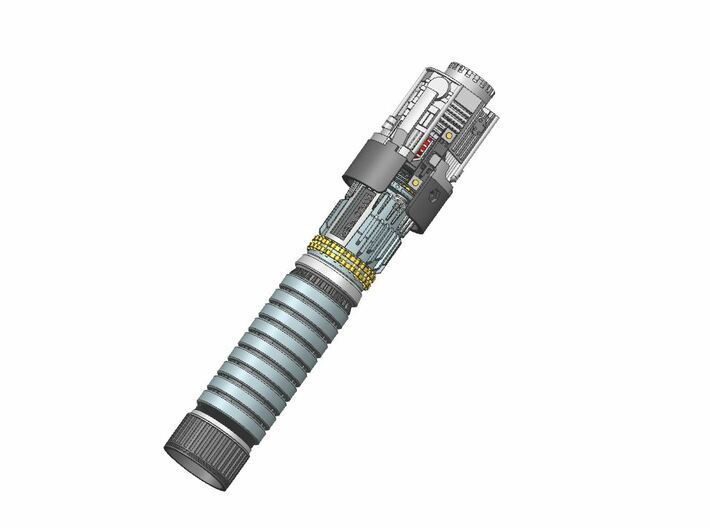
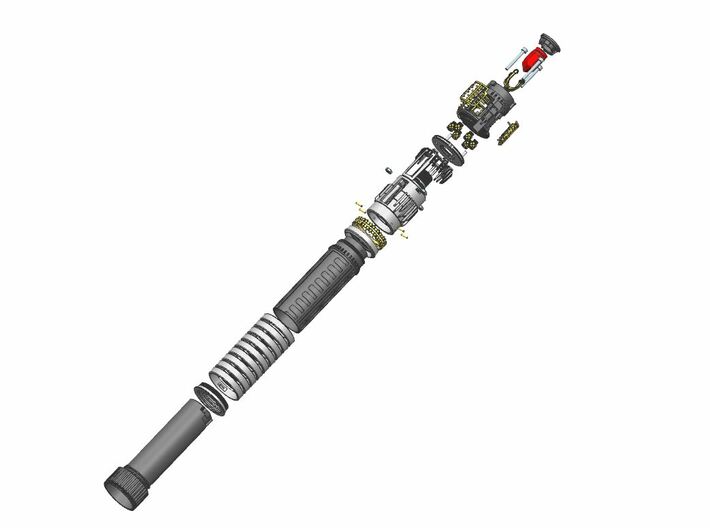
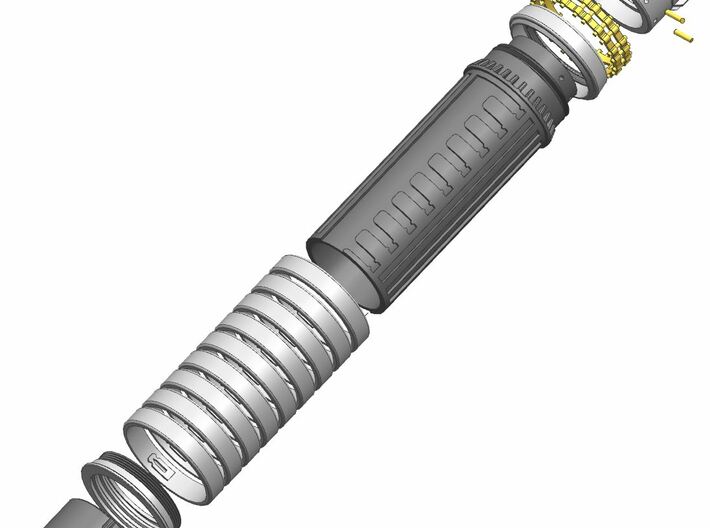
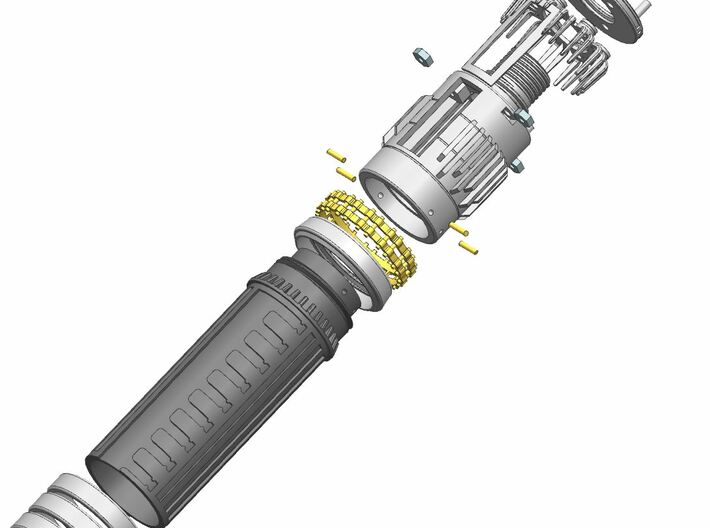
This chassis assembly also advances the structure of the hilt, helping remove some wobble between the two halfs by replacing the engine and the belt of the hilt. If you find the belt is too tight for your liking, you can carfully sand down the ID, but note this might restore any previous wobble issues. I recommend spraying the P1, P5 & P8 parts with silver/chrome rustoleum paint.
Tips, chassis options and warnings!
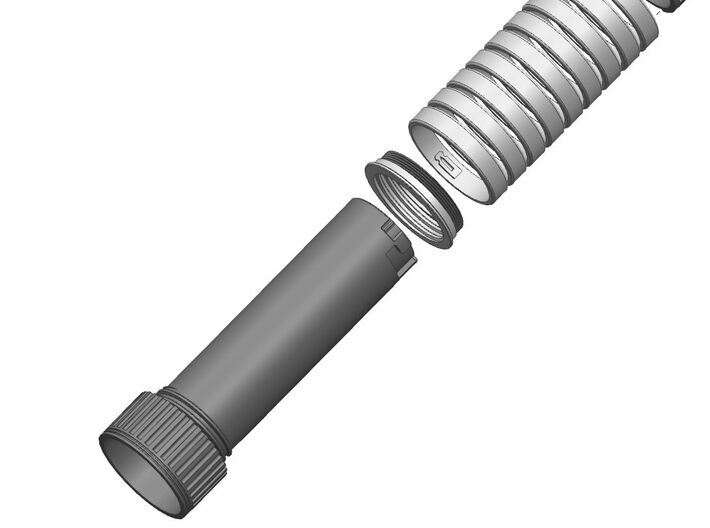
Be aware! My ultimate most accurate twist and click chassis is a complex install and requires common sense to assemble in order correctly, only for the most skillful of installers. Do not buy this chassis before consulting your installer ahead of time with links and descriptions. If you purchase this chassis and can't install it or struggle, you have done that at your own effort, you have been warned! I honeslty am not looking to hold anyone's hand, I designed this as a project for myself around my own capability of installing. You can make it easier by going for a non motorised crystal chamber P8 version (recommended as motors are horrible and noisy) or the non OLED cover P9 version. The battery compartment twists and clicks in to the main assembly to keep it hidden, you can tune the turn strength of the click mechanism with carefull filing at your own risk, because you could go too far and ruin the part. To gain access to your board post assembly, you will need to remove or poke through the brass rods and carefully seperate the main assembly. Leave enough length of wire between the split so you can do this if required.
Or if you really want to make the install easy, less expensive and still want to illuminate the engine and have a removable twist & click chassis with OLED display, go for the "easy install" chassis P3 option.
Both types of install require you to use the most suitable wire gauges. For the switch wires, you can go for the thinnest wires possible as it is only carrying a signal. You may need to clear out any powder residue left from the printing process inside the switch house area.
Full parts list and addtional parts for both types of installs are listed below.
Please note the twist and click chassis mechanism is bespoke to Jimmy's Saber Junk and not to be replicated.
Required electronics and assembly parts for the complex most accurate twist and click chassis
(3-off) M2.5x20 Cap head screw https://www.westfieldfasteners.co.uk/Bolts-Screws-Metric/Socket-Head-Cap-Allen-Screw-M2.5x20-A2-Stainless.html
(3-off) M2.5 hex nut https://www.westfieldfasteners.co.uk/Metric-Nuts/Hex-Nut-M2.5-A2-Stainless.html
(3-off) M3 half hex nut https://www.westfieldfasteners.co.uk/Metric-Nuts/Half-Nut-Hex-Lock-Nut-M3-A2-Stainless.html
(1-off) KR 128X32 OLED DISPLAY MODULE https://thesaberarmory.com/products/kr-128x32-oled-display-module?_pos=1&_sid=4d55ae6dd&_ss=r
(4-off) 1.5 Dia brass rods cut to 6mm long
(1-off) 1-stage motor (motor body to not exceed 16mm long) https://www.ebay.co.uk/itm/384564123905
(2-off) 1.5mm momentary tactile switches
(1-off) high amp kill switch
(1-off) crystal plus single pixel
(1-off) 25mm KR speaker
(1-off) sprung negagtive battery terminal set
(1-off) SHTOKCUSTOMWORX BATTERY AND SPEAKER PCB CONNECTOR SET (17.5mm OD)
(1-off) SHTOKCUSTOMWORX ROTARY NEOPIXEL & 2 BUTTON PCB CONNECTOR SET
(3-off) Shtok emitter pcbs
(1-off) proffie V2
Required prints from shapeways for the complex most accurate twist and click chassis
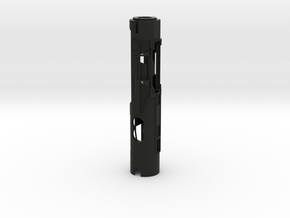
(1-off) KRORssguard Ultimate Chassis P1 (Engine)
(1-off) KRORssguard Ultimate Chassis P2 (Hilt Belt)
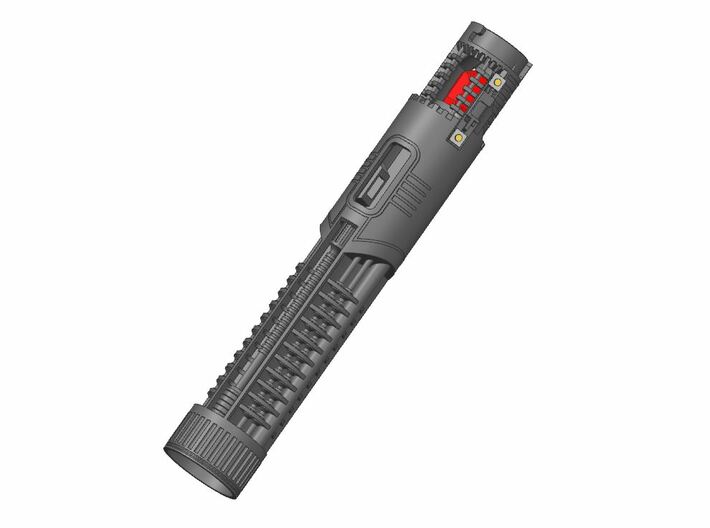
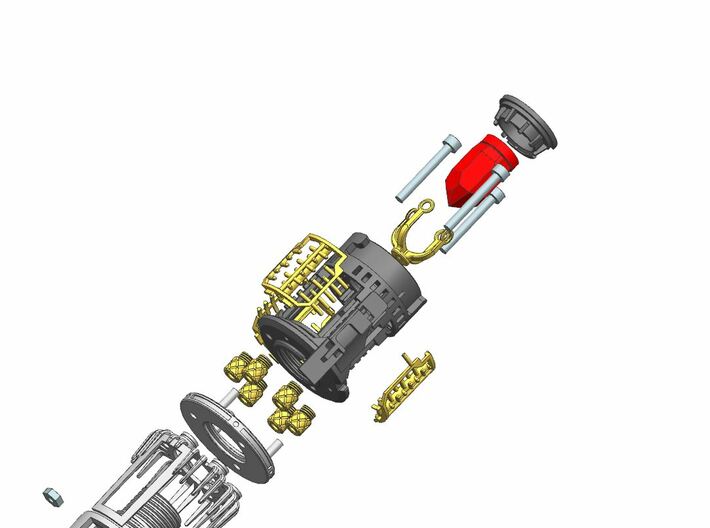
(1-off) KRORssguard Ultimate Chassis P3 (Main body parts-remove stems shown in red)
(1-off) KRORssguard Ultimate Chassis P4 (Main body parts-remove stems shown in red)
(1-off) KRORssguard Ultimate Chassis P5 (Accent parts-remove stems shown in red)
(1-off) KRORssguard Ultimate Chassis P6 (Accent parts-remove stems shown in red)
(1-off) KRORssguard Ultimate Chassis P7 (Chamber accent parts-remove stems shown in red)
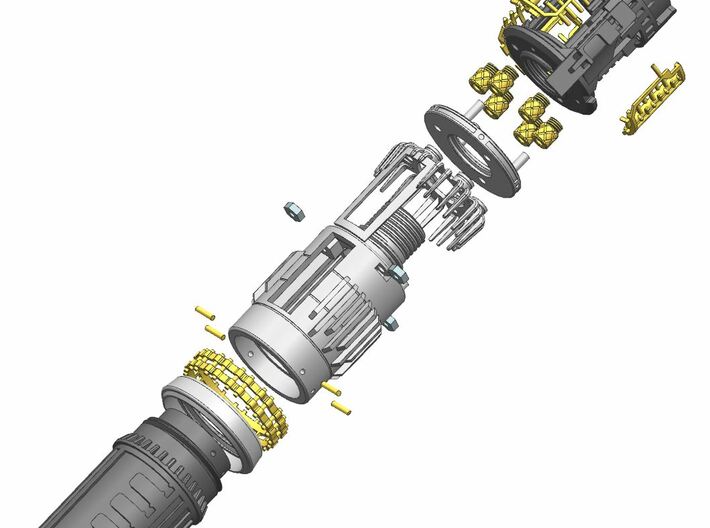
(1-off) KRORssguard Ultimate Chassis P8 (Main body part, two versions/listings available, one to fit a motor, one not to fit a motor with more wiring space)
(1-off) KRORssguard Ultimate Chassis P9 (Accent part, two versions/listings available, one to show the KR OLED screen, one grilled not to show a screen but can be used for more accent pixels if desired)
(1-off) KRORssguard Ultimate Chassis P10 (Crystal stabilser)
Required electronics and assembly parts for the easy install click and twist chassis
(3-off) M3 half hex nut https://www.westfieldfasteners.co.uk/Metric-Nuts/Half-Nut-Hex-Lock-Nut-M3-A2-Stainless.html
(1-off) Standard 128X32 OLED screen
(2-off) 1.5mm momentary tactile switches
(1-off) high amp kill switch
(1-off) crystal plus single pixel
(1-off) 25mm KR speaker
(1-off) sprung negagtive battery terminal set
(1-off) SHTOKCUSTOMWORX ROTARY NEOPIXEL & 2 BUTTON PCB CONNECTOR SET
(3-off) Shtok emitter pcbs
(1-off) board (Two versions/listings available, proffie or GHV3)
Required prints from shapeways for the easy install click and twist chassis
(1-off) KRORssguard Ultimate Chassis P1 (Engine)
(1-off) KRORssguard Ultimate Chassis P2 (Hilt Belt)
(1-off) KRORssguard Ultimate Easy Chassis P3 (Main body part)
Easy Install twist and click listings have been released for purchase.
The most accurate twist and click chassis will be released 26th-28th of April.
This chassis assembly also advances the structure of the hilt, helping remove some wobble between the two halfs by replacing the engine and the belt of the hilt. If you find the belt is too tight for your liking, you can carfully sand down the ID, but note this might restore any previous wobble issues. I recommend spraying the P1, P5 & P8 parts with silver/chrome rustoleum paint.
Tips, chassis options and warnings!
Be aware! My ultimate most accurate twist and click chassis is a complex install and requires common sense to assemble in order correctly, only for the most skillful of installers. Do not buy this chassis before consulting your installer ahead of time with links and descriptions. If you purchase this chassis and can't install it or struggle, you have done that at your own effort, you have been warned! I honeslty am not looking to hold anyone's hand, I designed this as a project for myself around my own capability of installing. You can make it easier by going for a non motorised crystal chamber P8 version (recommended as motors are horrible and noisy) or the non OLED cover P9 version. The battery compartment twists and clicks in to the main assembly to keep it hidden, you can tune the turn strength of the click mechanism with carefull filing at your own risk, because you could go too far and ruin the part. To gain access to your board post assembly, you will need to remove or poke through the brass rods and carefully seperate the main assembly. Leave enough length of wire between the split so you can do this if required.
Or if you really want to make the install easy, less expensive and still want to illuminate the engine and have a removable twist & click chassis with OLED display, go for the "easy install" chassis P3 option.
Both types of install require you to use the most suitable wire gauges. For the switch wires, you can go for the thinnest wires possible as it is only carrying a signal. You may need to clear out any powder residue left from the printing process inside the switch house area.
Full parts list and addtional parts for both types of installs are listed below.
Please note the twist and click chassis mechanism is bespoke to Jimmy's Saber Junk and not to be replicated.
Required electronics and assembly parts for the complex most accurate twist and click chassis
(3-off) M2.5x20 Cap head screw https://www.westfieldfasteners.co.uk/Bolts-Screws-Metric/Socket-Head-Cap-Allen-Screw-M2.5x20-A2-Stainless.html
(3-off) M2.5 hex nut https://www.westfieldfasteners.co.uk/Metric-Nuts/Hex-Nut-M2.5-A2-Stainless.html
(3-off) M3 half hex nut https://www.westfieldfasteners.co.uk/Metric-Nuts/Half-Nut-Hex-Lock-Nut-M3-A2-Stainless.html
(1-off) KR 128X32 OLED DISPLAY MODULE https://thesaberarmory.com/products/kr-128x32-oled-display-module?_pos=1&_sid=4d55ae6dd&_ss=r
(4-off) 1.5 Dia brass rods cut to 6mm long
(1-off) 1-stage motor (motor body to not exceed 16mm long) https://www.ebay.co.uk/itm/384564123905
(2-off) 1.5mm momentary tactile switches
(1-off) high amp kill switch
(1-off) crystal plus single pixel
(1-off) 25mm KR speaker
(1-off) sprung negagtive battery terminal set
(1-off) SHTOKCUSTOMWORX BATTERY AND SPEAKER PCB CONNECTOR SET (17.5mm OD)
(1-off) SHTOKCUSTOMWORX ROTARY NEOPIXEL & 2 BUTTON PCB CONNECTOR SET
(3-off) Shtok emitter pcbs
(1-off) proffie V2
Required prints from shapeways for the complex most accurate twist and click chassis
(1-off) KRORssguard Ultimate Chassis P1 (Engine)
(1-off) KRORssguard Ultimate Chassis P2 (Hilt Belt)
(1-off) KRORssguard Ultimate Chassis P3 (Main body parts-remove stems shown in red)
(1-off) KRORssguard Ultimate Chassis P4 (Main body parts-remove stems shown in red)
(1-off) KRORssguard Ultimate Chassis P5 (Accent parts-remove stems shown in red)
(1-off) KRORssguard Ultimate Chassis P6 (Accent parts-remove stems shown in red)
(1-off) KRORssguard Ultimate Chassis P7 (Chamber accent parts-remove stems shown in red)
(1-off) KRORssguard Ultimate Chassis P8 (Main body part, two versions/listings available, one to fit a motor, one not to fit a motor with more wiring space)
(1-off) KRORssguard Ultimate Chassis P9 (Accent part, two versions/listings available, one to show the KR OLED screen, one grilled not to show a screen but can be used for more accent pixels if desired)
(1-off) KRORssguard Ultimate Chassis P10 (Crystal stabilser)
Required electronics and assembly parts for the easy install click and twist chassis
(3-off) M3 half hex nut https://www.westfieldfasteners.co.uk/Metric-Nuts/Half-Nut-Hex-Lock-Nut-M3-A2-Stainless.html
(1-off) Standard 128X32 OLED screen
(2-off) 1.5mm momentary tactile switches
(1-off) high amp kill switch
(1-off) crystal plus single pixel
(1-off) 25mm KR speaker
(1-off) sprung negagtive battery terminal set
(1-off) SHTOKCUSTOMWORX ROTARY NEOPIXEL & 2 BUTTON PCB CONNECTOR SET
(3-off) Shtok emitter pcbs
(1-off) board (Two versions/listings available, proffie or GHV3)
Required prints from shapeways for the easy install click and twist chassis
(1-off) KRORssguard Ultimate Chassis P1 (Engine)
(1-off) KRORssguard Ultimate Chassis P2 (Hilt Belt)
(1-off) KRORssguard Ultimate Easy Chassis P3 (Main body part)
Details
What's in the box:
KR Krorssguard Ultimate Chassis P1

Dimensions:
Success Rate:
First To try.
What's this?
Rating:
Mature audiences only.
