
Gray PA12


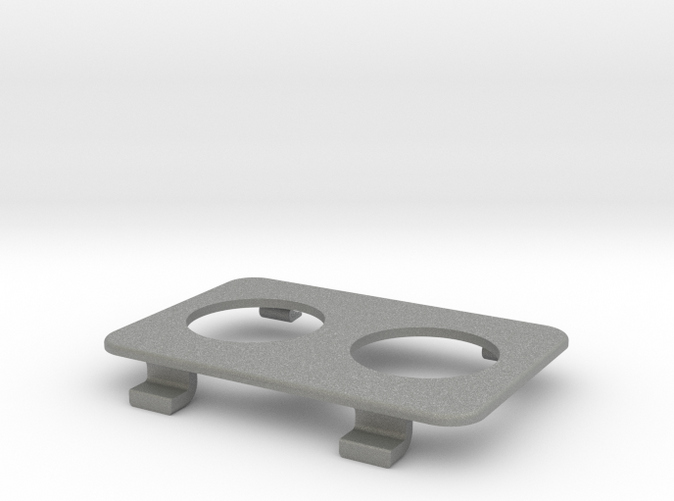
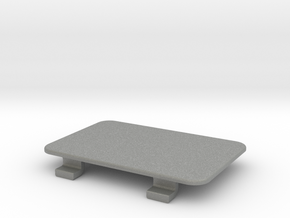
Toyota 4Runner - 12V & USB Retrofit, Dual Outlet
Made by
Print With Shapeways
 Choose Your Material
 Choose your color and finish
$16.00
Have a question about this product?
contact the designerYou must be logged in and verified to contact the designer.
Product Description
Which vehicles does this part fit?
What does this part do?
What else will I need?Add-a-fuse with an appropriate sized fuse (7.5A is good) - example Appropriate wiring Appropriate wire connectors Spray paint (depending on your color preference) Electrical tape or silicone caulk
How do I install in it?
Anything else I should know?
- Toyota 4Runner, model years 1996-2002
What does this part do?
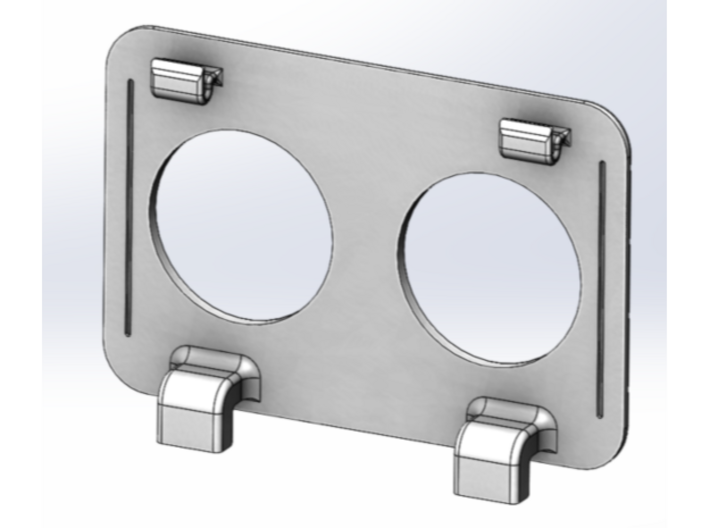
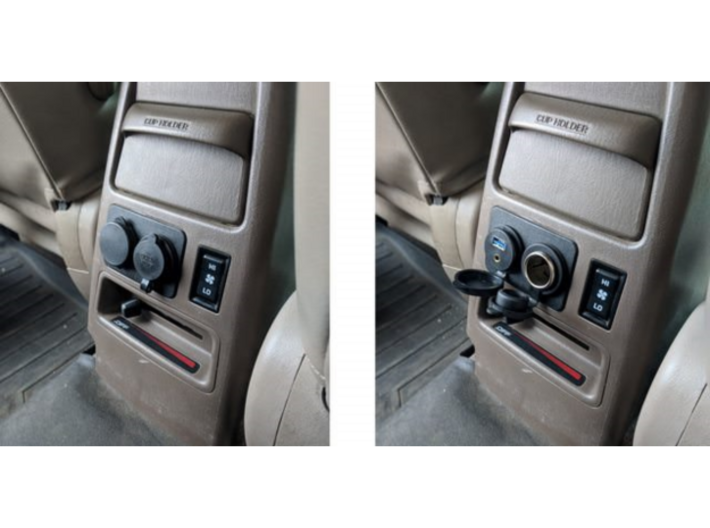
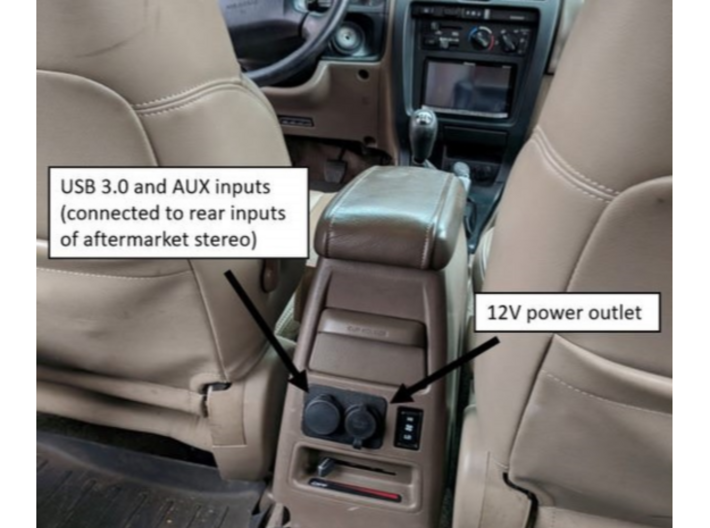
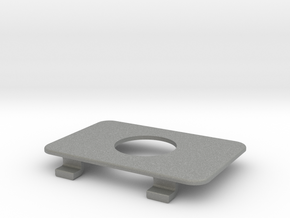
- Replaces the rear passenger ashtray with a mounting plate that can be used for a clean, “OEM-style” installation of 12V outlets and/or USB outlets
- If you have an aftermarket stereo with an AUX input, you can install a rear AUX outlet with this mounting plate
What else will I need?
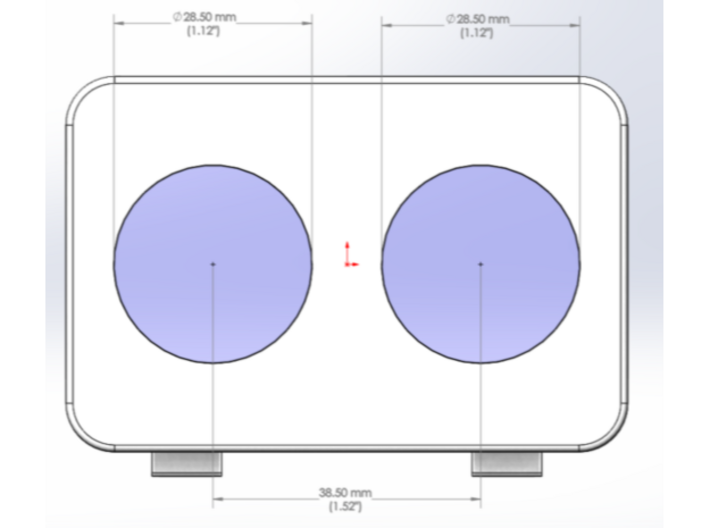
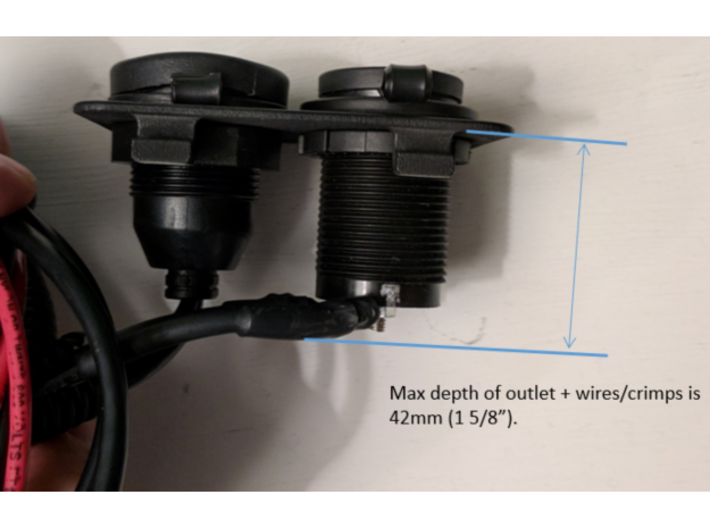
- USB or 12V power outlet(s) that have a maximum depth of 42mm (1.625”), including the crimps/ wire bend radius. These outlets have been tested and are known to work:
- 12V power outlet - Amazon - 12V, 20A accessory socket by 12vtechnology
- Powered USB outlets - Amazon - BlueSea 1045
- For aftermarket stereo with USB and AUX inputs (note: the USB will provide power, but will likely not work for music/data) - Amazon - USB & AUX or Amazon - USB
- I used 9 feet of 14AWG wire to reach the driver-side fuse box. You will need a few more feet for the ground wire too.
- I also recommend using a corrugated wire loom to protect the positive wire
- I recommend using quick-disconnects in case you need to pull things apart and a ring terminal to ground on the hand brake bolt.
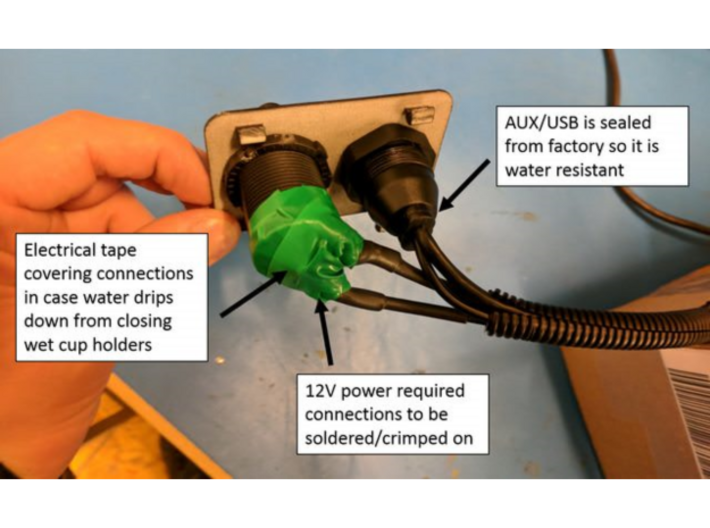
- Use to seal any exposed connections so water from the cup holders doesn’t drip down and cause a short
How do I install in it?
- You will need basic electrical knowledge of how to safely wire a device in a car (finding a ground connection, tapping a wire into a fuse box with an add-a-fuse). If you have no experience with this, I would strongly suggest asking a knowledgeable friend for help.
- You will need basic tools – wire cutters, crimpers, socket set, ratchet with extensions, needle nose pliers, etc.
- I found this video on YouTube which details how to remove the center console. Once the center console is removed, you can bend the small metal tabs on the back of the ashtray to release it.
- The positive wire can be run from the driver-side fuse box, under the carpet, up through where the shifter is and under the driver side of the center console to the outlets
Anything else I should know?
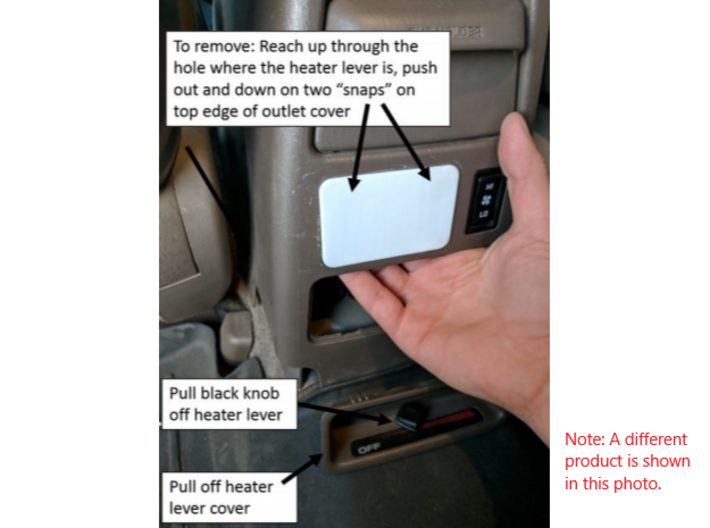
- After you click the mounting plate into place, it can be removed but you must be careful with how you do it. See the pictures above.
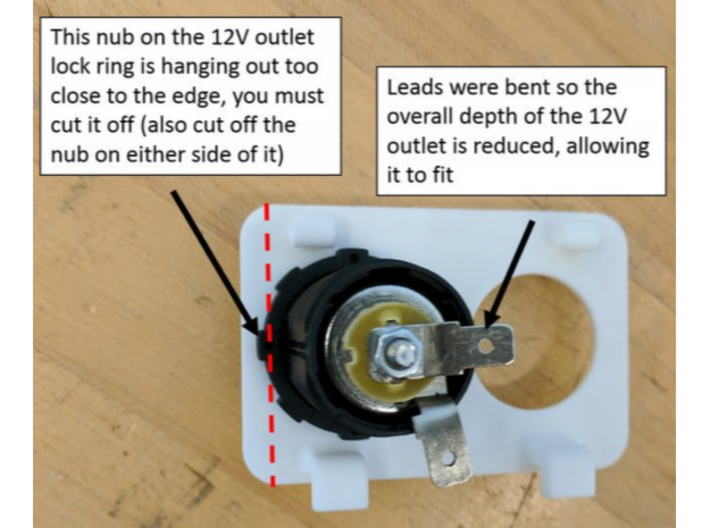
- There is limited space for mounting two 12V/USB outlets. I had to optimize the design and squeeze everything in place to get them to fit. If you don’t use the exact same 12V/USB outlets that are recommended above, then I can’t guarantee that everything will fit. See pictures about bending the leads and cutting the nubs off the lock rings.
- If you follow these instructions, the cup holders are still 100% functional
- I originally sold these parts on the T4R forums, if you want to read more about people's installs, check out this thread.
Details
What's in the box:
Rear Outlet Cover v6 - Double, 20200622
Dimensions:
Success Rate:
First To try.
What's this?
Rating:
Mature audiences only.
