
Polished Bronzed-Silver Steel


Flexible Filament Adapter For Snapmaker
Made by
Print With Shapeways
 Choose Your Material
 Choose your color and finish
$34.19
Have a question about this product?
contact the designerYou must be logged in and verified to contact the designer.
Product Description
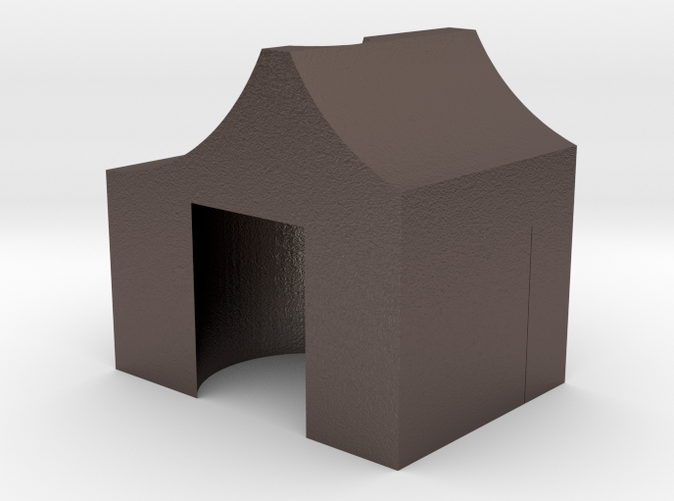
This is an adapter meant to be placed within the snapmaker 3d printing module in order to reduce the amount of space for flexible filament to move around between the filament feeder gear and the hot end of the extruder. This part drasticly reduces jams when dealing with flexible filaments.
WARNING!!! disassembling the 3d module may void warranty
Installation pictures are found at the end of the image list.
Instructions for Installation are as follows:
1. Follow snapmaker instructions to remove 3d module from printer body
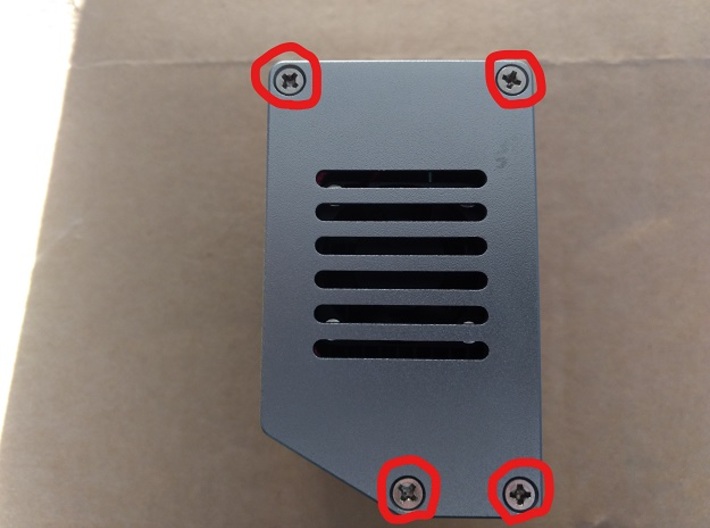
2. Remove cover plates on either side of the module. (picture 1)
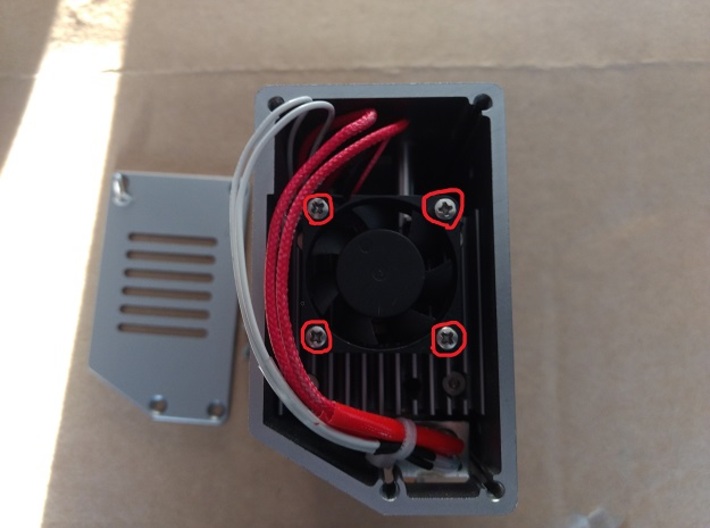
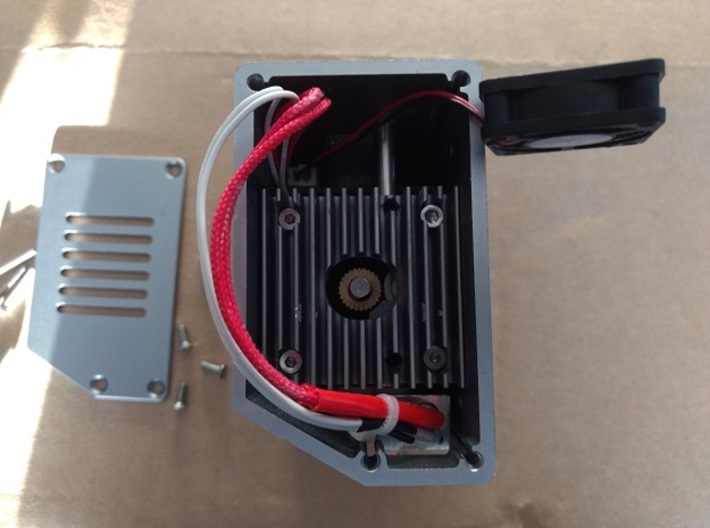
3. Unscrew the cooling fan and move fan out of the way. (picture 2)
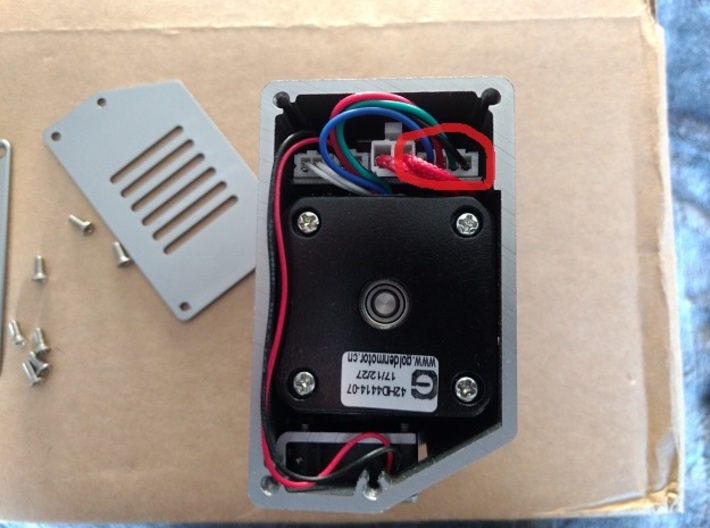
4. Gently unplug the stepper motor from the module. (picture 3)
5. Using a 2mm Hex Key remove the screws on the heat sink anchoring the stepper motor in place. (picture 4)
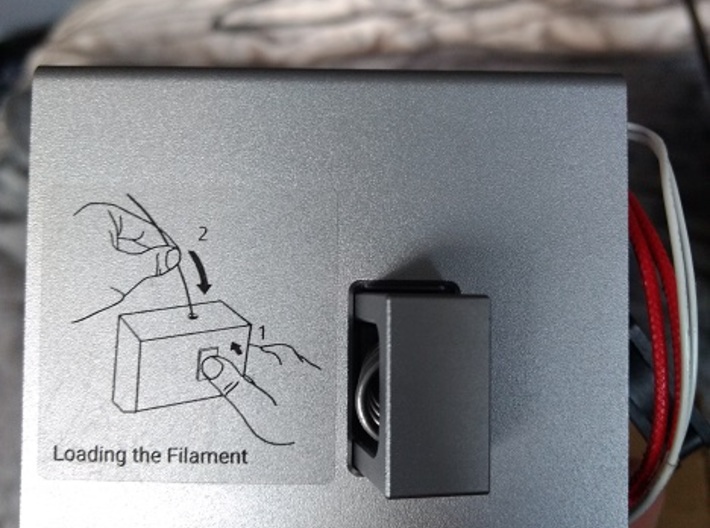
6. While pressing the filament loading button remove the stepper motor. (picture 5)
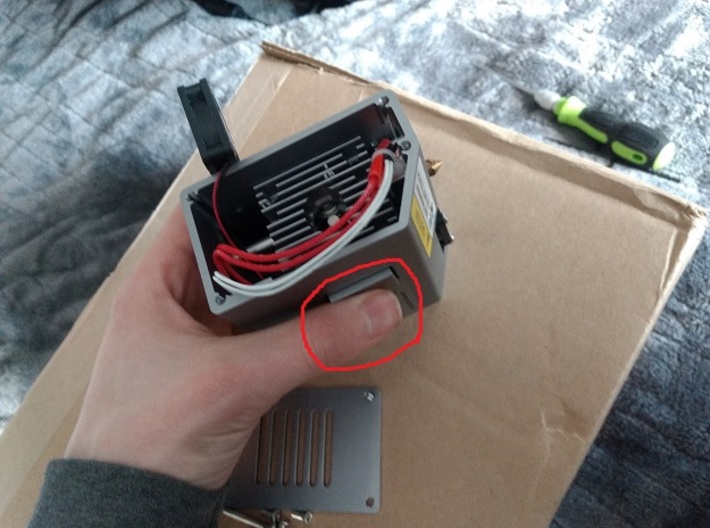
7. Angle the filament load button to the right so that it clears the extruder throat. (picture 6)
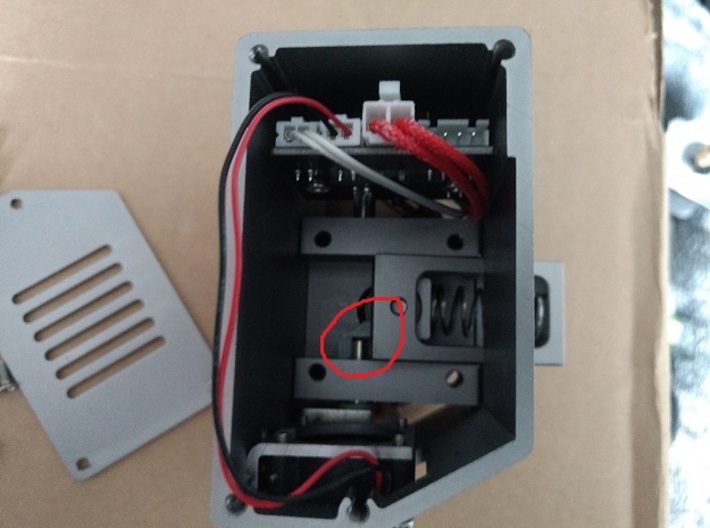
7. Using a pair of tweezers/ needle nose pliers, place the adapter onto the cold end aka exctruder throat so the the open side faces the stepper motor and the peak is near the front. (picture 7)
8. Reassemble module.
Polished Metal or a high tempature material is suggested as this part does sit fairly close to the hot end which reaches up to 250 degrees celcius and a polished surface would aid in reducing friction on the filament.
WARNING!!! disassembling the 3d module may void warranty
Installation pictures are found at the end of the image list.
Instructions for Installation are as follows:
1. Follow snapmaker instructions to remove 3d module from printer body
2. Remove cover plates on either side of the module. (picture 1)
3. Unscrew the cooling fan and move fan out of the way. (picture 2)
4. Gently unplug the stepper motor from the module. (picture 3)
5. Using a 2mm Hex Key remove the screws on the heat sink anchoring the stepper motor in place. (picture 4)
6. While pressing the filament loading button remove the stepper motor. (picture 5)
7. Angle the filament load button to the right so that it clears the extruder throat. (picture 6)
7. Using a pair of tweezers/ needle nose pliers, place the adapter onto the cold end aka exctruder throat so the the open side faces the stepper motor and the peak is near the front. (picture 7)
8. Reassemble module.
Polished Metal or a high tempature material is suggested as this part does sit fairly close to the hot end which reaches up to 250 degrees celcius and a polished surface would aid in reducing friction on the filament.
Details
What's in the box:
extruder cold end adapter V3
Dimensions:
Success Rate:
First To try.
What's this?
Rating:
Mature audiences only.
