


Tamiya Terra Scorcher Bearing Steering Set
Made by
Print With Shapeways
 Choose Your Material
 Choose your color and finish
$12.28
Have a question about this product?
contact the designerYou must be logged in and verified to contact the designer.
Product Description
These parts allow you to solid mount the steering arms, use bearings to reduce slop in the steering, and also increase Ackerman effect to improve response on your Tamiya Thundershot, Thunder Dragon, Fire Dragon or Terra Scorcher.
To carry out this hop up you will need:
4 x 630 rubber sealed bearings (to install in the wiper arms)
2 x 730 rubber sealed bearings (to install in the connecting arm)
2 x M3 x 20 cap head or flange head screw (to attach the arms to the tub)
2 x M3 x 8 cap head screws
4 x M3 flat nut
2 x M3 nylock nut
Tamiya 3mm x 0.1 or 0.2 shims from 53585 shim set
Either reuse your 5mm ball screws or get new hardened steel 53968
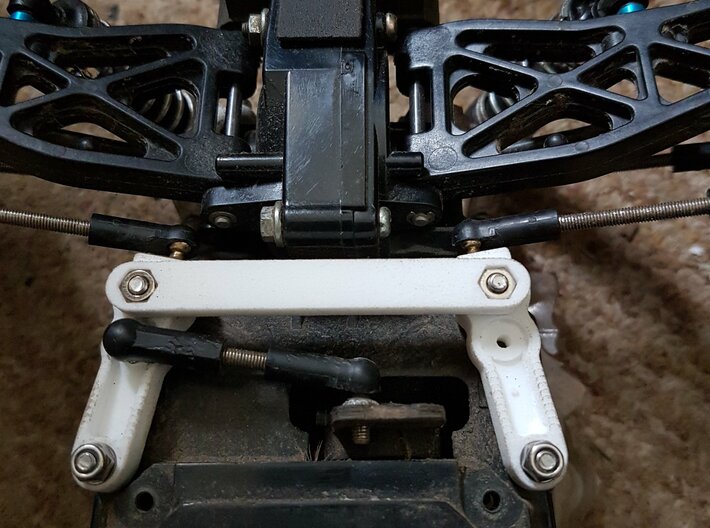
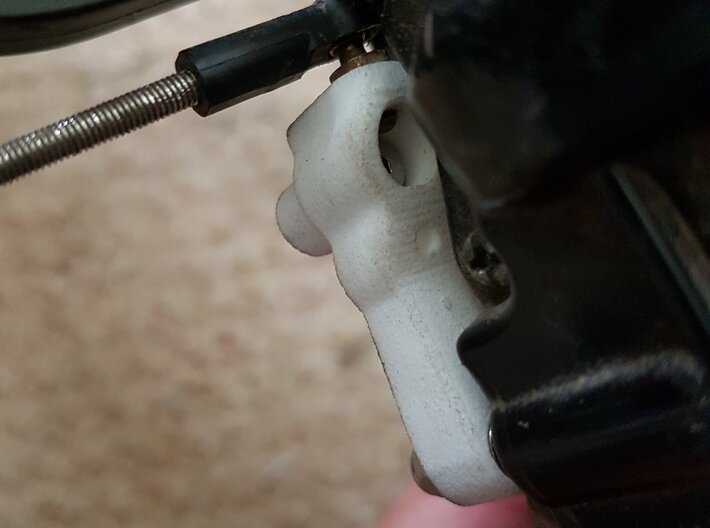
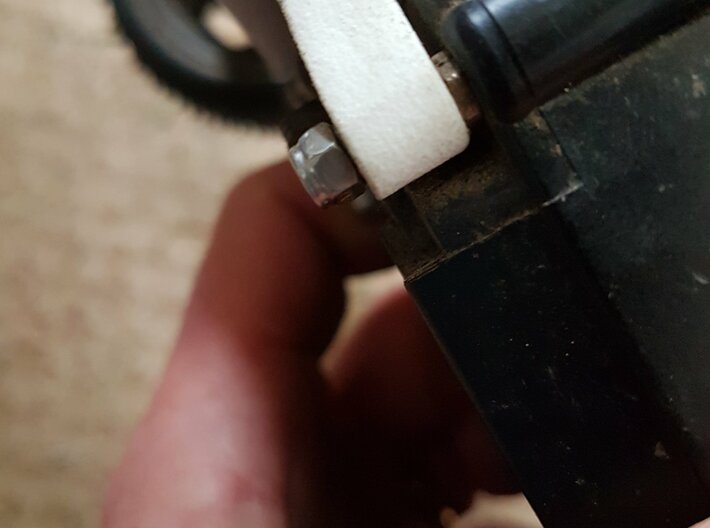
Uses a M3 x 20 screw fixed hard to the chassis hole using the top nut in the third picture to create 'hard' steering pivots. Insert the M3 x 20 through from the inside of the chassis tub and then fix down hard against the tub using 2 of the M3 flat nuts.
Use an exacto knife to clean out the bearing bores, then push a 630 bearing into the top and bottom of each of the steering wiper arm ends, and the 730 bearings into the larger bores 2/3 of the way along the arms, from the top if the buggy is on it's wheels. They will stop on the 1mm lip towards the bottom of the bore.
On left hand arm thread one of your ball connectors into the arm for connecting to the servo saver, same as the kit. Thread another two ball connectors into the ends of each arms.
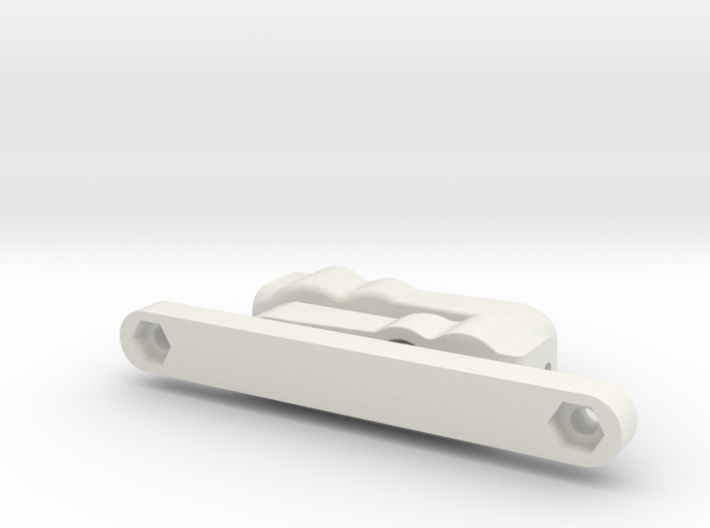
Push two of the M3 flat nuts into the hexagon recess in the cross connector arm, then use the M3 x 8 screws pushed through from above the 730 bearing, and tighten down on the M3 nuts in the cross connector. You should now have a steering assembly.
Put a 0.1 or 0.2 shim onto the M3 x 20 attached to the chassis, slide the steering arm ends with the 630 bearings over the M3 x 20, then add another 0.1 or 0.2 shim, and fix in place using the Nylock M3 nut. Tighten until any slop is removed, but the bearings still work freely. Too tight and you will crush the bearings. This is why this end nut has to be a nylock. See the other product photos for help.
As these move the wiper arms in a little to improve Ackerman, your kit M3 x 30 threaded rod on the links between the wipers and the uprights might be a little short. Either get some M3 threaded rod and cut to length to suit, or get some 3 x 32mm turnbuckles and some reinforced adjuster 54527 for a full race setup.
There is now very little slop in this system, although it's still very reliant on the ball cup for the servo saver link being nice and tight.
To carry out this hop up you will need:
4 x 630 rubber sealed bearings (to install in the wiper arms)
2 x 730 rubber sealed bearings (to install in the connecting arm)
2 x M3 x 20 cap head or flange head screw (to attach the arms to the tub)
2 x M3 x 8 cap head screws
4 x M3 flat nut
2 x M3 nylock nut
Tamiya 3mm x 0.1 or 0.2 shims from 53585 shim set
Either reuse your 5mm ball screws or get new hardened steel 53968
Uses a M3 x 20 screw fixed hard to the chassis hole using the top nut in the third picture to create 'hard' steering pivots. Insert the M3 x 20 through from the inside of the chassis tub and then fix down hard against the tub using 2 of the M3 flat nuts.
Use an exacto knife to clean out the bearing bores, then push a 630 bearing into the top and bottom of each of the steering wiper arm ends, and the 730 bearings into the larger bores 2/3 of the way along the arms, from the top if the buggy is on it's wheels. They will stop on the 1mm lip towards the bottom of the bore.
On left hand arm thread one of your ball connectors into the arm for connecting to the servo saver, same as the kit. Thread another two ball connectors into the ends of each arms.
Push two of the M3 flat nuts into the hexagon recess in the cross connector arm, then use the M3 x 8 screws pushed through from above the 730 bearing, and tighten down on the M3 nuts in the cross connector. You should now have a steering assembly.
Put a 0.1 or 0.2 shim onto the M3 x 20 attached to the chassis, slide the steering arm ends with the 630 bearings over the M3 x 20, then add another 0.1 or 0.2 shim, and fix in place using the Nylock M3 nut. Tighten until any slop is removed, but the bearings still work freely. Too tight and you will crush the bearings. This is why this end nut has to be a nylock. See the other product photos for help.
As these move the wiper arms in a little to improve Ackerman, your kit M3 x 30 threaded rod on the links between the wipers and the uprights might be a little short. Either get some M3 threaded rod and cut to length to suit, or get some 3 x 32mm turnbuckles and some reinforced adjuster 54527 for a full race setup.
There is now very little slop in this system, although it's still very reliant on the ball cup for the servo saver link being nice and tight.
Details
What's in the box:
Steering Arm V2 Pair

Dimensions:
Success Rate:
First To try.
What's this?
Rating:
Mature audiences only.

