


Kehrmaschine KM20 / KM02 für S4000
Made by
Print With Shapeways
 Choose Your Material
 Choose your color and finish
$22.78
Have a question about this product?
contact the designerYou must be logged in and verified to contact the designer.
Product Description
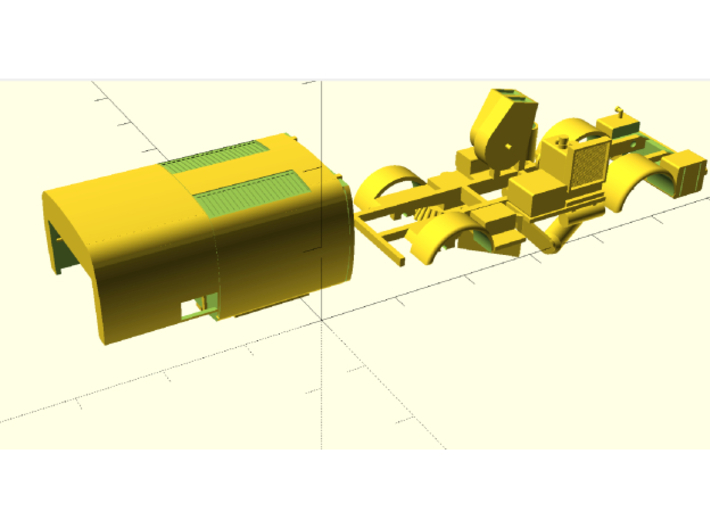
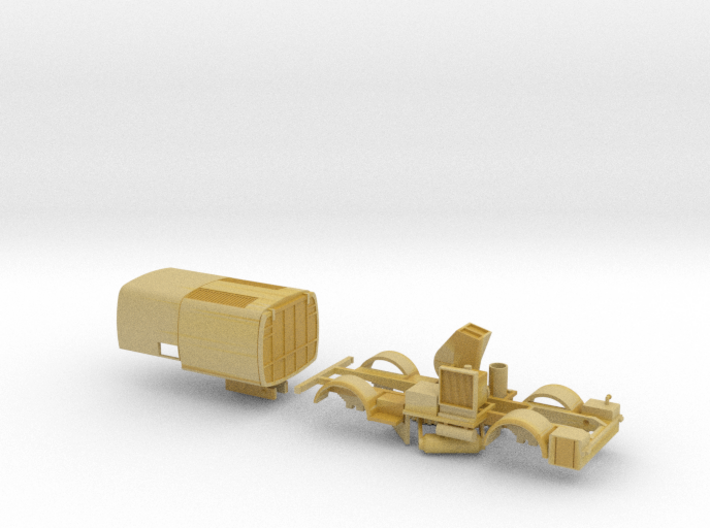
DE: Dies ist ein Teilesatz, auf dessen Grundlage man eine S4000 KM20 bzw. KM02 - Kehrmaschine bauen kann, welche im Original vom VEB Spezialfahrzeugwerk Adlershof zwischen 1962 und 1967 gebaut wurde. Zusätzlich zu diesem Teilesatz benötigt man ein Modell des H3A von Tillig.
Nicht enthalten in diesem Modell sind Fenster, Nasschiebebilder, Kennzeichen aus Papier oder Zurüstteile aus Metall.
Das Modell wird unlackiert und als Bausatz geliefert.
Bauanleitung: Entfetten Sie die Teile gut, indem Sie sie z.B. einen Tag lang in mit nichtparfümiertem Spülmittel angereicherten Wasser liegen lassen und anschließend gut spülen sowie z.B. mit einer Zahnbürste sorgfältig abbürsten.
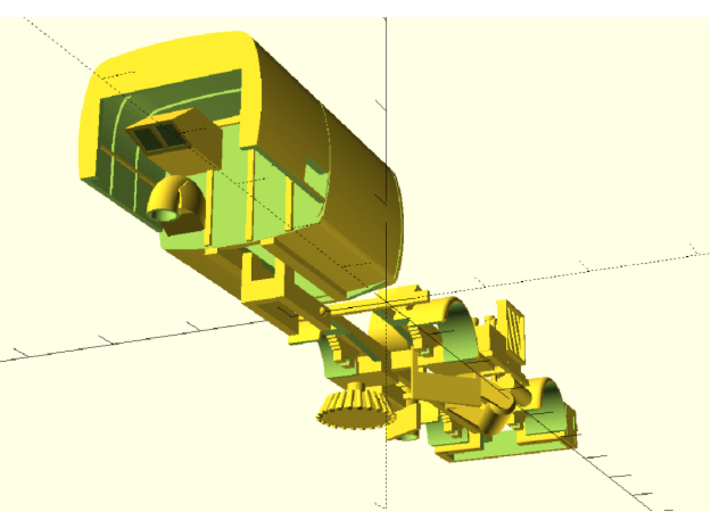
Stecken Sie die Teile vor dem Lackieren zusammen, um die Passform zu prüfen. Die Teile sind maßgenau entworfen, aber Fertigungstoleranzen, Überbleibsel des Stützmaterials oder Grate können dazu führen, dass Nacharbeit mit Schleifpapier und Feile nötig wird. Wenn die Druckschichten zu stark sichtbar sind, kann man auch hier mit feinem Schleifpapier nacharbeiten. Lackieren Sie das Fahrwerk schwarz und den Aufbau sowie das vom Tillig-Modell entnommene Fahrerhaus orange oder grau. Details wie Scheinwerfer, Blinklichter, Begrenzungsleuchten und die Felgen können anschließend mit feinem Permanent-Marker eingefärbt werden. Sollten Sie Decals verwenden, empfiehlt es sich, diese, nachdem sie gründlich getrocknet sind, mit Klarlack zu überziehen. Dieser Arbeitsschritt muss vor dem Einsetzen der Fenster erfolgen, wenn nicht, sind die Fenster während des Auftragens des Klarlacks abzudecken. Die Achsen werden ebenfalls vom Tillig-Modell übernommen. Sie sollten in den entsprechenden Aussparungen am Fahrgestell bei sanftem Druck einrasten. Vorsicht: Die Radaufhängungen sind sehr zerbrechlich. Wenn sanfter Druck nicht ausreicht, müssen die Öffnungen für die Achsen sehr vorsichtig ein wenig ausgefeilt werden. Der Aufbau wird nicht mit dem Fahrgestell verklebt. Auf der Unterseite des Aufbaus befinden sich Hebelarme mit halbkugelförmigen Drehpunkten. Diese passen in entsprechende Aussparungen im Rahmen. So bleibt der Aufbau kippbar.
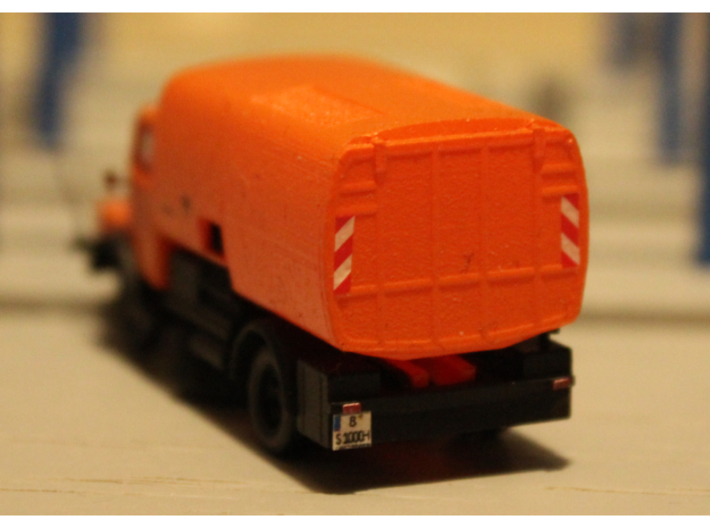
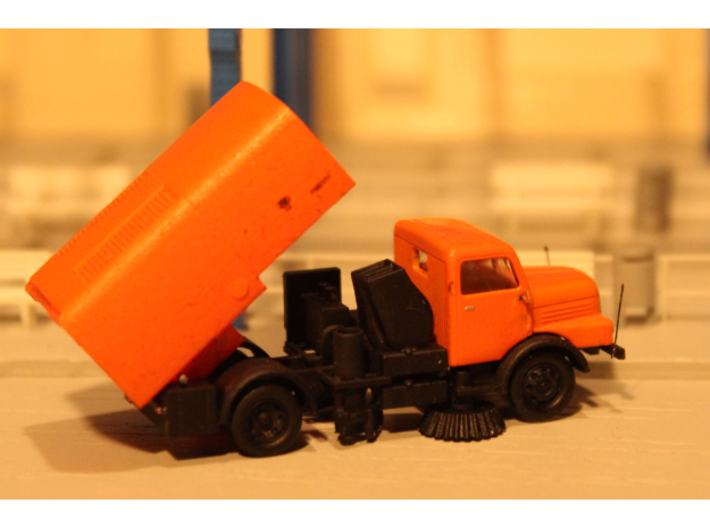
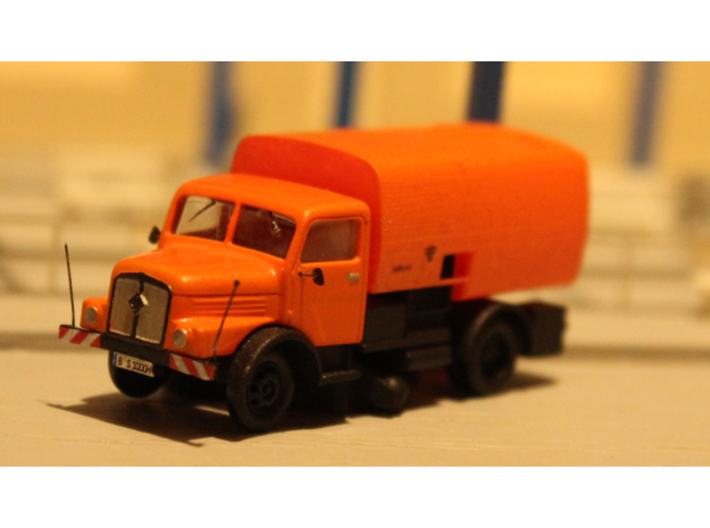
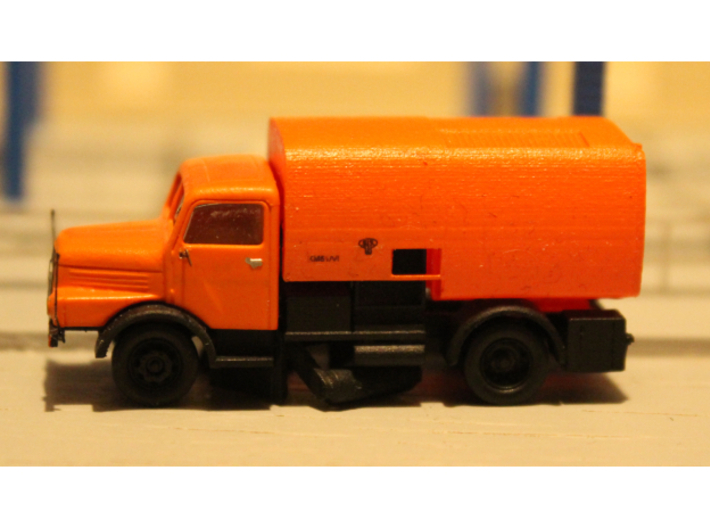
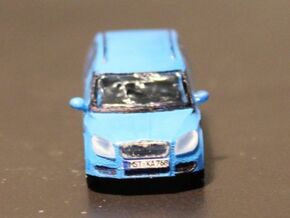
EN: This is a set of parts which enables you to build an S4000 KM20 / KM02 street sweeper which was produced by VEB Spezialfahrzeugwerk Adlershof between 1962 and 1967. In addition to this set of parts you need a model of the H3A lorry made by Tillig.
Windows, decals, paper number plates, or brass add-ons are not included. The model is delivered unpainted and as a kit. Building instructions:
Carefully clean an decrease the surfaces, suggested method is by bathing them in unscented detergent for 24 hours, then thoroughly rinsing them and lightly brushing them with a toothbrush.
Before painting assemble the kit without glue. The parts are designed to fit, but production tolerances, residue of support material or protruding burr might prevent them from fitting properly. Correct this by filing or sanding off excess material. You might also find it necessary to lightly sand the body in order to get a smoother surface.
Paint the chassis black, the body and the cab (from the Tillig model) orange or gray. Details such as head- and rear lights, indicators and rims can be painted using fine point permanent markers. In case you want to use decals seal them after they have thoroughly dried using the appropriate transparent varnish, but do so BEFORE you put in the windows (or cover them with masking tape). Wheels and axles are also taken from the Tillig model. They should clip into holes in the suspension with little force. Be careful not to break anything. If gentle force isn't sufficient enlarge the holes in the suspension by gently filing off some excess material. The sweeper body is not glued to the chassis. Under the bottom of the body there are levers that have hemispheres on their ends. These fit into holes on the inner side of the frame. Thus the body remains tiltable.
Nicht enthalten in diesem Modell sind Fenster, Nasschiebebilder, Kennzeichen aus Papier oder Zurüstteile aus Metall.
Das Modell wird unlackiert und als Bausatz geliefert.
Bauanleitung: Entfetten Sie die Teile gut, indem Sie sie z.B. einen Tag lang in mit nichtparfümiertem Spülmittel angereicherten Wasser liegen lassen und anschließend gut spülen sowie z.B. mit einer Zahnbürste sorgfältig abbürsten.
Stecken Sie die Teile vor dem Lackieren zusammen, um die Passform zu prüfen. Die Teile sind maßgenau entworfen, aber Fertigungstoleranzen, Überbleibsel des Stützmaterials oder Grate können dazu führen, dass Nacharbeit mit Schleifpapier und Feile nötig wird. Wenn die Druckschichten zu stark sichtbar sind, kann man auch hier mit feinem Schleifpapier nacharbeiten. Lackieren Sie das Fahrwerk schwarz und den Aufbau sowie das vom Tillig-Modell entnommene Fahrerhaus orange oder grau. Details wie Scheinwerfer, Blinklichter, Begrenzungsleuchten und die Felgen können anschließend mit feinem Permanent-Marker eingefärbt werden. Sollten Sie Decals verwenden, empfiehlt es sich, diese, nachdem sie gründlich getrocknet sind, mit Klarlack zu überziehen. Dieser Arbeitsschritt muss vor dem Einsetzen der Fenster erfolgen, wenn nicht, sind die Fenster während des Auftragens des Klarlacks abzudecken. Die Achsen werden ebenfalls vom Tillig-Modell übernommen. Sie sollten in den entsprechenden Aussparungen am Fahrgestell bei sanftem Druck einrasten. Vorsicht: Die Radaufhängungen sind sehr zerbrechlich. Wenn sanfter Druck nicht ausreicht, müssen die Öffnungen für die Achsen sehr vorsichtig ein wenig ausgefeilt werden. Der Aufbau wird nicht mit dem Fahrgestell verklebt. Auf der Unterseite des Aufbaus befinden sich Hebelarme mit halbkugelförmigen Drehpunkten. Diese passen in entsprechende Aussparungen im Rahmen. So bleibt der Aufbau kippbar.
EN: This is a set of parts which enables you to build an S4000 KM20 / KM02 street sweeper which was produced by VEB Spezialfahrzeugwerk Adlershof between 1962 and 1967. In addition to this set of parts you need a model of the H3A lorry made by Tillig.
Windows, decals, paper number plates, or brass add-ons are not included. The model is delivered unpainted and as a kit. Building instructions:
Carefully clean an decrease the surfaces, suggested method is by bathing them in unscented detergent for 24 hours, then thoroughly rinsing them and lightly brushing them with a toothbrush.
Before painting assemble the kit without glue. The parts are designed to fit, but production tolerances, residue of support material or protruding burr might prevent them from fitting properly. Correct this by filing or sanding off excess material. You might also find it necessary to lightly sand the body in order to get a smoother surface.
Paint the chassis black, the body and the cab (from the Tillig model) orange or gray. Details such as head- and rear lights, indicators and rims can be painted using fine point permanent markers. In case you want to use decals seal them after they have thoroughly dried using the appropriate transparent varnish, but do so BEFORE you put in the windows (or cover them with masking tape). Wheels and axles are also taken from the Tillig model. They should clip into holes in the suspension with little force. Be careful not to break anything. If gentle force isn't sufficient enlarge the holes in the suspension by gently filing off some excess material. The sweeper body is not glued to the chassis. Under the bottom of the body there are levers that have hemispheres on their ends. These fit into holes on the inner side of the frame. Thus the body remains tiltable.
Details
What's in the box:
km1v3

Dimensions:
Success Rate:
First To try.
What's this?
Rating:
Mature audiences only.
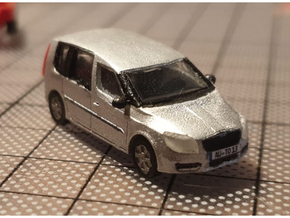
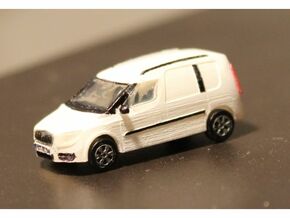
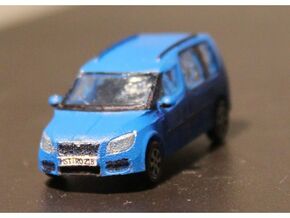
More From This Shop
$16.44
$16.07