


Foot Rails 72nd Elco 80' PT Boat
Made by
Print With Shapeways
 Choose Your Material
 Choose your color and finish
$11.05
Have a question about this product?
contact the designerYou must be logged in and verified to contact the designer.
Product Description
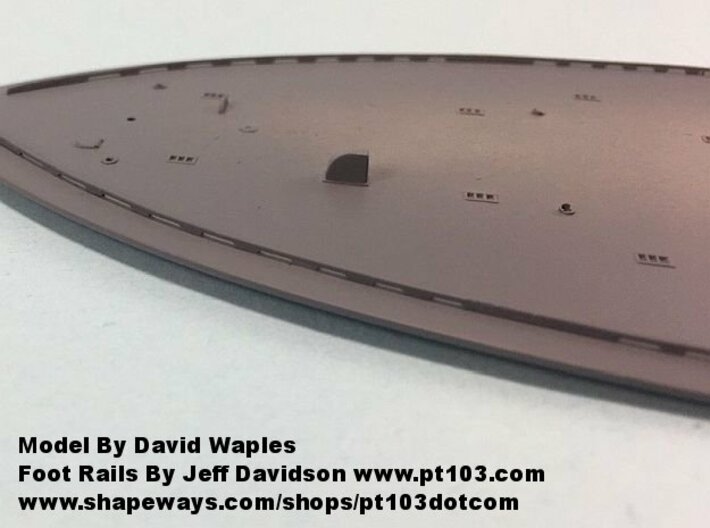
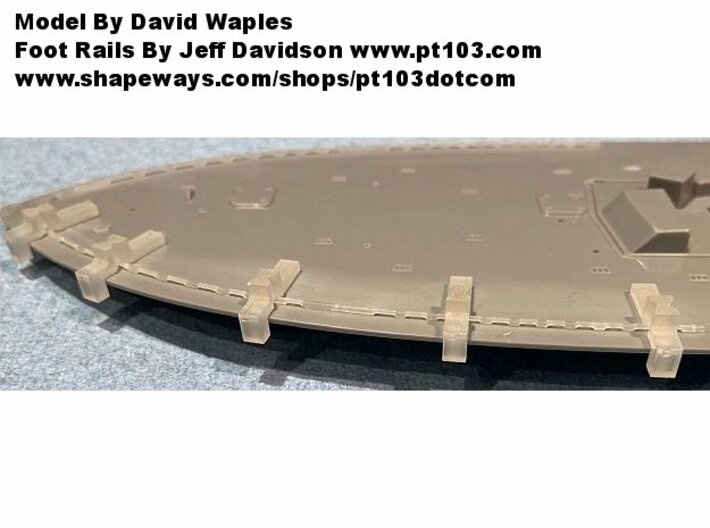
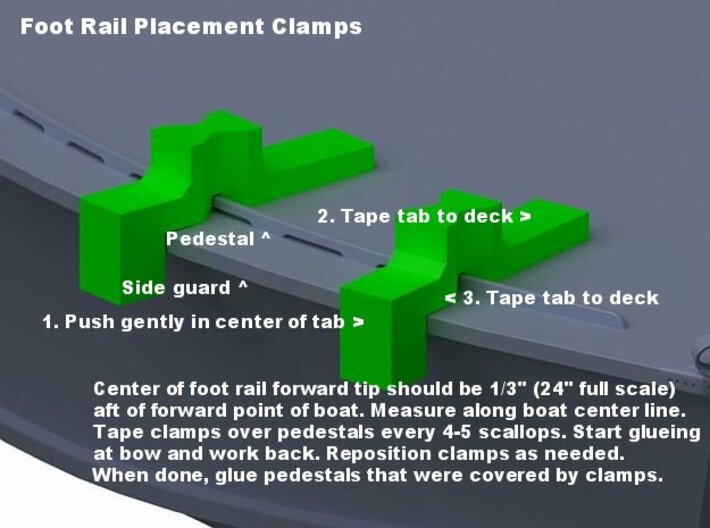
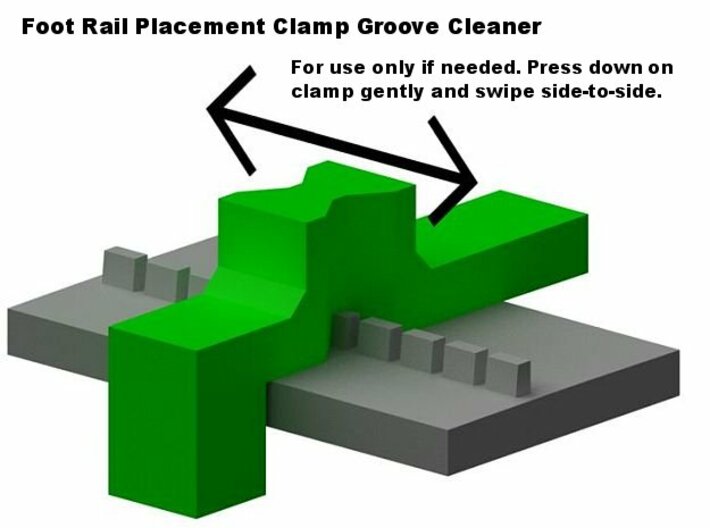
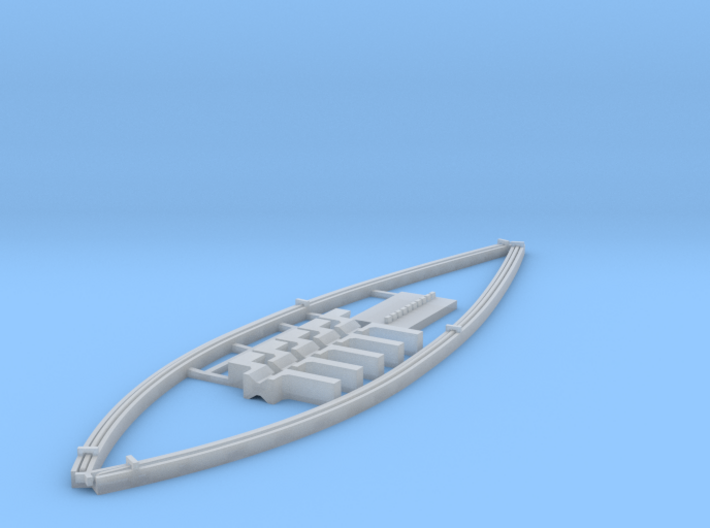
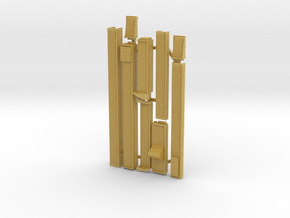
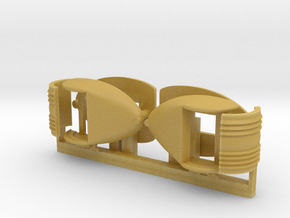
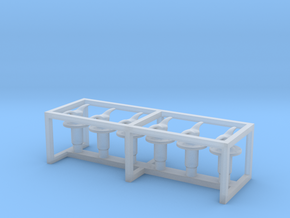
This model is the foot rails for an 80' Elco PT boat. It is made to Elco drawings and features accurately spaced pedestals between the scallops. The pedestals are located over the boat's frames and bulkheads which means they are almost all differently spaced due to curvature and different frame / bulkhead spacing. The rails also have the correct slight taper towards the top and at the forward end. Also included are 5 clamps that position the rails the correct distance inboard of the side guards and at right angles to the deck while gluing the rails, and a rail groove cleaner for the clamps if needed. Where it fits against the side guard, the clamp tab is slightly hollowed in the center so that the clamp will sit at right angles to the guard.
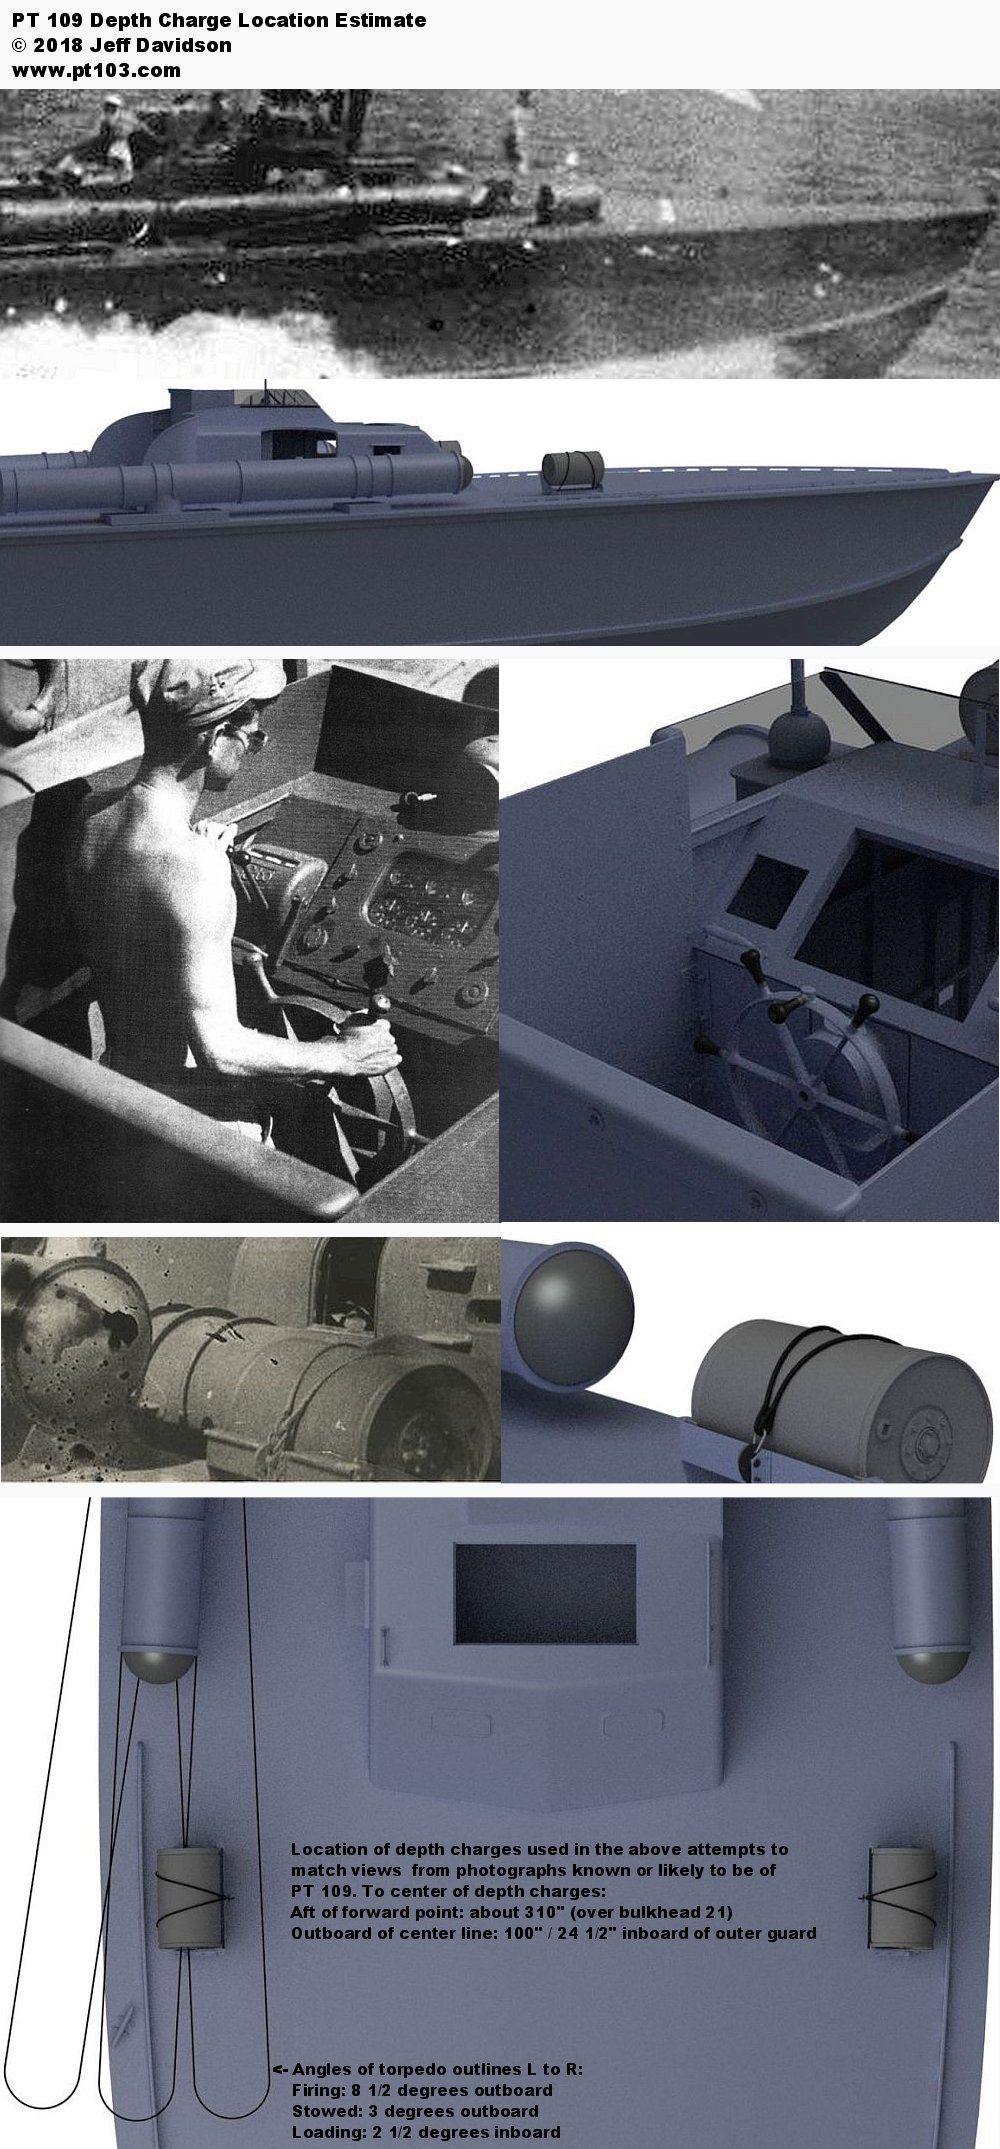
For the depth charge locations on PT 109, I came up with a different location than what the 2018 Revell kit has based on available images of PT 109. Please see here: http://www.pt103.com/images/asst/PT_109_Depth_Charges_Location_Estimate.jpg
Preparation
The first step is to clean all parts thoroughly. Since wax and oil are used in the printing process, an ultrasonic cleaning with a Simple Green or similar solution is highly recommended. Handle very carefully as the plastic is brittle. Please see the guide and links here: http://www.pt103.com/3D_Printed_PT_Boat_Parts.html. For successful gluing and painting results be sure to follow cleaning with a UV cure from a lamp with the correct output, or the sun.
Remove the holding clamps and separate them. Remove the groove cleaner. Remove the retainers above the foot rails. Mine broke off easily with a fingernail. Carefully remove the rails from their protective channels. If needed, carefully push up the rails slightly through the holes in the bottom of the channel. If you did not use an ultrasonic cleaner, gently clean the sides and bottom of the rails that were hidden by the protective channels.
Check the fit of the clamps on a rail. They should be snug but able to be removed easily. If too tight, clean the grooves (where the rail goes) with a medium stiff brush like a toothbrush with a Simple Green solution. If still too tight, place them on the groove cleaner and swipe them side to side with gentle pressure until the clamps fit the rails. If clamps can rest against the cleaner and are still too tight, very carefully sand the sides of the rails with fine sandpaper.
Installation
Also see the 2 images above.
Measure 1/3" (24 full scale inches) back from the bow at boat's center line and draw a line at a right angle to the boat's center line. This is where the center of the forward tips of the foot rails start.
Tape clamps over pedestals every 4-5 scallops.
Start glueing at bow and work back. Keep glue well away from clamps. Reposition clamps as needed.
When done, glue pedestals that were covered by clamps.
Details
What's in the box:
Foot_Rail_72nd_Full_Curved_Elco_80_2020_03

Dimensions:
Success Rate:
First To try.
What's this?
Rating:
Mature audiences only.
