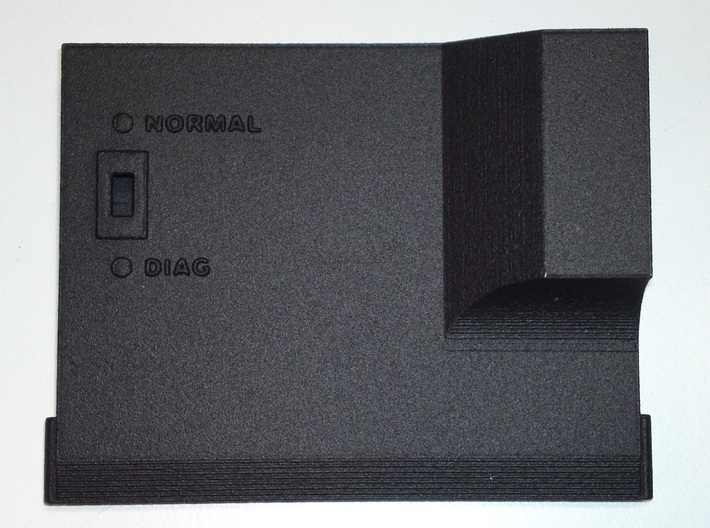


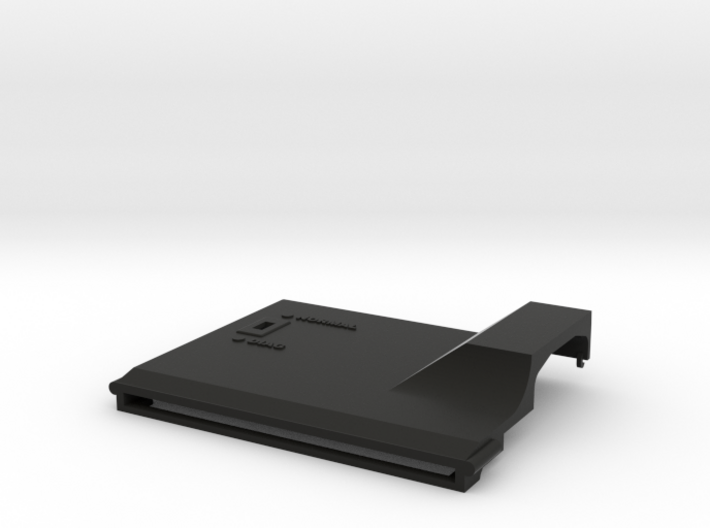
SMART Card v2 case - back shell half
Made by
Print With Shapeways
 Choose Your Material
 Choose your color and finish
$19.82
Have a question about this product?
contact the designerYou must be logged in and verified to contact the designer.
Product Description
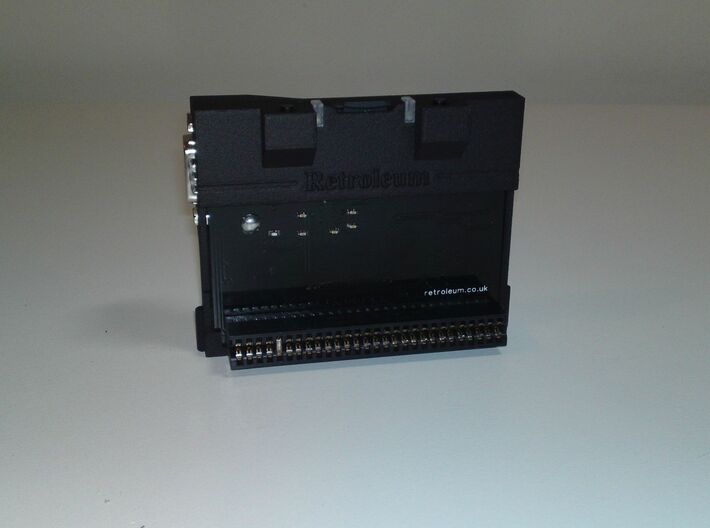
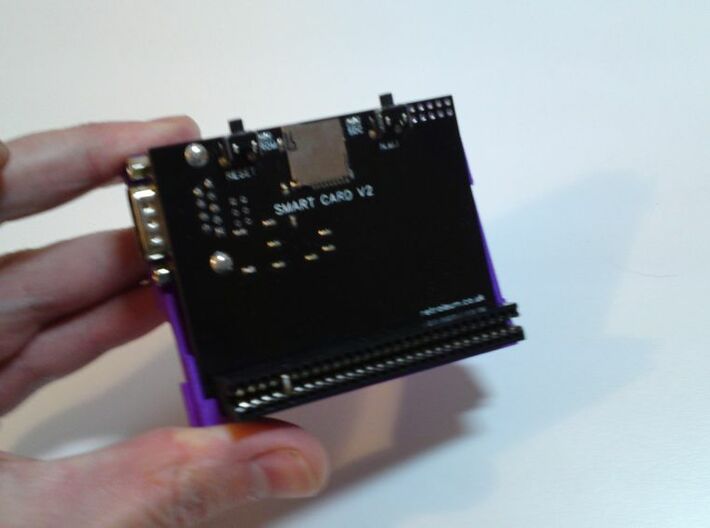
The first picture illustrated is the back shell half for a case I have designed for Phil Ruston's wonderful SMART Card V2. This case will only fit either an original rubber key 48k or a 48k+ ZX Spectrum equipped with a SMART Card V2.
Please read all of this text very carefully before ordering to avoid frustration and disappointment.
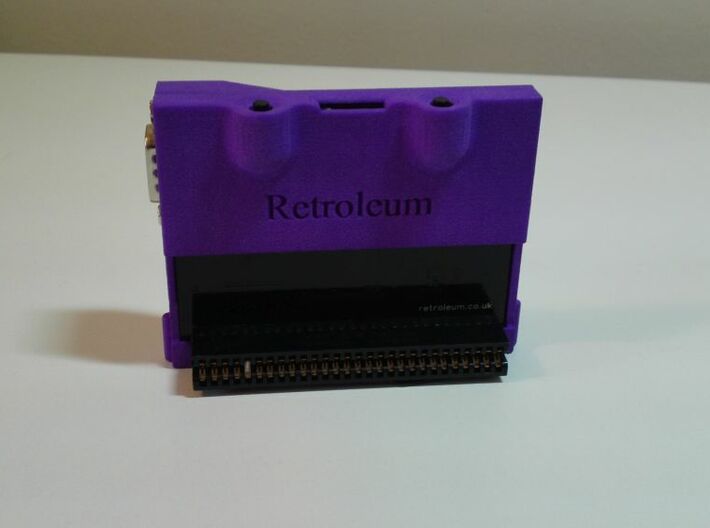
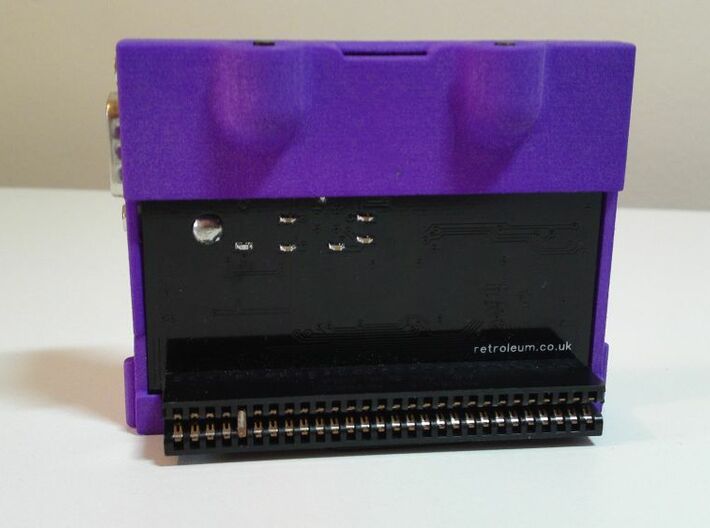
My SMART Card v2 case is made up of two essential parts.
1 . SMART Card v2 case - back shell half - (common to all front facades; the part on this page)
2. SMART Card v2 front facade (pick one of many options dependent on personal taste)
The front facades are either designed to fit the 48k or the 48k+, so important to order the one for your machine. Although if you enjoy using a 48k+ and 48k, the smaller 48k+ front facade will fit both machines, although will not look quite as tidy on the 48k in my personal opinion.
Front facade options are as follows; 'stealth' which only come in black with LED slots and 'organic' which only comes in a colour without LED slots (please scroll through the image carousel to visually appreciate the differences):-
SMART Card v2 case - 48k front 'stealth' facade
SMART Card v2 case - 48k+ front 'stealth' facade
SMART Card v2 case - 48k front 'organic' facade
SMART Card v2 case - 48k+ front 'organic' facade
Instructions to fit - please read before attempting build
(please copy and paste this text somewhere safe on your computer, ready for receipt of the parts and installation process should you wish to purchase a case)
0.Make sure you do not have a memory card inserted into the SMART Card V2 as this will hinder installation.
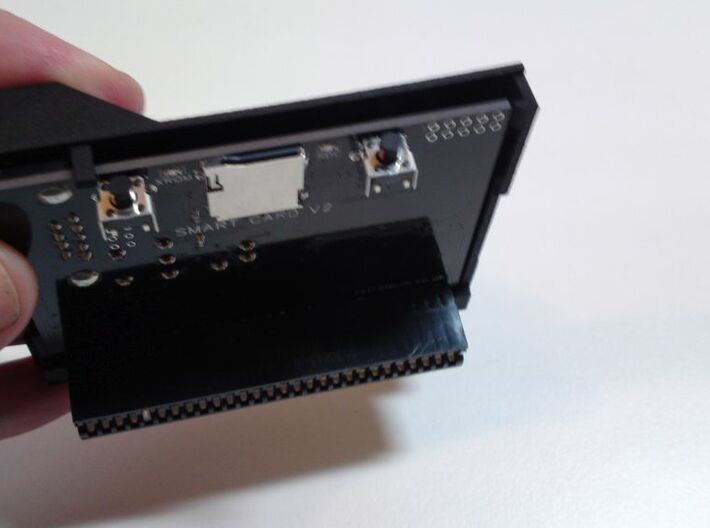
1. Slide your SMART Card V2 into the back shell half, locating the bottom of the card, in the slot in the bottom of the back shell half. The card should be pushed fully home so the edge connector is on or near the bottom of the case. See picture A
2. Carefully tug the left hand clip (joystick port side - SMART V2 facing you) around the SMART Card V2, tugging it just enough to get the clip around the card. Leave the right side unclipped (switch side). See picture B
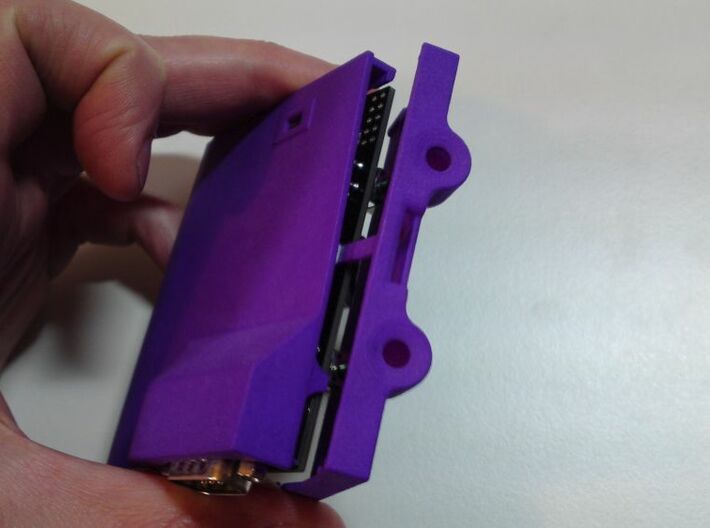
3.Picking your front facade up, carefully maneuver the central peg outwards a little using your index finger to get under it a little. See picture C
4. Slide the front facade peg under the SMART Card V2, removing your finger once under, with the right hand side unclipped it should slide OK but with a gentle bend to get over the two micro switches. See picture D.
5. With everything loose, press the SMART Card V2 on the right hand side to clip it home into the back shell half.
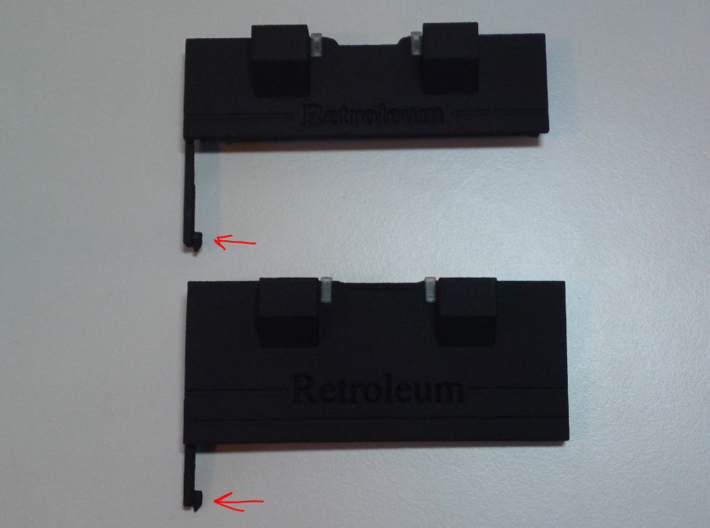
6. Tuck in the left hand front facade latch under the SMART Card V2 if it is not already there (picture E). Ensure everything looks ready to locate into place (square) and press the front facade home gently, pressing the right hand side to clip it in.
7. Holding the edge connector firmly, gently move the completed case around slightly, so the two select buttons are reasonably central within the front facade button recesses.
8.Celebrate your success with a cup of tea and a game of Exolon or carefully repair with a dob of superglue to hold the case sides together, if something on the case has got broken during the build process, preventing the front facade from staying attached..
Finally, please note I am a hobbyist enthusiast, an IT technician by profession, not an engineer, so whilst I strongly believe the solution works, and every precaution has been taken, your mileage may vary and liability for this is for you alone. It requires care and sensible installation, as it is a little tricky & fiddly to fit together; if you struggle with practical things, please think carefully before purchasing to avoid disappointment.
Thank you for your interest in this product. I created this as my way of saying thank you to the wonderful ZX Spectrum community for the projects I have enjoyed since rediscovering my childhood ZX Spectrum in 2019.
For those unaware of the SMART Card V2 micro SD card reader for the ZX Spectrum, you can find out more about it here. A wonderful piece of kit, and for me, a must for any 48k Spectrum enthusiast.
Please read all of this text very carefully before ordering to avoid frustration and disappointment.
My SMART Card v2 case is made up of two essential parts.
1 . SMART Card v2 case - back shell half - (common to all front facades; the part on this page)
2. SMART Card v2 front facade (pick one of many options dependent on personal taste)
The front facades are either designed to fit the 48k or the 48k+, so important to order the one for your machine. Although if you enjoy using a 48k+ and 48k, the smaller 48k+ front facade will fit both machines, although will not look quite as tidy on the 48k in my personal opinion.
Front facade options are as follows; 'stealth' which only come in black with LED slots and 'organic' which only comes in a colour without LED slots (please scroll through the image carousel to visually appreciate the differences):-
SMART Card v2 case - 48k front 'stealth' facade
SMART Card v2 case - 48k+ front 'stealth' facade
SMART Card v2 case - 48k front 'organic' facade
SMART Card v2 case - 48k+ front 'organic' facade
Instructions to fit - please read before attempting build
(please copy and paste this text somewhere safe on your computer, ready for receipt of the parts and installation process should you wish to purchase a case)
0.Make sure you do not have a memory card inserted into the SMART Card V2 as this will hinder installation.
1. Slide your SMART Card V2 into the back shell half, locating the bottom of the card, in the slot in the bottom of the back shell half. The card should be pushed fully home so the edge connector is on or near the bottom of the case. See picture A
2. Carefully tug the left hand clip (joystick port side - SMART V2 facing you) around the SMART Card V2, tugging it just enough to get the clip around the card. Leave the right side unclipped (switch side). See picture B
3.Picking your front facade up, carefully maneuver the central peg outwards a little using your index finger to get under it a little. See picture C
4. Slide the front facade peg under the SMART Card V2, removing your finger once under, with the right hand side unclipped it should slide OK but with a gentle bend to get over the two micro switches. See picture D.
5. With everything loose, press the SMART Card V2 on the right hand side to clip it home into the back shell half.
6. Tuck in the left hand front facade latch under the SMART Card V2 if it is not already there (picture E). Ensure everything looks ready to locate into place (square) and press the front facade home gently, pressing the right hand side to clip it in.
7. Holding the edge connector firmly, gently move the completed case around slightly, so the two select buttons are reasonably central within the front facade button recesses.
8.Celebrate your success with a cup of tea and a game of Exolon or carefully repair with a dob of superglue to hold the case sides together, if something on the case has got broken during the build process, preventing the front facade from staying attached..
Finally, please note I am a hobbyist enthusiast, an IT technician by profession, not an engineer, so whilst I strongly believe the solution works, and every precaution has been taken, your mileage may vary and liability for this is for you alone. It requires care and sensible installation, as it is a little tricky & fiddly to fit together; if you struggle with practical things, please think carefully before purchasing to avoid disappointment.
Thank you for your interest in this product. I created this as my way of saying thank you to the wonderful ZX Spectrum community for the projects I have enjoyed since rediscovering my childhood ZX Spectrum in 2019.
For those unaware of the SMART Card V2 micro SD card reader for the ZX Spectrum, you can find out more about it here. A wonderful piece of kit, and for me, a must for any 48k Spectrum enthusiast.
Details
What's in the box:
Smart Card v2 case back - MK4a

Dimensions:
Success Rate:
First To try.
What's this?
Rating:
Mature audiences only.

