


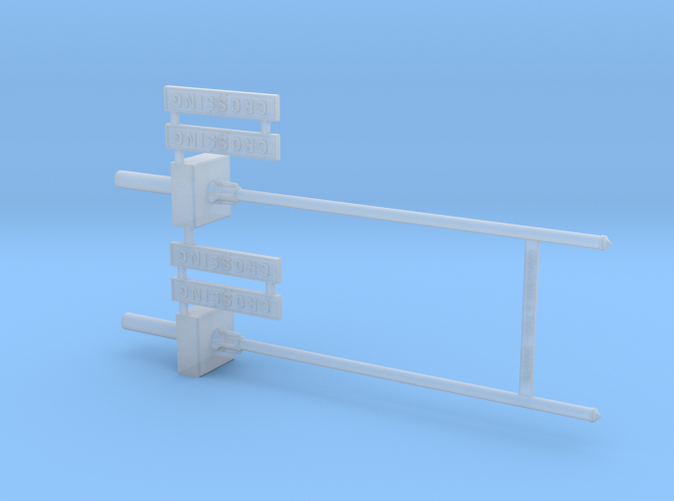
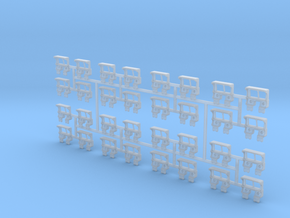
HO Cast Iron Crossbucks opposite mount w/ pointed
Made by
Print With Shapeways
 Choose Your Material
 Choose your color and finish
$11.35
Have a question about this product?
contact the designerYou must be logged in and verified to contact the designer.
Product Description
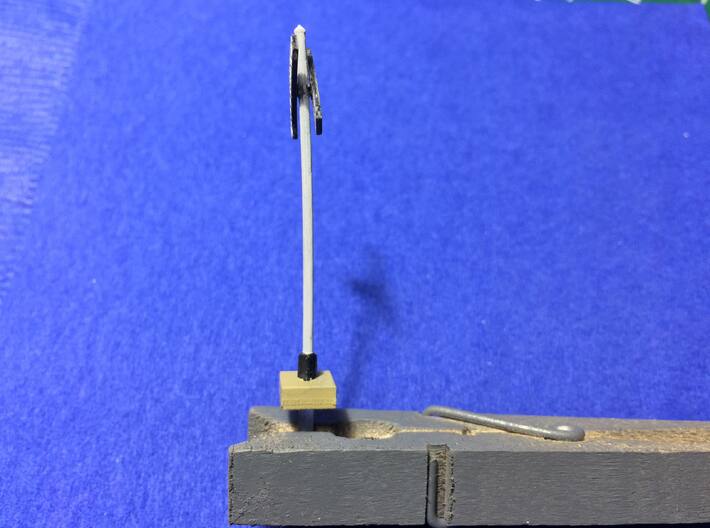
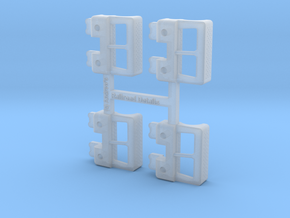
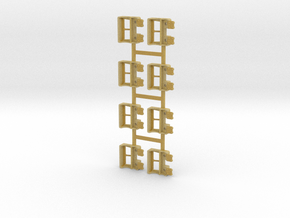
A classic old-style crossbuck where each part is mounted on the opposite side of the post. Each model is a kit for 2, enough to protect one crossing. This version is scaled from a drawing in the ARHS' "Maintenance of Way Standard Plans of the Reading Company", but it's suitable for many Northeastern railroads. This version has a pointed finial at the top, as specified in the plan. Another version is coming with a flat cap at the top, which seems to have been used more than the point in later years. The parts may come from Shapeways with a curve to them, but the material is quite bendy and can be adjusted to be straight. The sprue connecting the posts is at the height where the signs should be attached - cut the sprue with just a little bit left on the post and make a light pencil mark around the post after painting as a guide. I brush-painted mine with my stash of Polly Scale. Here's the trick: prime the whole thing first (I used Rustoleum Painter's Touch flat gray). Then cut off two signboards at a time, leaving them attached to each other, and paint them black. While they're drying, you can paint the posts white, with the "metal" base black and a bit of black up the post (maybe 1/8"). The square part is concrete. Once the boards are dry, overpaint them white, keeping the white to the recessed part between the letters as much as possible. I found two coats covered better. Finally, use very fine grit sandpaper and a very light touch to remove the white and expose the black underneath. If you accidentally take off too much, it doesn't show unless you hold the crossbucks up to the light and see through the plastic. Once the boards are dry, lay them flat with the "CROSSING" side down and at a 45-degree angle to the direction of the post. Apply a drop of thick CA to the mounting bracket, and press the post in place with the pencil mark lining up with said bracket. Be sure that the boards are parallel to the edges of the concrete base and each other. *A portion of all proceeds benefits the Anthracite Railroads Historical Society and the Reading Company Technical & Historical Society!* Thanks for your support!
Details
What's in the box:
HO Revised Cast Iron Crossbucks-Opposite Mount_v4
Dimensions:
Success Rate:
First To try.
What's this?
Rating:
Mature audiences only.

More From This Shop
$11.06
$84.33