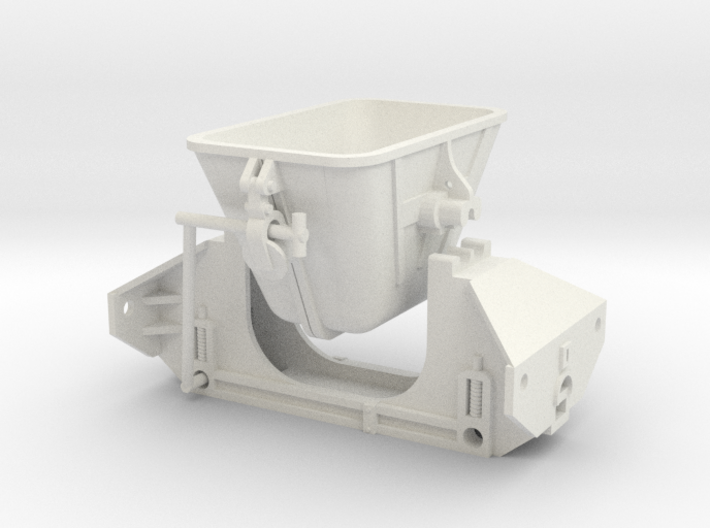
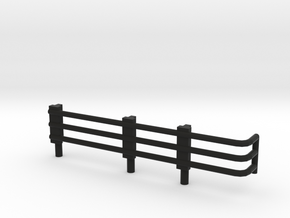
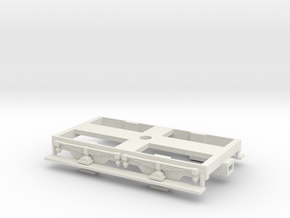
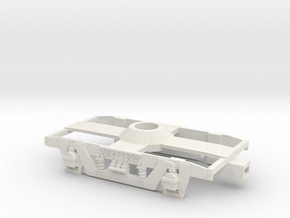
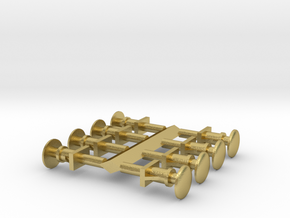
Parts contained within this print.


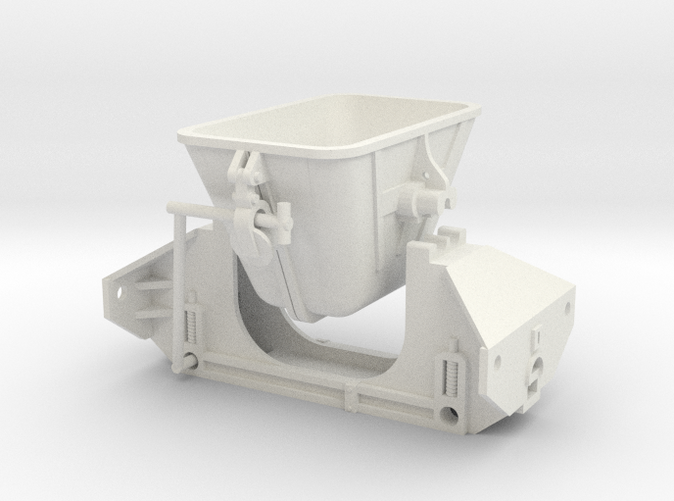
Stanton Slag Wagon
Made by
Print With Shapeways
 Choose Your Material
 Choose your color and finish
$15.69
Have a question about this product?
contact the designerYou must be logged in and verified to contact the designer.
Product Description
History and Details
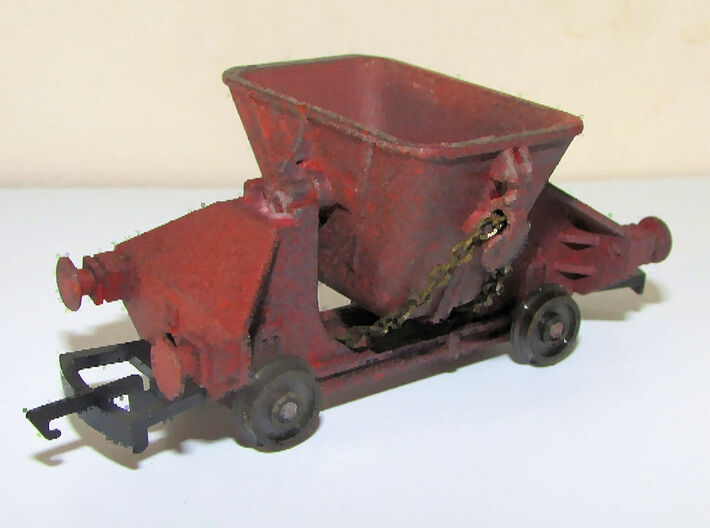
Iron and steel production creates large quantities of slag which was made up of the impurities in the ore which is removed in the blast furnace.
This slag was transported from the blast furnace while still molten in cast iron ladles mounted on rail wagons to a slag heap tip where it was tipped down a bank. After it had cooled down and solidified, it was processed into agregate for road building, construction blocks, railway ballast and even fertilizer depending on its composition.
These wagons usually ran in short rake's the length of which depended upon the power of the locomotive hauling them, the gradient n of the line, and the amount of slag carried. A typical train being made-up of three to five la ladles.
This kit is based on one of the types used at the Stanton Iron Works until iron smelting ended in the 1970. The kit is a 00-gauge model which means the wagons frames are slightly closer together to accommodate the narrower 16.5mm gauge.
Construction of the Kit.
This print contains both the chassis and rhe hopper. Consequently, to complete the model, you will also need 4 x Stanton Slag Wagon Buffers available in one print also on this site. Please remember to order both items to save on postage.
To complete the model you will also need:
2 x pairs of Romford 9mm wheels (or similar) 00/HO guage disc wheels;
1 x pair of straight shaft couplings for the NEM pockets;
2 x split pins (the type used by Smiths and Cambrian to secure their 3 link couplings are ideal).
A length of 3x2mm chain.
Assembly:
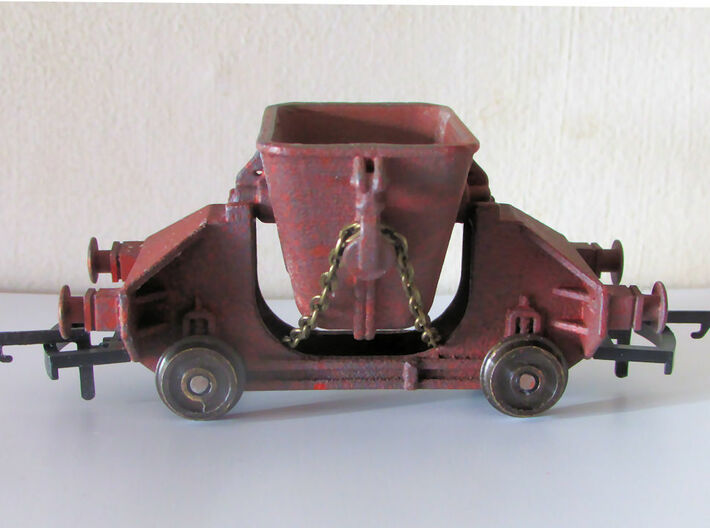
1. Separate the hopper from the chassis by cutting the linking bar:
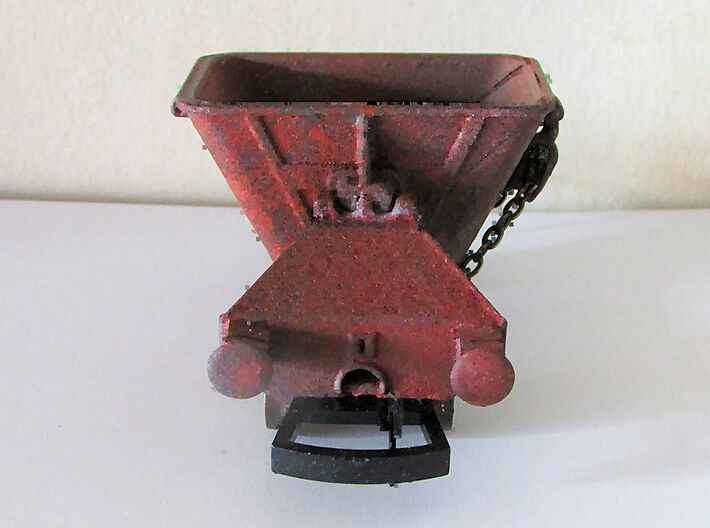
2.Remove the buffers from the sprue leaving at least 2mm of the locating pin;
3. Glue each buffer into the holes in each buffer beam on the chassis using cynoacrylite (super) glue;
4. After the glue has set paint both the chassis assembly and hopper (see below for "livery";
5. Fit a split pin to one end of the Chain (both not provided) and insert pin into one of the small hole in the chassis base plate (note the hole may need opening out with a small drill);
6. Bend the tails of the split pin outwards then trim off surplus;
7. Place the hopper in the chassis so that it is either level and thread the chain though the round hole in the imitation pulley;
8. Pull the chain through the pully until it hangs about right. Next count th number of links between the split pin and the middle of the pulley;
9. Count on an equal number of links (and add one or two for luck) and cut the chain.
10. fit the second split pin to the last link and thread it through the remaining hole in the chassis base plate (You will need to allow the hopper to hang out of its cradle to access the hole);
11. Check that the chain sits correctly (with a slight sag) when the hopper is level. It may be necessary to remove some of the links and rethread the pin until it looks right.
12 Bend the tails of the second split pin outwards then trim off surplus;
13. If the weight of the chain causes the hopper to tip it may be necessary to glue this in place;
14. Grind off any pin ponts on the end of the wagon wheels (not supplied) and thread through the axle boxes after removing one wheel;
15. Refit the previously removed wheel and ensure that it runs freely.
16. Repeat 14 and 15 for the remaining wheel, then insert couplings into the NEM sockets at each end. Note that on some prints the pockets can be very tight so it may be necessary to scrape the inside of the pocket with a precision srcew driver or pin;
17. Lastly glue the hopper into position (I used cynoacrylite (super glue) gell for this).
Painting/Livery.
I am unable to find out if these wagons were ever painted as most photographs show them as being rusty all over with a number painted on the left hand side of the frames.
Iron and steel production creates large quantities of slag which was made up of the impurities in the ore which is removed in the blast furnace.
This slag was transported from the blast furnace while still molten in cast iron ladles mounted on rail wagons to a slag heap tip where it was tipped down a bank. After it had cooled down and solidified, it was processed into agregate for road building, construction blocks, railway ballast and even fertilizer depending on its composition.
These wagons usually ran in short rake's the length of which depended upon the power of the locomotive hauling them, the gradient n of the line, and the amount of slag carried. A typical train being made-up of three to five la ladles.
This kit is based on one of the types used at the Stanton Iron Works until iron smelting ended in the 1970. The kit is a 00-gauge model which means the wagons frames are slightly closer together to accommodate the narrower 16.5mm gauge.
Construction of the Kit.
This print contains both the chassis and rhe hopper. Consequently, to complete the model, you will also need 4 x Stanton Slag Wagon Buffers available in one print also on this site. Please remember to order both items to save on postage.
To complete the model you will also need:
2 x pairs of Romford 9mm wheels (or similar) 00/HO guage disc wheels;
1 x pair of straight shaft couplings for the NEM pockets;
2 x split pins (the type used by Smiths and Cambrian to secure their 3 link couplings are ideal).
A length of 3x2mm chain.
Assembly:
1. Separate the hopper from the chassis by cutting the linking bar:
2.Remove the buffers from the sprue leaving at least 2mm of the locating pin;
3. Glue each buffer into the holes in each buffer beam on the chassis using cynoacrylite (super) glue;
4. After the glue has set paint both the chassis assembly and hopper (see below for "livery";
5. Fit a split pin to one end of the Chain (both not provided) and insert pin into one of the small hole in the chassis base plate (note the hole may need opening out with a small drill);
6. Bend the tails of the split pin outwards then trim off surplus;
7. Place the hopper in the chassis so that it is either level and thread the chain though the round hole in the imitation pulley;
8. Pull the chain through the pully until it hangs about right. Next count th number of links between the split pin and the middle of the pulley;
9. Count on an equal number of links (and add one or two for luck) and cut the chain.
10. fit the second split pin to the last link and thread it through the remaining hole in the chassis base plate (You will need to allow the hopper to hang out of its cradle to access the hole);
11. Check that the chain sits correctly (with a slight sag) when the hopper is level. It may be necessary to remove some of the links and rethread the pin until it looks right.
12 Bend the tails of the second split pin outwards then trim off surplus;
13. If the weight of the chain causes the hopper to tip it may be necessary to glue this in place;
14. Grind off any pin ponts on the end of the wagon wheels (not supplied) and thread through the axle boxes after removing one wheel;
15. Refit the previously removed wheel and ensure that it runs freely.
16. Repeat 14 and 15 for the remaining wheel, then insert couplings into the NEM sockets at each end. Note that on some prints the pockets can be very tight so it may be necessary to scrape the inside of the pocket with a precision srcew driver or pin;
17. Lastly glue the hopper into position (I used cynoacrylite (super glue) gell for this).
Painting/Livery.
I am unable to find out if these wagons were ever painted as most photographs show them as being rusty all over with a number painted on the left hand side of the frames.
Details
What's in the box:
Stanton Slag Wagon
Dimensions:
Success Rate:
First To try.
What's this?
Rating:
Mature audiences only.
