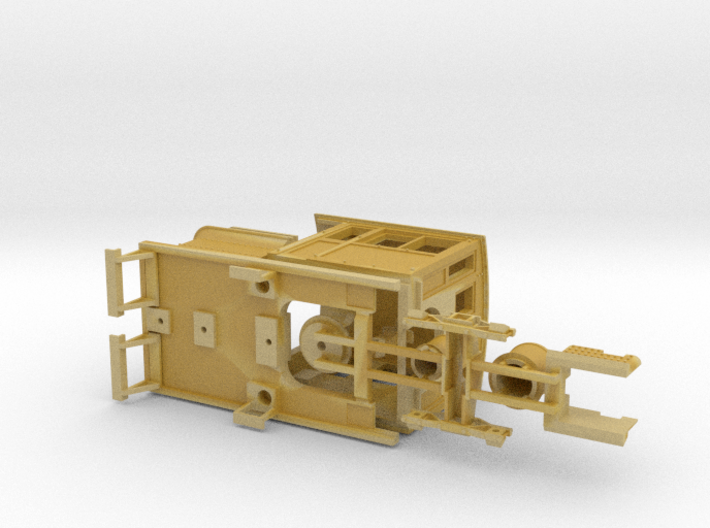
Tan Fine Detail Plastic


Dress-up kit for Minitrains Forney
Made by
Print With Shapeways
 Choose Your Material
 Choose your color and finish
$48.49
Have a question about this product?
contact the designerYou must be logged in and verified to contact the designer.
Product Description
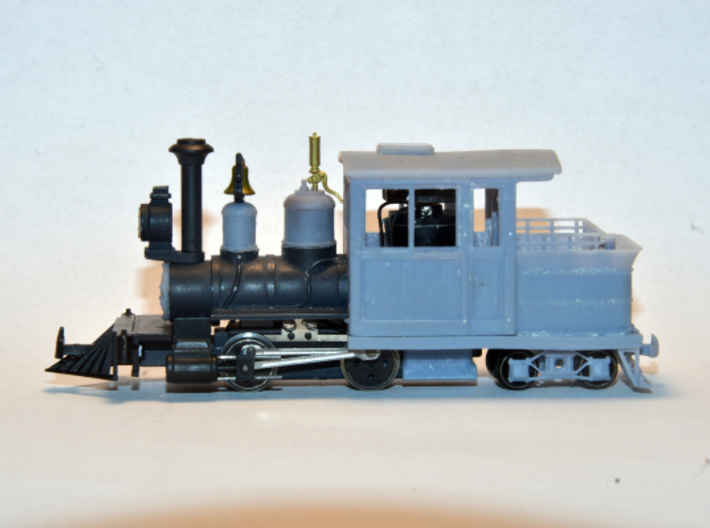
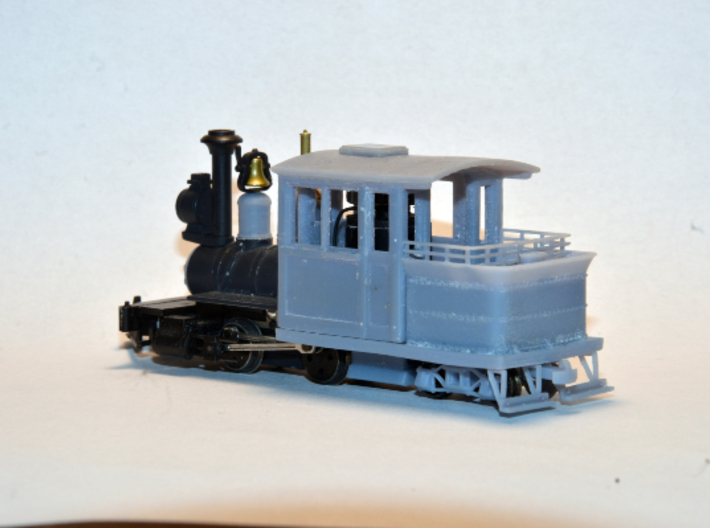
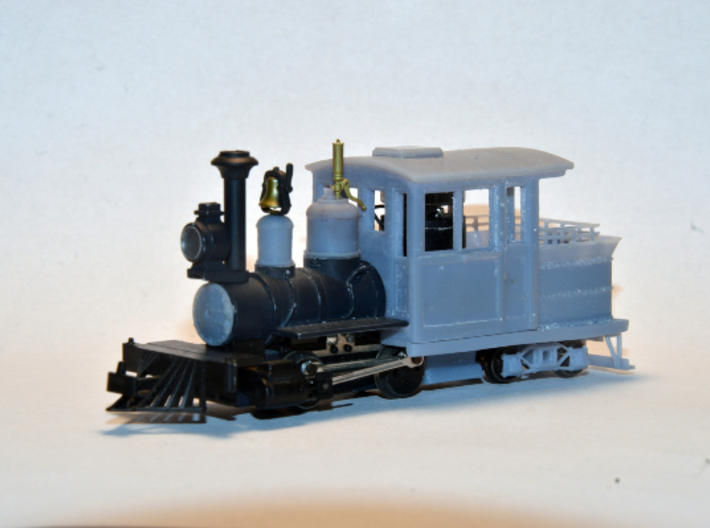
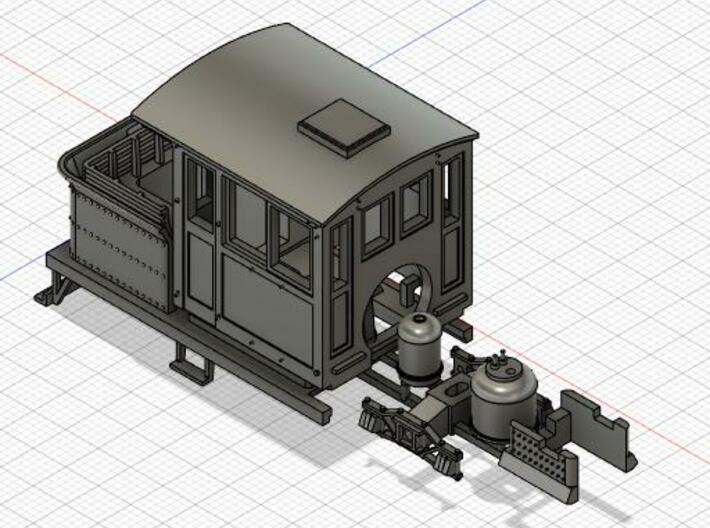
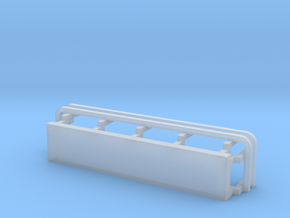
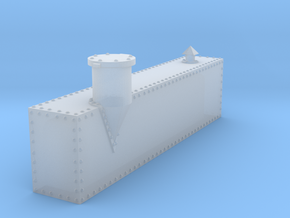
This is a kit of parts to modify the Minitrains HOe/HOn30 0-4-4T Forney locomotive. The idea behind this kit is to help give the locomotive a more “modern” look to the engine while also furnishing some more quality of life to the crew.
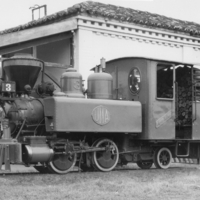
The resulting locomotive is rather on the small side as far as Forneys go, however such locomotives were far from unprototypical – for instance, H.K Porter listed a Forney in its catalog which had 6x10” cylinders, rode on 20” diameter drivers and weighed slightly under 8tons in working order. And at 17 feet 6 inches long it was smaller than the Minitrains locomotive!
The kit contains:
Not included but needed to complete model:
INSTRUCTIONS:
- Please read instructions carefully before starting. If in doubt, please contact designer.
- Open package and check part for integrity and imperfections. If by any chance there are any printing defects please contact Shapeways Customer Service.
- Using a pair of nippers or sprue cutters carefully separate the parts from the sprue. Given the number of small and/or fragile parts, the designer recommends washing the parts in white spirits before cutting them free from the sprue.
Take the opportunity and cut the reinforcement bar from the bottom of the boiler opening in cab and the second reinforcement bar located in front of the motor opening of the bunker/floor assembly.
- Remove original cab and bunker/floor sub-assembly from locomotive. These are held by a screw located on a tab the motor end of the chassis. Before pulling cab, carefully cut or unsolder the leads connecting the rear headlight SMD to the contacts – these won’t be used again but can be reused in another project (such as adding a rear headlight – not included).- Take cab, drill mounting holes 1mm and tap to 1.2mm.
- On cab side, locate pilot holes for handrails (they are next to the doors – use a magnifying glass if necessary) and drill them out with 0.3mm drill.
- Take Bunker/floor assembly, drill coupler mount and truck mounting pad hole 1mm and tap 1.2mm. Drill cab mounting holes 1mm, enlarge them to 1.4mm. Drill floor mounting pad hole 1mm, tap 1.4mm.
- Test fit cab and floor/bunker sub-assembly. The lugs under the front cab doors slip under the boiler walkways. If the floor is not horizontal, file (to bring down) or shim the mounting pad (to bring up) until floor
- Remove the chimney from the boiler and gently prise boiler away from locomotive chassis with a screwdriver. Again, before doing so unsolder the leads connecting the front headlight SMD to the contacts.
- Remove original domes from boiler by cutting them at the base. There is a slot which makes a perfect cutting guide and careful work with a sharp hobby knife will get them out easily. Sand/file the bases flat and test-fit the domes – these must fit level and concentric in the base. If the domes are not concentric, carefully file (or grind using a miniature power drill) inside of dome base until concentricity is achieved. The steam dome also conceals a boiler weight protrusion; it might be necessary to gently taper the inside edge of the dome so as to make it sit properly on the base.
- Drill the hole on top of steam dome to 1mm then enlarge to fit whistle of choice;
- Remove the original smokebox door from the boiler. Here one can either glue a number plate onto the new smokebox door, recycle the original number plate or add a new one. In the last two cases the mounting hole must be enlarged to suit.
- Install wheelsets on the trucks. As mentioned above there were designed to take wheelsets with Micro-Trains axle lengths (0.540”/13.7mm); low-profile wheelsets look best but are not entirely necessary.
- Reassemble locomotive; screw bunker/floor/cab sub-assembly in place. Screw truck in place, making sure it can swing and rotate freely. Install coupler – the kit comes with a hook-type coupler compatible with BEMO-type couplers; this must be screwed but left more or less free to swing from side to side to avoid risking derailing coupled rolling stock on sharp curves. Micro-Trains couplers can also be used if wanted – a MT 2004 will fit, however a version with a longer shank might be a better deal.
- Add the firebox insert – this goes under the cab with the notches facing up, to clear the motor mounting screws.
- By now you should have a functional,if still unfinished, locomotive. Test-run the engine to see if everything runs properly. The kit was designed to run round 249mm/9.75” radius curves however it will look and run better on much wider radii, just like real Forneys were wont to do.
- Disassemble the locomotive again and put your finishing touches. Add extra details if wanted. Sand, prime and paint printed parts; strip and repaint remaining original parts as needed; resolder headlights to contacts, or, if wanted, wire it to DCC decoder. Reassemble again, finish… enjoy your handiwork!
Locomotive, Greenwich couplings and track not included.
(The model photos are of the resin printed prototype. Production sample might differ).
Unfortunately Sha
Questions, Requests, Suggestions, Complaints (about the design)? Please contact me!
Enjoy!
The resulting locomotive is rather on the small side as far as Forneys go, however such locomotives were far from unprototypical – for instance, H.K Porter listed a Forney in its catalog which had 6x10” cylinders, rode on 20” diameter drivers and weighed slightly under 8tons in working order. And at 17 feet 6 inches long it was smaller than the Minitrains locomotive!
The kit contains:
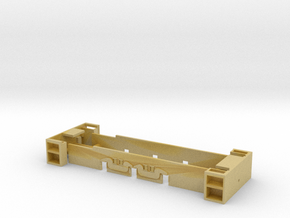
- One bunker + cab floor;
- One cab;
- One smokebox door (not visible in render – it’s inside the cab)
- Radial hook coupler;
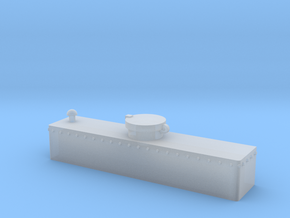
- Sand and Steam Domes;
- Trailing truck, Thielsen style;
- Firebox insert.
Not included but needed to complete model:
- Minitrains Forney;
- 2x N scale 33” wheelsets with axle length to suit Micro-Trains trucks. Any brand will work although the designer suggests Fox Valley Models low-profile wheelsets for best results;
- 0.3mm, 1mm, 1.2mm and 1.4mm drills;
- 1.2mm and/or 1.4mm taps;
- 1.2mm and 1.4mm screws
- 0.3mm brass or steel wire (for cab handrail).
- Assorted tools and supplies (hobby knife, screwdriver, soldering iron, CA glue, magnifying glass, miniature power drill).
- Patience :-).
INSTRUCTIONS:
- Please read instructions carefully before starting. If in doubt, please contact designer.
- Open package and check part for integrity and imperfections. If by any chance there are any printing defects please contact Shapeways Customer Service.
- Using a pair of nippers or sprue cutters carefully separate the parts from the sprue. Given the number of small and/or fragile parts, the designer recommends washing the parts in white spirits before cutting them free from the sprue.
Take the opportunity and cut the reinforcement bar from the bottom of the boiler opening in cab and the second reinforcement bar located in front of the motor opening of the bunker/floor assembly.
- Remove original cab and bunker/floor sub-assembly from locomotive. These are held by a screw located on a tab the motor end of the chassis. Before pulling cab, carefully cut or unsolder the leads connecting the rear headlight SMD to the contacts – these won’t be used again but can be reused in another project (such as adding a rear headlight – not included).- Take cab, drill mounting holes 1mm and tap to 1.2mm.
- On cab side, locate pilot holes for handrails (they are next to the doors – use a magnifying glass if necessary) and drill them out with 0.3mm drill.
- Take Bunker/floor assembly, drill coupler mount and truck mounting pad hole 1mm and tap 1.2mm. Drill cab mounting holes 1mm, enlarge them to 1.4mm. Drill floor mounting pad hole 1mm, tap 1.4mm.
- Test fit cab and floor/bunker sub-assembly. The lugs under the front cab doors slip under the boiler walkways. If the floor is not horizontal, file (to bring down) or shim the mounting pad (to bring up) until floor
- Remove the chimney from the boiler and gently prise boiler away from locomotive chassis with a screwdriver. Again, before doing so unsolder the leads connecting the front headlight SMD to the contacts.
- Remove original domes from boiler by cutting them at the base. There is a slot which makes a perfect cutting guide and careful work with a sharp hobby knife will get them out easily. Sand/file the bases flat and test-fit the domes – these must fit level and concentric in the base. If the domes are not concentric, carefully file (or grind using a miniature power drill) inside of dome base until concentricity is achieved. The steam dome also conceals a boiler weight protrusion; it might be necessary to gently taper the inside edge of the dome so as to make it sit properly on the base.
- Drill the hole on top of steam dome to 1mm then enlarge to fit whistle of choice;
- Remove the original smokebox door from the boiler. Here one can either glue a number plate onto the new smokebox door, recycle the original number plate or add a new one. In the last two cases the mounting hole must be enlarged to suit.
- Install wheelsets on the trucks. As mentioned above there were designed to take wheelsets with Micro-Trains axle lengths (0.540”/13.7mm); low-profile wheelsets look best but are not entirely necessary.
- Reassemble locomotive; screw bunker/floor/cab sub-assembly in place. Screw truck in place, making sure it can swing and rotate freely. Install coupler – the kit comes with a hook-type coupler compatible with BEMO-type couplers; this must be screwed but left more or less free to swing from side to side to avoid risking derailing coupled rolling stock on sharp curves. Micro-Trains couplers can also be used if wanted – a MT 2004 will fit, however a version with a longer shank might be a better deal.
- Add the firebox insert – this goes under the cab with the notches facing up, to clear the motor mounting screws.
- By now you should have a functional,if still unfinished, locomotive. Test-run the engine to see if everything runs properly. The kit was designed to run round 249mm/9.75” radius curves however it will look and run better on much wider radii, just like real Forneys were wont to do.
- Disassemble the locomotive again and put your finishing touches. Add extra details if wanted. Sand, prime and paint printed parts; strip and repaint remaining original parts as needed; resolder headlights to contacts, or, if wanted, wire it to DCC decoder. Reassemble again, finish… enjoy your handiwork!
Locomotive, Greenwich couplings and track not included.
(The model photos are of the resin printed prototype. Production sample might differ).
Unfortunately Sha
Questions, Requests, Suggestions, Complaints (about the design)? Please contact me!
Enjoy!
Details
What's in the box:
Forney_kit_retail_fixed

Dimensions:
Success Rate:
First To try.
What's this?
Rating:
Mature audiences only.