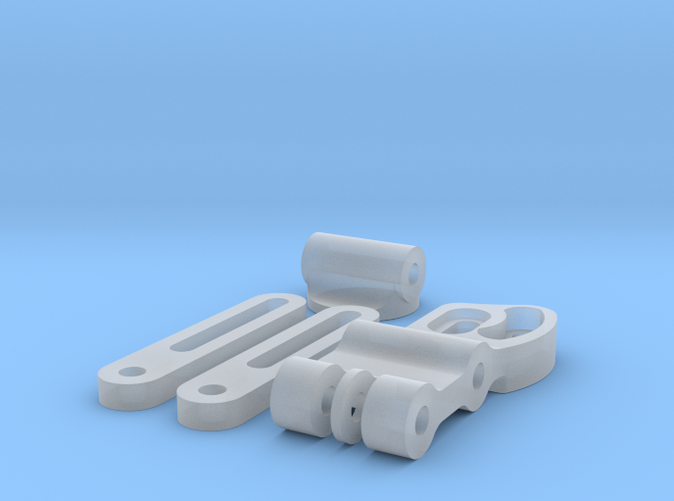
This stabilization rig was developed be used with Sony's VCT-HSM1 helmet mount base. It is compatible with any camera utilizing a 1/4"-20 mounting thread that can fit within the confines of the assembly. Rig has 61 degrees of pan adjustment and can be adjusted for horizon positioning from 72 - 123 degrees.
KNOWN COMPATIBLE CAMERA MODELS
- Sony FDR-X3000
- Sony HDR-AS300
- Sony HDR-AS50R
- Sony HDR-AS50
- Sony FDR-x1000/FDR-x1000VR
- Sony HDR-AS200V
- Sony HDR-AS100V
- Sony AZ1VR
- Sony AS20
- Olympus TG Tracker
*This only includes the base parts and does not include the hardware to assemble. Look to the below materials to complete assembly.
- (3) 2.5" 1/4-20 Bolts
- (3) 1/4-20 Nylon locking nuts
- (6) 1/4" washers
- (1) 10-24 nylon Locking nut
- (1) 3/4" 10-24 phillips head screw
- 3M VHB double sided foam tape
INSTRUCTIONS
1 ) Remove round foam pad from VCT-HSM1 upper assembly
2 ) Remove lower mount arm of VCT-HSM1 upper assembly
3 ) Remove eclip and 1/4" thumb screw from lower mount arm.
4 ) Attach mount arm from kit to VCT-HSM1 with (1) 1/4"-20 bolt, (2)1/4" washer, and (1) nylon locking nut. Do not tighten fully at this time.
5 ) Attach bracing arms to kit mount arm with
(1) 1/4"-20 bolt, (2)1/4" washer, and (1) nylon locking nut. Do not tighten fully at this time.
6 ) Attach bracing arms to mount anchor with (1) 1/4"-20 bolt, (2)1/4" washer, and (1) nylon locking nut.Do not tighten fully at this time.
7 ) Attach eclip and 1/4" thumb screw from VCT-HSM1 lower mount arm.
8 ) Attach 10-24 screw and locking nut to pan adjustment channel on kit mount arm.
9 ) Apply 3M VHB Double sided foam tape to mount anchor
10 ) Mount assembly to helmet
11 ) Attach camera to mount arm.
12 ) Use camera viewing remote or phone app and adjust tilt angle rotation with VCT-HSM1 native adjustment.
13 ) Once tilt is adjusted to desired setting, stick mount anchor to round area on VCT-HSM1.
14 ) Adjust horizon roll angle and tighten bolts.
15 ) Adjust Pan and tighten phillips screw in pan channel.
16) Enjoy
*Notes
- If you prefere a part in another color not offered, the white polished option may be purchased instead with a bit of DIY elbow grease to dye the part yourself to the color you want.
See http://www.instructables.com/id/How-to-Dye-Your-Nylon-3D-Prints/ For Color Dying
- Dyes used for colored components on shapeways (white is uncolored) are water based and need to be sealed with a UV resistant clear coat for maintaining color appearance with exposure outdoors.
- Fiebing's Leather Dye is an alcohol based waterproof alternative but will still require sealing with a UV protective clearcoat to maintain color. You can see their color options here https://www.fiebing.com/wp-content/uploads/2012/08/2016_Color-Chart_Web.jpg
Model Design © 2017 Sir Burg
