Tan Fine Detail Plastic

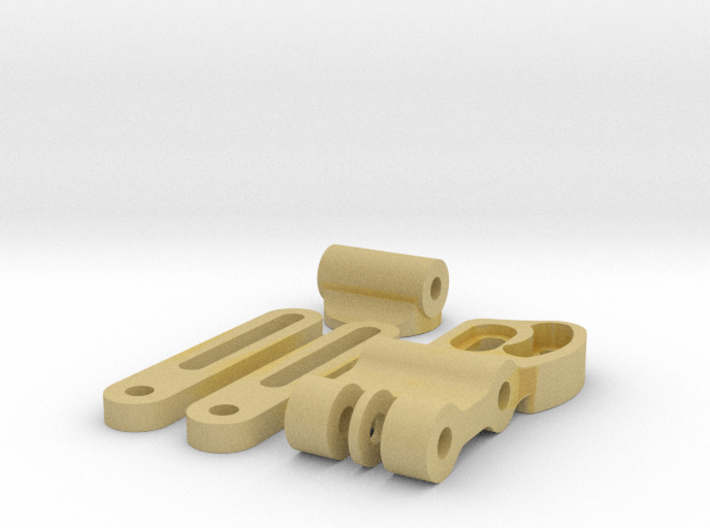
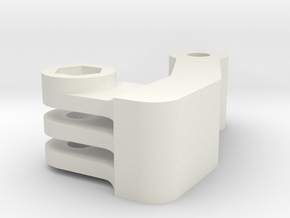
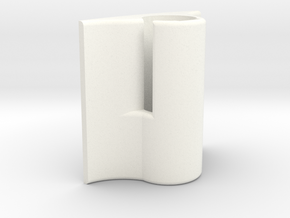
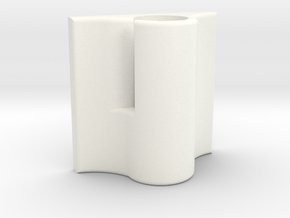
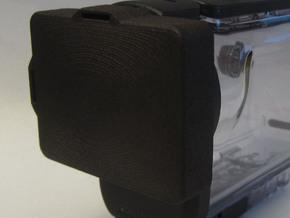
Action Camera Helmet Stabilizer Kit
Made by
Print With Shapeways
 Choose Your Material
 Choose your color and finish
$88.23
Have a question about this product?
contact the designerYou must be logged in and verified to contact the designer.
Product Description
This stabilization rig was developed be used with Sony's VCT-HSM1 helmet mount base. It is compatible with any camera utilizing a 1/4"-20 mounting thread that can fit within the confines of the assembly. Rig has 61 degrees of pan adjustment and can be adjusted for horizon positioning from 72 - 123 degrees.
KNOWN COMPATIBLE CAMERA MODELS
- Sony FDR-X3000
- Sony HDR-AS300
- Sony HDR-AS50R
- Sony HDR-AS50
- Sony FDR-x1000/FDR-x1000VR
- Sony HDR-AS200V
- Sony HDR-AS100V
- Sony AZ1VR
- Sony AS20
- Olympus TG Tracker
*This only includes the base parts and does not include the hardware to assemble. Look to the below materials to complete assembly.
- (3) 2.5" 1/4-20 Bolts
- (3) 1/4-20 Nylon locking nuts
- (6) 1/4" washers
- (1) 10-24 nylon Locking nut
- (1) 3/4" 10-24 phillips head screw
- 3M VHB double sided foam tape
INSTRUCTIONS
1 ) Remove round foam pad from VCT-HSM1 upper assembly
2 ) Remove lower mount arm of VCT-HSM1 upper assembly
3 ) Remove eclip and 1/4" thumb screw from lower mount arm.
4 ) Attach mount arm from kit to VCT-HSM1 with (1) 1/4"-20 bolt, (2)1/4" washer, and (1) nylon locking nut. Do not tighten fully at this time.
5 ) Attach bracing arms to kit mount arm with (1) 1/4"-20 bolt, (2)1/4" washer, and (1) nylon locking nut. Do not tighten fully at this time.
6 ) Attach bracing arms to mount anchor with (1) 1/4"-20 bolt, (2)1/4" washer, and (1) nylon locking nut.Do not tighten fully at this time.
7 ) Attach eclip and 1/4" thumb screw from VCT-HSM1 lower mount arm.
8 ) Attach 10-24 screw and locking nut to pan adjustment channel on kit mount arm.
9 ) Apply 3M VHB Double sided foam tape to mount anchor
10 ) Mount assembly to helmet
11 ) Attach camera to mount arm.
12 ) Use camera viewing remote or phone app and adjust tilt angle rotation with VCT-HSM1 native adjustment.
13 ) Once tilt is adjusted to desired setting, stick mount anchor to round area on VCT-HSM1.
14 ) Adjust horizon roll angle and tighten bolts.
15 ) Adjust Pan and tighten phillips screw in pan channel.
16) Enjoy
*Notes
- If you prefere a part in another color not offered, the white polished option may be purchased instead with a bit of DIY elbow grease to dye the part yourself to the color you want.
See http://www.instructables.com/id/How-to-Dye-Your-Nylon-3D-Prints/ For Color Dying
- Dyes used for colored components on shapeways (white is uncolored) are water based and need to be sealed with a UV resistant clear coat for maintaining color appearance with exposure outdoors.
- Fiebing's Leather Dye is an alcohol based waterproof alternative but will still require sealing with a UV protective clearcoat to maintain color. You can see their color options here https://www.fiebing.com/wp-content/uploads/2012/08/2016_Color-Chart_Web.jpg
Model Design © 2017 Sir Burg
Tags
Mount Sony Outdoors action cam action cam arm action cam side mount action camera action camera arm action camera mount action camera stabilizer fdr x3000 fdr-x3000 helmet cam helmet cam stabilizer helmet camera helmet side mount motorcycle helmet mount motovlog setup motovlogging setup olympus tg tracker sony sony action cam mount sony action camera mount sony helmet mount tg tracker helmet mount tg tracker mount vct hsm1 vct-hsm1Details
What's in the box:
Sony VCT-HSM1 Stabilizer Kit

Dimensions:
Success Rate:
First To try.
What's this?
Rating:
Mature audiences only.

More From This Shop
$13.34