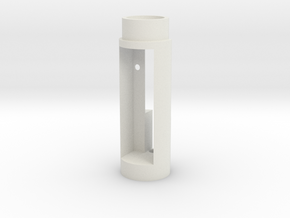
3/4 Rear view (Battery faces top of hilt)


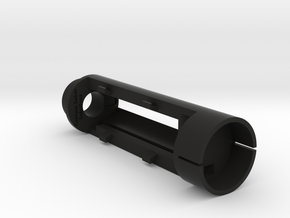
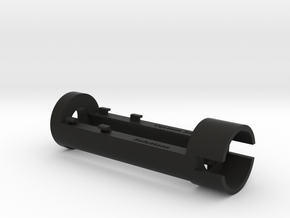
Proffieboard Chassis for Ultrasabers
Made by
Print With Shapeways
 Choose Your Material
 Choose your color and finish
$54.67
Have a question about this product?
contact the designerYou must be logged in and verified to contact the designer.
Product Description
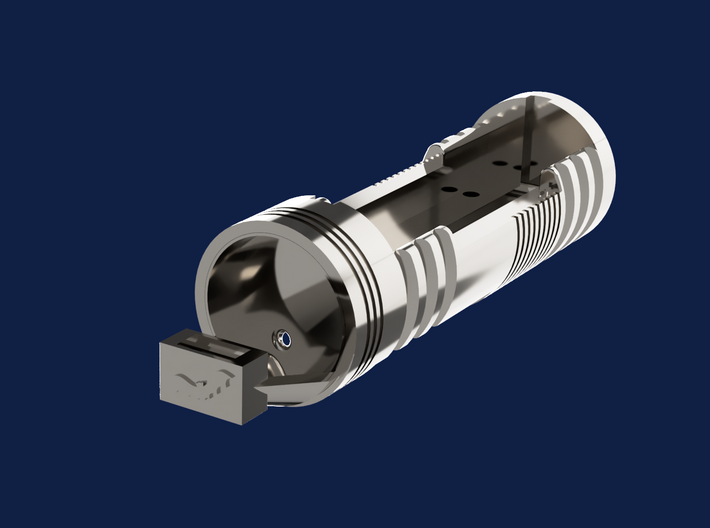
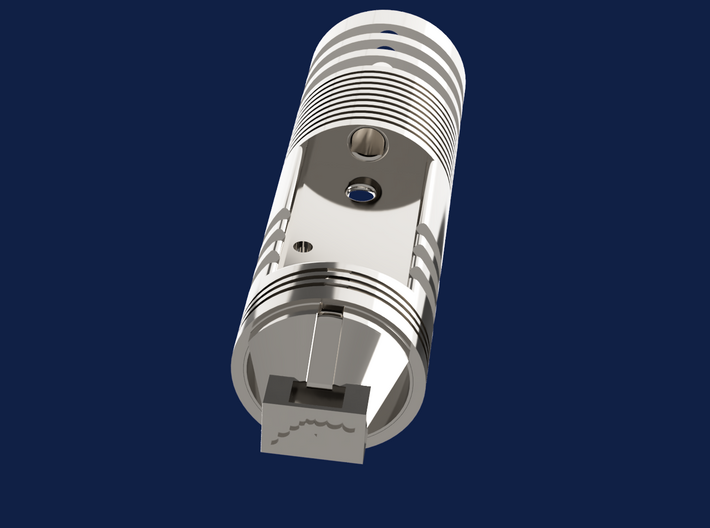
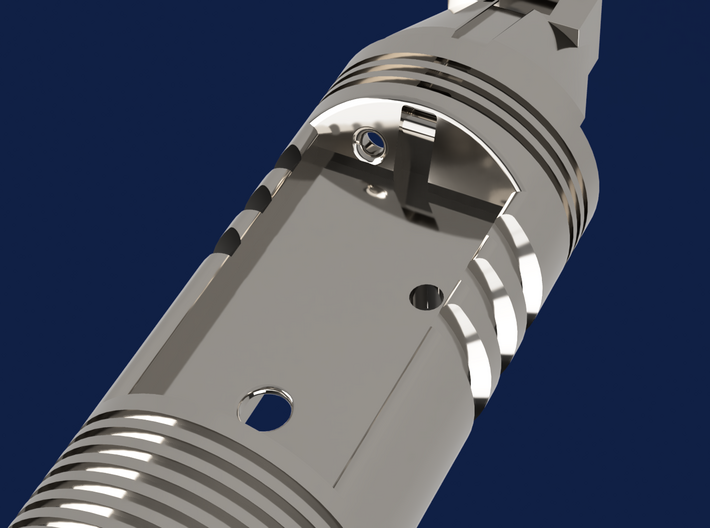
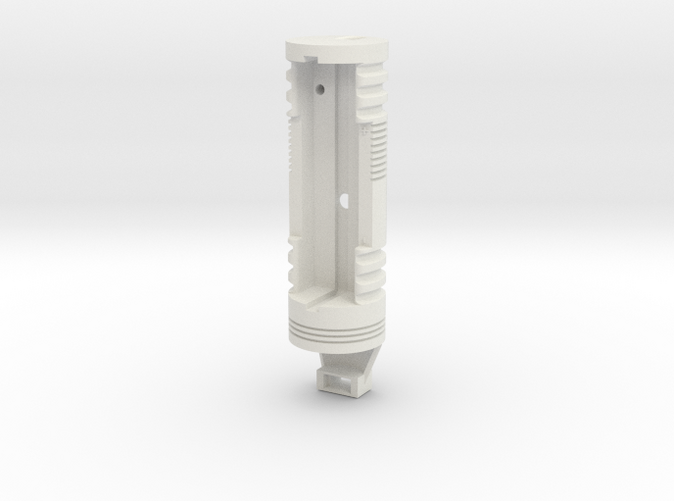
This chassis contains several features designed to make your life easier when installing a Proffieboard (or smaller) lightsaber control board into your Ultrasabers hilt.
These include:
This chassis has been tested with hilts such as the Dominix, Sentinel, and Initiate. As most Ultrasabers hilts feature similar internal configurations, it will surely fit many more, but verify the dimensions of your hilt before ordering.
IMPORTANT NOTE: The kill switch extends into the pommel region of a vented pommel - this is NOT compatible with exceptionally short vented pommels or with solid pommels.
Installation Notes:
Product intended for use with this switch.
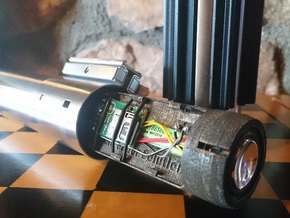
Pre-wire your Keystone, speaker, and kill switch before installing into the chassis. If your kill switch has long leads, they should be clipped to approximately 5-6mm in length before soldering. Be sure to use shrink wrap on these leads as they will remain exposed (a future revision of the design may enclose them, but it is not necessary if properly insulated with shrink wrap). Route the speaker, kill switch, and battery wires through the chassis and terminate them at the sound board. As a best practice, leads from the rear of the chassis (speaker and kill switch) should be left long, and double back to their solder pads from the front of the sound board. The board should be placed with the USB port and buttons facing up in the recess with the USB port to the rear of the chassis. This will allow the board to be lifted gently to access the USB port and SD card.
Pre-wire the board and extend all wires through the U shaped channel to the front of the chassis, being sure to leave enough length to solder your switch and LED in place. Your final wire length will be determined by the position of the chassis when the switch is soldered in. Ideally the wide back plate of the chassis (adjacent to the positive end of the Keystone - the part that butts up against the ledge inside the hilt) will rest at the pommel threads. This will allow full access to remove the battery from the keystone but not remove the chassis from the hilt. It is recommended to use a section of stiff heat shrink on the entire wire bundle as it comes out of the chassis to ensure it feeds back into the hilt properly upon chassis reinsertion.
These include:
- 28mm High Bass speaker compatibility
- Rear mounted kill switch
- Keystone 18650 holder compatibility
- Wiring channels to ensure clean routing of wires to the switch and LED or addressable LED strip connector
This chassis has been tested with hilts such as the Dominix, Sentinel, and Initiate. As most Ultrasabers hilts feature similar internal configurations, it will surely fit many more, but verify the dimensions of your hilt before ordering.
IMPORTANT NOTE: The kill switch extends into the pommel region of a vented pommel - this is NOT compatible with exceptionally short vented pommels or with solid pommels.
Installation Notes:
Product intended for use with this switch.
Pre-wire your Keystone, speaker, and kill switch before installing into the chassis. If your kill switch has long leads, they should be clipped to approximately 5-6mm in length before soldering. Be sure to use shrink wrap on these leads as they will remain exposed (a future revision of the design may enclose them, but it is not necessary if properly insulated with shrink wrap). Route the speaker, kill switch, and battery wires through the chassis and terminate them at the sound board. As a best practice, leads from the rear of the chassis (speaker and kill switch) should be left long, and double back to their solder pads from the front of the sound board. The board should be placed with the USB port and buttons facing up in the recess with the USB port to the rear of the chassis. This will allow the board to be lifted gently to access the USB port and SD card.
Pre-wire the board and extend all wires through the U shaped channel to the front of the chassis, being sure to leave enough length to solder your switch and LED in place. Your final wire length will be determined by the position of the chassis when the switch is soldered in. Ideally the wide back plate of the chassis (adjacent to the positive end of the Keystone - the part that butts up against the ledge inside the hilt) will rest at the pommel threads. This will allow full access to remove the battery from the keystone but not remove the chassis from the hilt. It is recommended to use a section of stiff heat shrink on the entire wire bundle as it comes out of the chassis to ensure it feeds back into the hilt properly upon chassis reinsertion.
Details
What's in the box:
US proffie
Dimensions:
Success Rate:
First To try.
What's this?
Rating:
Mature audiences only.
