1.43 TRANSPORT MODELS.
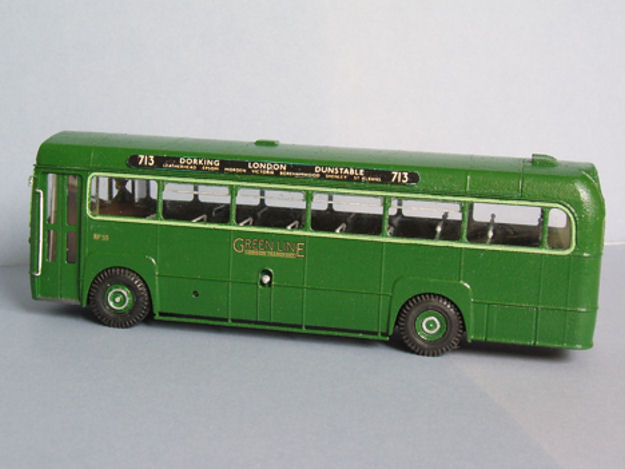
London Transport RF2 Coach / Bus
Parts supplied: Body, floor & seats, roof,window vents.
1. Drill any holes required for handrails, mirror arms, etc.
2. Clean model ensuring that all loose material is removed.
3. E-mail
tonyheselden@btinternet.com to obtain the appropriate Green Line or London Transport roundel ( free of charge in UK) Paint (both enamel & acrylic are O.K) all parts of the model inside & outside. The material is fairly porous & often absorbs a lot of the first coat(s)of paint. Applying a primer coat first is recommended.. Fix roundel in place,after cutting to size, in recess on front of bus. It will need to be held firmly in place whilst the glue sets in order to conform to the slight curve of the bus.
4. Measure glazing ( I use 0.007” thick ) & cut to size . Fix in place ( Canopy glue recommended). When glazing is firmly fixed , glue previously glazed window vents on outside of glazing on the appropriate four windows on each side. Glue to window frame rather than to the glazing.
5..Fix floor & seating in place ( Epoxy recommended) .Add cab detail , handrails & passengers if required.
6. Glue roof in place.
7. Fit axles ( 2mm dia.), wheels & tyres of your choice. An insert ( free of charge in U.K) to fit Kingfisher Models AEC rear wheels is available by E-mailing
tonyheselden@btinternet.com.
8. Add any exterior detail required.
7mm Green Line &/or London Transport Fleet names & RF fleet nos are available from Fox Transfers.
RF bus drawing (B1) available from Terry Russell Trams.
NOTE. Roundel & window vents are made of a rather brittle thin material ,so handle very carefully.. ( extra window vents have been provided in case of breakages).