Smooth Fine Detail Plastic


Bandai Lando Falcon Corridors and Details, 1:144
Made by
Print With Shapeways
 Choose Your Material
 Choose your color and finish
$22.86
Have a question about this product?
contact the designerYou must be logged in and verified to contact the designer.
Product Description
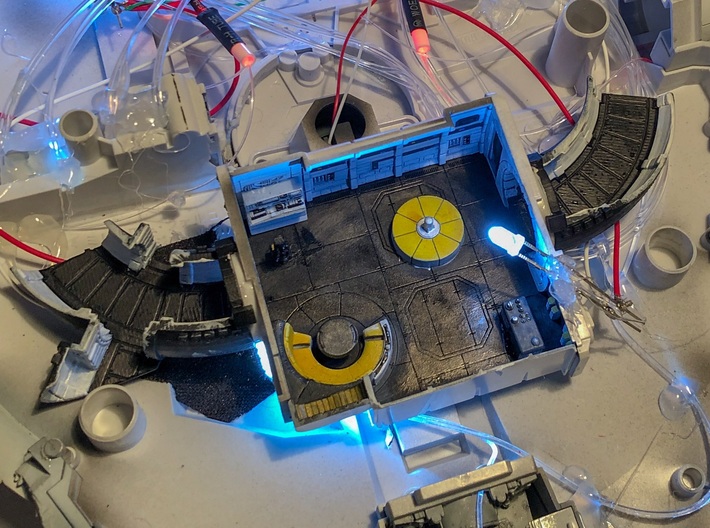
So you’ve got one of Bandai’s Lando Falcon kits. It’s pretty great, and even includes some internal detailing so you can see the interior hold through a tiny hole in the top.
Awesome! The Dejarik table and couch, the bar... but wait! What about the internal corridors? Nope. Just blank plastic discs covering the doorways. And why does the navigation console chair look like some sort of weird throne? Argh.
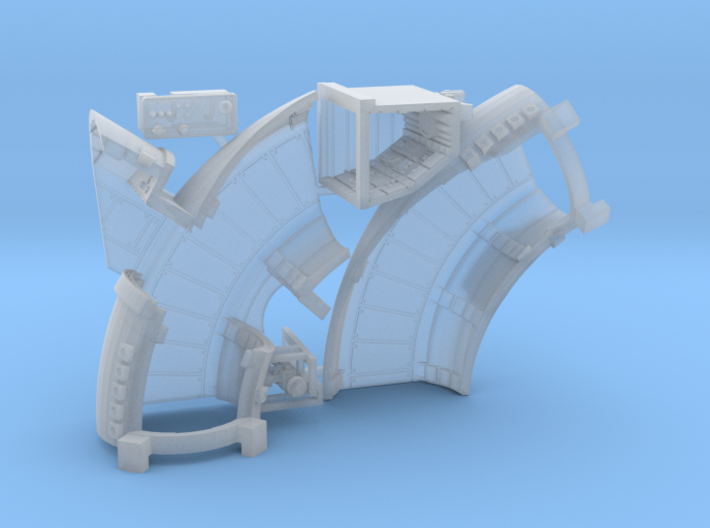
Well here are corridors, the kissing booth/circuit bay, the bar, the nav chair, and L3-37 droid for improving your Lando-era Falcon!
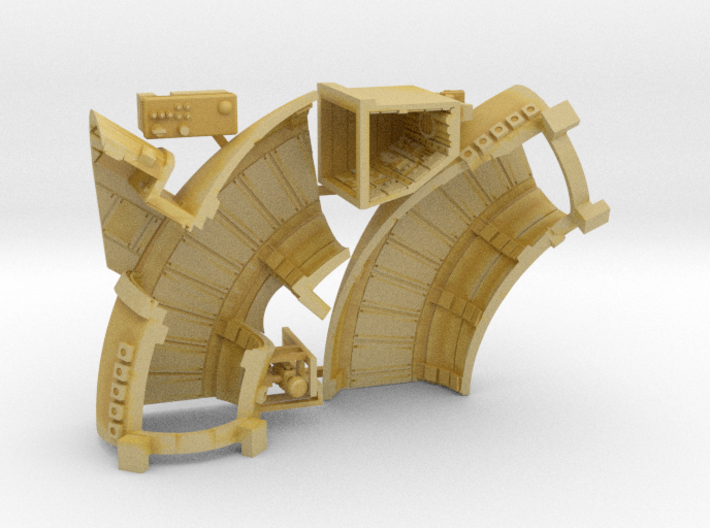
The hallways
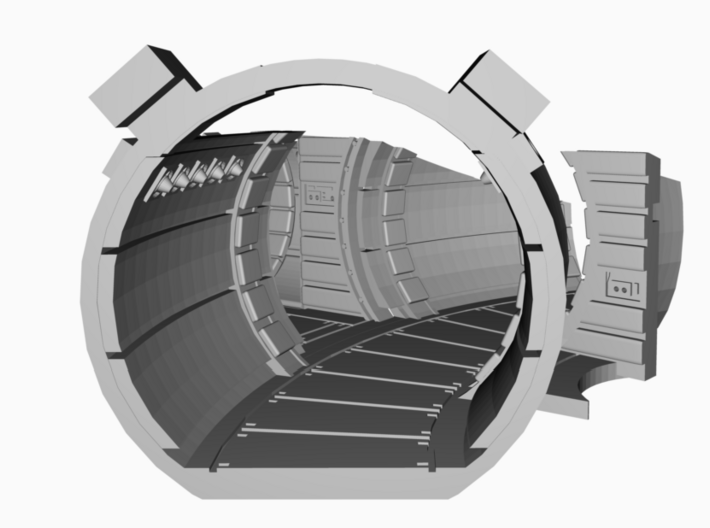
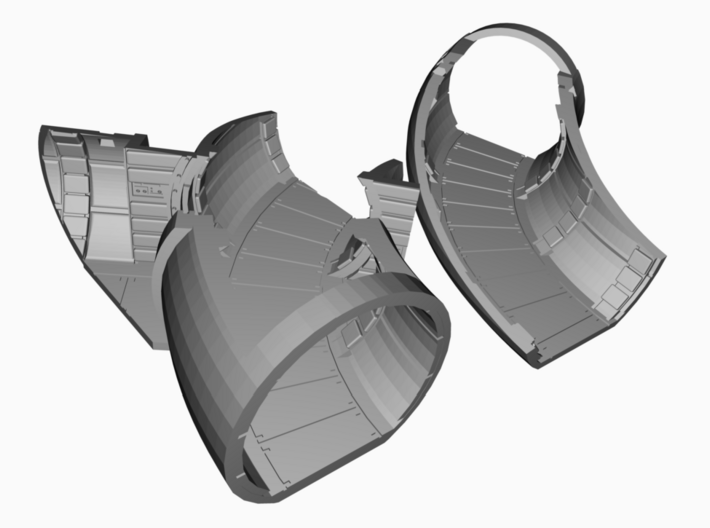
To start, some perfectly detailed interior corridors! Just cut out the cover plates from the Bandai doorways, carefully trim out around the doorway, and glue these components in place. I would recommend putting some putty on the saucer bottom for resting the corridor while you're test fitting, and then maybe cutting a balsa wood block or something similar for it to rest on permanently. The corridor end that glues to the Bandai part also has a pair of blocks. These fit loosely rather than snugly, so you can put blobs of epoxy on them to secure the top of the corridor once the piece is glued in place.
These parts are designed to include all the parts of the corridor that are visible from the top opening. (though to be honest there are a bunch of areas like the corridor lights and the cockpit tunnel that aren’t visible at all but which I included for the heck of it!)
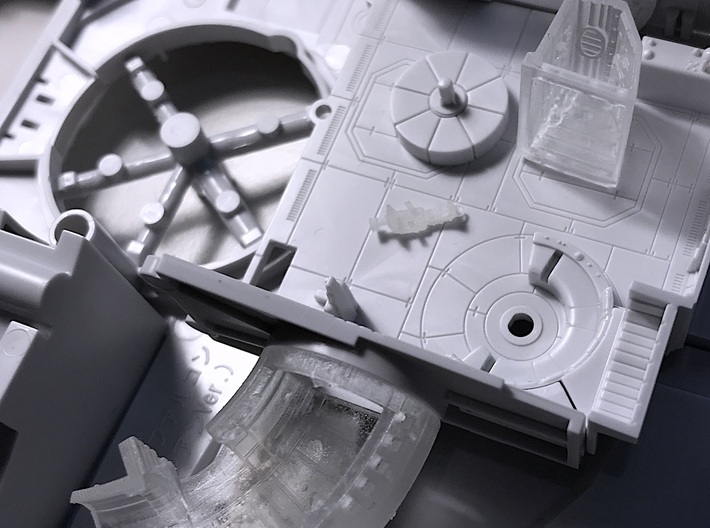
The gotcha
There is one much-lamented problem when it comes to detailing the interior of a Falcon model. And that is that the interior sets for the ship could never have fit inside the exterior sets!
So basically the interior corridors of these 3D prints don’t quite line up with exterior features. Because they can’t. This is most noticeable in terms of the side corridor that leads off to the cockpit. The only way around that would have been to rescale and angle the interior parts, and then it wouldn’t have resembled the interior sets as they appeared in the movie.
This is also why the parts are cut off at odd angles, to clear internal parts of the Bandai model, and to avoid the waste of printing parts not visible from the top. Note that, like Bandai, I didn't model the floor lights in the corridor as through-hole components. Sadly it's not possible to do so and have a printable model. I could have made oversized holes, but those would have looked pretty bad.
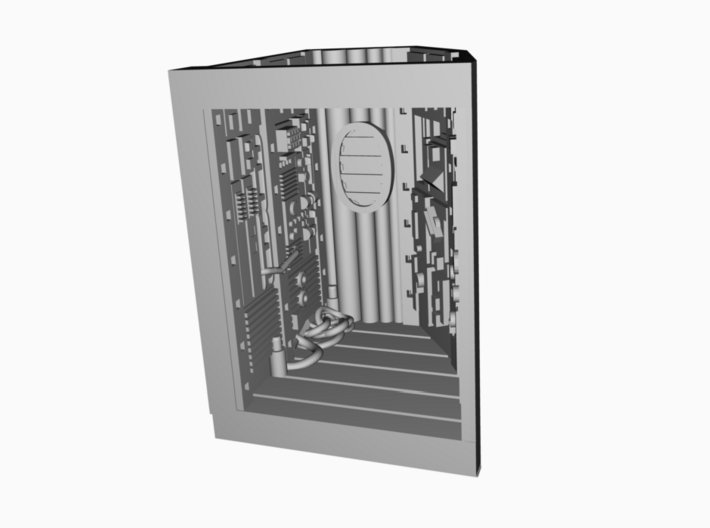
The kissing booth/circuit bay
For extra fun I’ve designed a hyperdetailed interior for the hold’s storage cupboard, often known as the circuit bay (also known as Empire’s “kissing booth”, since it's where Han and Leia first got snuggly in Episode V).
You can cut out the closed door in the Bandai part, and install this piece behind it if you like. The details on the back and left walls are based on behind-the-scenes promo footage, which show what that part of the set looked like. This includes the unruly piles of hoses or electrical cables or whatever they are on the floor. Note that I added floor panels, though the set didn't have them, to give a bit more detail as it's one of the few areas clearly visible from above.
The right-hand side wall is based mostly on the set design for the Empire/Episode V set, since I don't have any photo references as to what it looked like in Solo. However, you can't see this section from the upper saucer hole anyway.
Nav chair
I've included a more accurate navigation console chair. It's really tiny and fragile, so be careful cutting it off the sprue! (though leave the cylindrical sprue intact for ease of installation)
It also isn't as wide as the Bandai model, and so you won't be able to fit one of the seated figures easily. It's also frankly a bit awkward to install as you'll find that there'll be a hole left when you cut off the existing Bandai throne. This will need to be filled, and then drilled out for the protruding cylindrical piece of sprue.
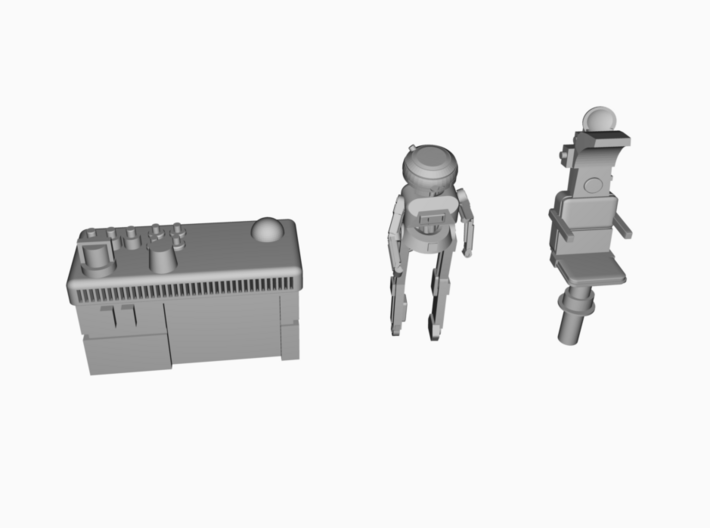
The bar
The included bar is actually pretty good, and includes details like the top edge notches which I can't reproduce to the same resolution using Shapeways 3D printing technology. However, my bar component has recesses in the front like the set piece did, plus I've added two curved internal tunnels to feed 0.25mm fibre optics for optional lighting.
L3-37
Finally, I've included an L3-37 droid figurine. Start your own droid revolution with Star Wars' feistiest robot! She has an arm raised to operate a control panel or whatever. The raised arm is also because that gives you three points to glue the model down. Note that L3 is a very difficult character to model in 1:144 scale, because of the fineness of details. I've had to enlarge parts of the model considerably just to make her printable. Even so, she's extremely fragile and so I've had to enclose the character in a cage for protection during printing and shipping. You'll need to snip the connecting sprue extremely carefully.
Please read the following if you're interested in this item.
These accurizing parts are not mass-market commercial products. I made them for my own use, and have put them here in case they're of interest to someone else. Possibly you, since you’re reading this.
These are components for the serious model maker who wants to build a more accurate miniature. They require finishing. If you don't want to trim, file, sand, and glue, then these aren't the parts you're looking for!
The parts are tiny, and easily broken. They push the limits of today's 3D printers. The detail in the digital previews is all there, but it won't always be visible at the miniscule sizes that this scale requires!
Awesome! The Dejarik table and couch, the bar... but wait! What about the internal corridors? Nope. Just blank plastic discs covering the doorways. And why does the navigation console chair look like some sort of weird throne? Argh.
Well here are corridors, the kissing booth/circuit bay, the bar, the nav chair, and L3-37 droid for improving your Lando-era Falcon!
The hallways
To start, some perfectly detailed interior corridors! Just cut out the cover plates from the Bandai doorways, carefully trim out around the doorway, and glue these components in place. I would recommend putting some putty on the saucer bottom for resting the corridor while you're test fitting, and then maybe cutting a balsa wood block or something similar for it to rest on permanently. The corridor end that glues to the Bandai part also has a pair of blocks. These fit loosely rather than snugly, so you can put blobs of epoxy on them to secure the top of the corridor once the piece is glued in place.
These parts are designed to include all the parts of the corridor that are visible from the top opening. (though to be honest there are a bunch of areas like the corridor lights and the cockpit tunnel that aren’t visible at all but which I included for the heck of it!)
The gotcha
There is one much-lamented problem when it comes to detailing the interior of a Falcon model. And that is that the interior sets for the ship could never have fit inside the exterior sets!
So basically the interior corridors of these 3D prints don’t quite line up with exterior features. Because they can’t. This is most noticeable in terms of the side corridor that leads off to the cockpit. The only way around that would have been to rescale and angle the interior parts, and then it wouldn’t have resembled the interior sets as they appeared in the movie.
This is also why the parts are cut off at odd angles, to clear internal parts of the Bandai model, and to avoid the waste of printing parts not visible from the top. Note that, like Bandai, I didn't model the floor lights in the corridor as through-hole components. Sadly it's not possible to do so and have a printable model. I could have made oversized holes, but those would have looked pretty bad.
The kissing booth/circuit bay
For extra fun I’ve designed a hyperdetailed interior for the hold’s storage cupboard, often known as the circuit bay (also known as Empire’s “kissing booth”, since it's where Han and Leia first got snuggly in Episode V).
You can cut out the closed door in the Bandai part, and install this piece behind it if you like. The details on the back and left walls are based on behind-the-scenes promo footage, which show what that part of the set looked like. This includes the unruly piles of hoses or electrical cables or whatever they are on the floor. Note that I added floor panels, though the set didn't have them, to give a bit more detail as it's one of the few areas clearly visible from above.
The right-hand side wall is based mostly on the set design for the Empire/Episode V set, since I don't have any photo references as to what it looked like in Solo. However, you can't see this section from the upper saucer hole anyway.
Nav chair
I've included a more accurate navigation console chair. It's really tiny and fragile, so be careful cutting it off the sprue! (though leave the cylindrical sprue intact for ease of installation)
It also isn't as wide as the Bandai model, and so you won't be able to fit one of the seated figures easily. It's also frankly a bit awkward to install as you'll find that there'll be a hole left when you cut off the existing Bandai throne. This will need to be filled, and then drilled out for the protruding cylindrical piece of sprue.
The bar
The included bar is actually pretty good, and includes details like the top edge notches which I can't reproduce to the same resolution using Shapeways 3D printing technology. However, my bar component has recesses in the front like the set piece did, plus I've added two curved internal tunnels to feed 0.25mm fibre optics for optional lighting.
L3-37
Finally, I've included an L3-37 droid figurine. Start your own droid revolution with Star Wars' feistiest robot! She has an arm raised to operate a control panel or whatever. The raised arm is also because that gives you three points to glue the model down. Note that L3 is a very difficult character to model in 1:144 scale, because of the fineness of details. I've had to enlarge parts of the model considerably just to make her printable. Even so, she's extremely fragile and so I've had to enclose the character in a cage for protection during printing and shipping. You'll need to snip the connecting sprue extremely carefully.
Please read the following if you're interested in this item.
These accurizing parts are not mass-market commercial products. I made them for my own use, and have put them here in case they're of interest to someone else. Possibly you, since you’re reading this.
These are components for the serious model maker who wants to build a more accurate miniature. They require finishing. If you don't want to trim, file, sand, and glue, then these aren't the parts you're looking for!
The parts are tiny, and easily broken. They push the limits of today's 3D printers. The detail in the digital previews is all there, but it won't always be visible at the miniscule sizes that this scale requires!
Details
What's in the box:
Solo Corridors

Dimensions:
Success Rate:
First To try.
What's this?
Rating:
Mature audiences only.


