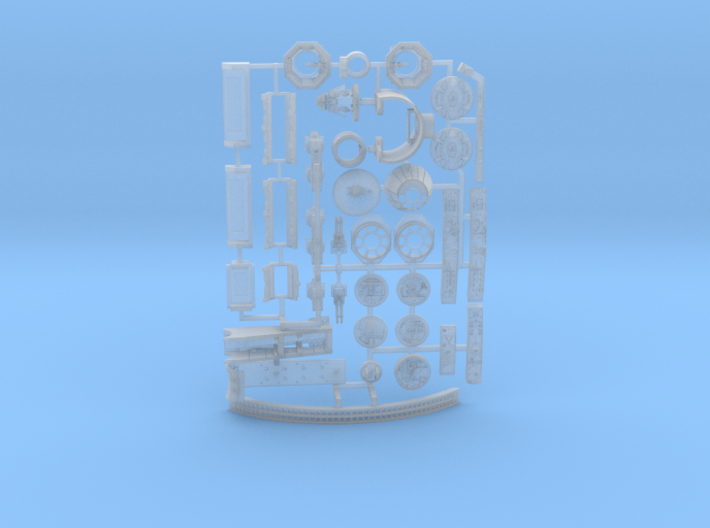
Smooth Fine Detail Plastic


Bandai Falcon 1/350 ANH Complete
Made by
Print With Shapeways
 Choose Your Material
 Choose your color and finish
$41.06
Have a question about this product?
contact the designerYou must be logged in and verified to contact the designer.
Product Description
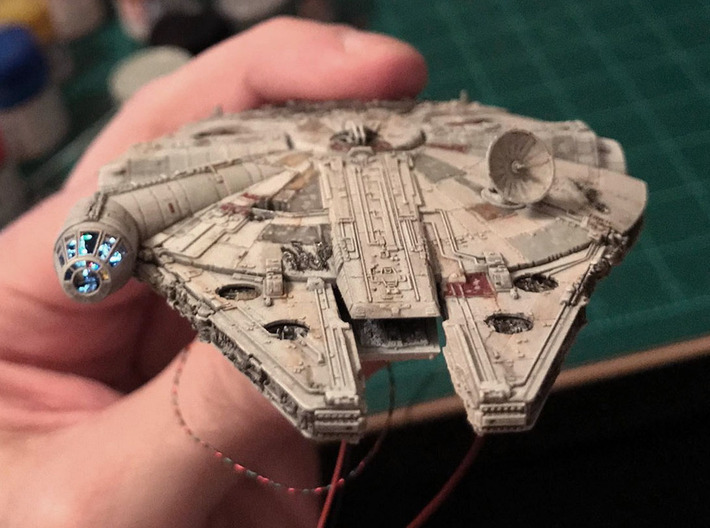
Take your Bandai 1:350 Falcon model to levels of detail nobody would think possible! And here is the full meal deal – every piece I've made for the 1:350 Bandai Falcon. Save money with this package.
Bandai 1:350 Falcon: the Outside Bits.
The Bandai 1:350 Vehicle 006 Kit is a pretty decent representation of the ANH (1977) Falcon in absolute miniature. But there are a couple things wrong with it. First, it has solid windows rather than open ones. And a few parts are TFA-style, rather than consistently ANH style.
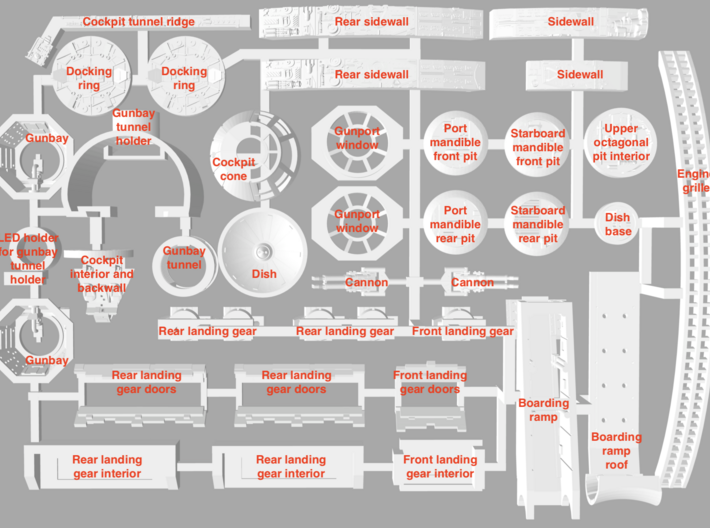
This set aims to fix those problems, and includes the cockpit cone, the gunport windows, the radar dish, a choice of engine grilles, the dish mount, the curved rear sidewalls, the docking rings, replacement top circular maintenance pits, and other goodies.
Cockpit cone.
This is a direct replacement, and gives you a nice open look. Though it will take some cutting and filing to fit (what they call "fettling" in the UK), and will need epoxy or superglue/ACC. Because of the way 3D printing works, you will probably want to fill the stairstep lines and sand them carefully.
The window bars have been thickened compared to the prototype to make them a bit sturdier and printable. The subtle scalloping on the front surface is present, but hard to see because of the print resolution problem. It's easy to fix that with a flat file.
No provisions are made for glazing since the original ILM models lacked glazing, model glass always looks unconvincing, adding "glass" will emphasize how thick the bars are, and finally glazing makes it harder to see a lovingly detailed interior. The cone is compatible with the interior details.
Docking rings.
The Bandai 350 docking rings aren't very screen-accurate since they taper in too much and, oddly, have TFA detailing. It would have been a lot of work to make new parts with the correct profile, so I just fixed the biggest problem: I made new disc surfaces that don't have the extraneous TFA pipework. You will need to drill out the ring faces and file them carefully with a small half-round file to get these replacements to fit.
Gunport windows.
The solid gunport windows are tricky to replace since the prototype ones have such slender bars. I had to make thicker bars to get something printable, which does unfortunately limit views of the interior. No glazing, as above. The windows are designed to sit flush with the surface, unlike the incorrectly sunken Bandai ones. You will need to carefully drill out the existing solid windows to fit these ones. It's hard to get the hole perfectly round, so this may require a bit of putty to fill any gaps.
Dish.
Here's a replacement radar dish, since the Bandai one is a bit overscaled and unconvincing. It's made in two parts so you can glue it together at whatever angle works for you. I suppose in theory you could drill tiny holes and add wires and make it adjustable, but it wouldn't be easy.
Replacement maintenance pits.
The round maintenance pits are filled with TFA pipes and details. So I've included four replacement pits. I didn't make replacements for the underside four round pits, though, as you have to stop somewhere!
To install these pits you'll need to slice off the existing ones from the lower mandible section and glue them in. Not difficult, but fiddly.
I've also made a replacement upper octagonal pit, which is a tremendous amount of work to install and probably not worth the hassle! But this version is slightly more screen accurate than the Bandai one.
Engine grilles.
The engine grille has a grid that approximates the SE version of the engine. It does not have the same number of openings as in the film, for the simple reason that the Shapeways 3D printers can't produce fine enough bars. Sorry about that.
Curved sidewalls.
The Bandai straight sidewalls are correct and have the OT 1977-era details. Awesome! But for some reason they didn't bother to correct the curved sidewalls, which have the TFA detailing. So I've made proper versions. Note, however, that they are really fiddly to fit properly - this will take some filing and sanding and gluing.
Cannons.
The 1:350 quad cannons are a bit too TFA looking for my tastes. I've supplied slightly more screen accurate versions, but since they're so tiny they had to be really oversized. I also had to put connector strips to join the four barrels together to avoid breakage.
Cockpit tunnel ridge.
Finally, this is the most difficult part to install and many people may not want to bother. And that's the ridge that runs along the cockpit tunnel on the Bandai 1:350 and 1:144 models is totally wrong. The details are raised too high, and are incorrect. (the Bandai 1:72 looks to fix this)
So I've made somewhat more accurate ridge detailing, but it's very very difficult to cut the top of the tunnel and fit this part without making a mess. Only take this if you're really obsessed with accuracy and have the skills, patience, and time to do it, is my advice!
Bandai 1:350 Falcon: the Inside Bits.
Cockpit interior.
I've built the boat-like internal section which fits neatly into the matching cockpit cone that I've built. The "boat" contains a reasonably accurate Falcon dashboard console, two pilots' chairs, and two navigator chairs. Attached to the back of the boat is the circular backwall.
All four seats and the dashboard have additional bracing at the base. This isn't screen-accurate at all, but does mean that the seats are very slightly tougher to break off. An earlier draft of this model had seat posts that were as close as possible to scale, but that meant that the seats snapped off at the brush of a finger. Oh well. The rear seat armrests are also much larger than they should be simply because my test prints kept failing when they had closer-to-scale armrests.
There are no figures, I'm afraid. It's hard enough to get the seats to print at this scale. I couldn't make printable figures that looked any good, as necks, arms and legs are just too thin!
The dash console has a number of small holes for 0.25mm fibre optic. It also has a hollow on the underside for lighting - there's just enough space for a very small (eg: 0402) wired SMD LED. You'd need to feed the wires through the underside of the boat, and out. Unfortunately there's no easy way to illuminate the projecting wings of the dash console. You could glue an 0201 SMD LED (0.65 x 0.35 x 0.2mm!) under there if you really wanted, with conductive paint to power it. But that's pretty microscopic kind of stuff there.
Cockpit backwall.
The backwall will require a lot of cutting of the original kit to fit. The Bandai cockpit tube contains a lot of junk that'll need to be removed. There are covers over the ends and internal tubes to hold the halves together. The backwall has four horizontal openings to simulate the backlit white plastic strips (use Microscale Micro Kristal Klear glazing, or else glue translucent material behind them or into them), and a bunch of tiny square holes for light positions. The model doesn't have any surface detailing, mostly since you can't actually see it at all once it's installed, and also because the design is intended to be backlit.
The lights aren't screen-accurate, but they can't be since they'd be unprintably small if thet were. These large (relative to the prototype) lights are very much a compromise after a lot of test prints.
They'll probably be filled with 3D printing support wax when you receive the product. Run hot water over the part and gently poke an ultrafine wire through the holes to clean them up. Dabs of clear yellow, red, and blue paint will let the holes light up in the proper colours.
The door is permanently closed, even though it was open in ANH, because otherwise it'd be hard to install lighting. And speaking of lights, I've included a cylindrical bracket that you can glue behind the backwall. This is designed to hold a white 3mm LED.
I did not include the side shelf or the interior cockpit sidewalls. This is because they'd be hard to see and easily broken. And, in the case of the sidewalls, very difficult to illuminate properly. The interior of the cockpit tube is fairly thick plastic in the Bandai kit, so it'd also have to be cut or filed back to make room. As it is, paint the interior black and you'll be good. People will be astounded that a cockpit so small has detail anyway!
Gunbay interiors.
It's kind of silly, making these interiors! First, they're insanely small. And second, the bars on the gunbay windows had to be pretty big to make them reliably printable. But hey - if we're going for a completist approach, then let's go all out!
The gunbays are both equipped with gunner seats, the octagonal walls with holes for lights, and a connecting ladder tunnel. Now, the tunnel is famously problematic, since the interior sets could never fit into the exterior set. So we've had to fake it here, with this little short section of tunnel. The tunnel also has concentric cutouts running the length of the tube, so that when lit it vaguely resembles the look of the movie. I've also built a cylindrical tube shaped bracket that can accommodate a white 3mm LED, so you can light it all up. Unfortunately the tube doesn't do a very good job of lighting the gunbay walls themselves, so you'll probably need to drill out the holes for 0.25mm fibre optics if you want that look.
As above, you'll have to cut a fair bit of Bandai plastic out to get these parts to fit.
Bandai 1:350 Falcon. Set 3: Ramp and Landing Gear.
You get the internal boarding ramp and back corridor. And you get 3 sets of landing gear with 5 feet, since the Bandai 006 model represents the original 1977 model. (all subsequent versions of the ship have featured 5 sets of landing gear with 7 feet) Each set of landing gear has simulated door flaps and an internal bracket for installation.
Installation Note.
This is one of the more complex accurizing sets I've produced, in terms of the amount of work required to install. Because the 1:350 kit is designed to be shown in-flight only, it doesn't have openings for either the ramp or the landing gear, the way its 1:144 sibling does.
So to install these parts you have to cut precise rectangular openings in the lower saucer. I'd recommend cutting a slightly smaller hole, and carefully filing and cutting the opening to fit the parts. Then you can glue the parts in place and patch with putty if required.
Ramp.
The ramp is fixed in a down position - the model is just too tiny to engineer a reliable moving ramp - and includes the visible sections of corridor. The ramp roof is equipped with holes for fibre optic lighting, and is a separate part in order to facilitate painting somewhat. The back wall of the internal corridor is included, with a hole for a fibre light. Note that the middle is a bit compressed. Partly to keep it simple and partly to clear the gunbays. However it's really hard to see up the tiny ramp, so it isn't too noticeable. But notice that I modelled the corridor correctly - it's a curved toroid corridor, which means the two rows of wall cushions curve outwards the way they should! How's that for insane attention to detail?
The ramp is NOT easy to install - you need to cut a perfect rectangular opening in the underside, glue in the ramp, and putty any slight gaps. The struts are a bit oversized, but unfortunately necessarily so to be printable and not too fragile. The ramp is constructed in two sections to facilitate painting of the interior.
The top of the ramp includes a very short segment of the internal corridor, including the famous Falcon hall cushions. There are small holes on the corridor wall and the ramp ceiling for fibres, so you can install lighting if you want.
Landing gear with doors and brackets.
As noted, the 1977 Falcon has three landing gear boxes. You'll need to cut the Bandai gear boxes to install the internal support brackets from the inside. You can then install the landing gear from below, gluing them to the box. There is also a rectangular frame with the gear bay doors in a fixed open position. As with the ramp, this is not an easy modification to make, as it's such a tiny model.
All components are slightly overscale, as they'd be unprintably small if they were correct sizes! The gear rings are not pierced for the same reason. In fact, the legs are a little simplified because the Shapeways printing process can't actually render detail as sharply and precisely as Bandai's injection moulding process.
The legs are partly hollow so you can install a length of 0.5mm brass wire to improve the strength of the part. This makes a big difference, since the legs are pretty vulnerable to lateral pressure and will simply snap if bumped. To add a wire you'll need to use a tiny 0.6mm drill, and carefully and slowly drill out the landing gear legs by hand. I put a pilot hole at the top to simplify this process. I couldn't, however, make the legs hollow all the way down as it would have caused problems with printing.
Doors/flaps.
Next, there are the landing gear hatch doors. These are designed to represent the film set's doors, though the detailwork is a bit of an approximation as the available photographic documentation is a bit hard to come by. The doors are formed with rectangular brackets that fit into the opening, and so they need to be fitted before you glue the legs into place!
One cool aspect to this design, incidentally, is that the doors conceal the long edges of the rectangular hole, so if your hole in the saucer isn't perfect they'll be partly covered up. The frame doesn't help conceal flaws in the short edge of the hole, though.
Obviously there are no landing gear cables supplied with this set - for that you could use the thinnest magnet wire you can find, painted black, hanging in loops.
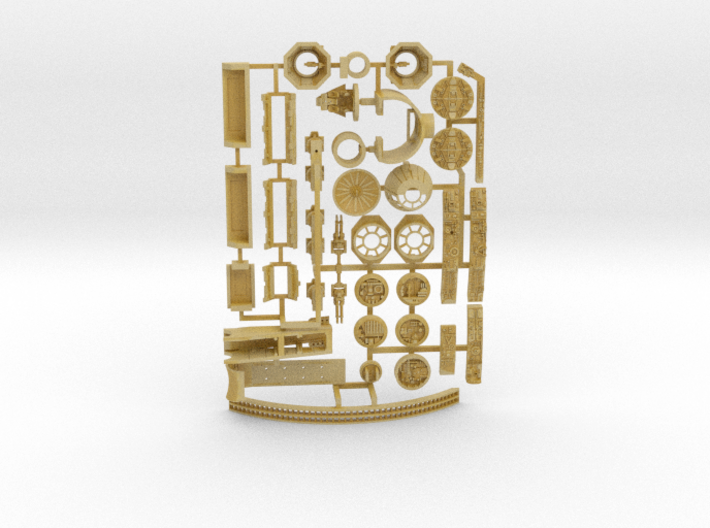
November 2019 update: Shapeways' changing algorithms affect pricing quite a bit. But by sprueing all the parts and rearranging them I was able to control the price. However this does mean you have to cut the parts off each sprue/runner very carefully! This is brittle 3D printed acrylic here. Use flush-cut sprue cutters - side-shear cutters tend to break things.
Bandai 1:350 Falcon: the Outside Bits.
The Bandai 1:350 Vehicle 006 Kit is a pretty decent representation of the ANH (1977) Falcon in absolute miniature. But there are a couple things wrong with it. First, it has solid windows rather than open ones. And a few parts are TFA-style, rather than consistently ANH style.
This set aims to fix those problems, and includes the cockpit cone, the gunport windows, the radar dish, a choice of engine grilles, the dish mount, the curved rear sidewalls, the docking rings, replacement top circular maintenance pits, and other goodies.
Cockpit cone.
This is a direct replacement, and gives you a nice open look. Though it will take some cutting and filing to fit (what they call "fettling" in the UK), and will need epoxy or superglue/ACC. Because of the way 3D printing works, you will probably want to fill the stairstep lines and sand them carefully.
The window bars have been thickened compared to the prototype to make them a bit sturdier and printable. The subtle scalloping on the front surface is present, but hard to see because of the print resolution problem. It's easy to fix that with a flat file.
No provisions are made for glazing since the original ILM models lacked glazing, model glass always looks unconvincing, adding "glass" will emphasize how thick the bars are, and finally glazing makes it harder to see a lovingly detailed interior. The cone is compatible with the interior details.
Docking rings.
The Bandai 350 docking rings aren't very screen-accurate since they taper in too much and, oddly, have TFA detailing. It would have been a lot of work to make new parts with the correct profile, so I just fixed the biggest problem: I made new disc surfaces that don't have the extraneous TFA pipework. You will need to drill out the ring faces and file them carefully with a small half-round file to get these replacements to fit.
Gunport windows.
The solid gunport windows are tricky to replace since the prototype ones have such slender bars. I had to make thicker bars to get something printable, which does unfortunately limit views of the interior. No glazing, as above. The windows are designed to sit flush with the surface, unlike the incorrectly sunken Bandai ones. You will need to carefully drill out the existing solid windows to fit these ones. It's hard to get the hole perfectly round, so this may require a bit of putty to fill any gaps.
Dish.
Here's a replacement radar dish, since the Bandai one is a bit overscaled and unconvincing. It's made in two parts so you can glue it together at whatever angle works for you. I suppose in theory you could drill tiny holes and add wires and make it adjustable, but it wouldn't be easy.
Replacement maintenance pits.
The round maintenance pits are filled with TFA pipes and details. So I've included four replacement pits. I didn't make replacements for the underside four round pits, though, as you have to stop somewhere!
To install these pits you'll need to slice off the existing ones from the lower mandible section and glue them in. Not difficult, but fiddly.
I've also made a replacement upper octagonal pit, which is a tremendous amount of work to install and probably not worth the hassle! But this version is slightly more screen accurate than the Bandai one.
Engine grilles.
The engine grille has a grid that approximates the SE version of the engine. It does not have the same number of openings as in the film, for the simple reason that the Shapeways 3D printers can't produce fine enough bars. Sorry about that.
Curved sidewalls.
The Bandai straight sidewalls are correct and have the OT 1977-era details. Awesome! But for some reason they didn't bother to correct the curved sidewalls, which have the TFA detailing. So I've made proper versions. Note, however, that they are really fiddly to fit properly - this will take some filing and sanding and gluing.
Cannons.
The 1:350 quad cannons are a bit too TFA looking for my tastes. I've supplied slightly more screen accurate versions, but since they're so tiny they had to be really oversized. I also had to put connector strips to join the four barrels together to avoid breakage.
Cockpit tunnel ridge.
Finally, this is the most difficult part to install and many people may not want to bother. And that's the ridge that runs along the cockpit tunnel on the Bandai 1:350 and 1:144 models is totally wrong. The details are raised too high, and are incorrect. (the Bandai 1:72 looks to fix this)
So I've made somewhat more accurate ridge detailing, but it's very very difficult to cut the top of the tunnel and fit this part without making a mess. Only take this if you're really obsessed with accuracy and have the skills, patience, and time to do it, is my advice!
Bandai 1:350 Falcon: the Inside Bits.
Cockpit interior.
I've built the boat-like internal section which fits neatly into the matching cockpit cone that I've built. The "boat" contains a reasonably accurate Falcon dashboard console, two pilots' chairs, and two navigator chairs. Attached to the back of the boat is the circular backwall.
All four seats and the dashboard have additional bracing at the base. This isn't screen-accurate at all, but does mean that the seats are very slightly tougher to break off. An earlier draft of this model had seat posts that were as close as possible to scale, but that meant that the seats snapped off at the brush of a finger. Oh well. The rear seat armrests are also much larger than they should be simply because my test prints kept failing when they had closer-to-scale armrests.
There are no figures, I'm afraid. It's hard enough to get the seats to print at this scale. I couldn't make printable figures that looked any good, as necks, arms and legs are just too thin!
The dash console has a number of small holes for 0.25mm fibre optic. It also has a hollow on the underside for lighting - there's just enough space for a very small (eg: 0402) wired SMD LED. You'd need to feed the wires through the underside of the boat, and out. Unfortunately there's no easy way to illuminate the projecting wings of the dash console. You could glue an 0201 SMD LED (0.65 x 0.35 x 0.2mm!) under there if you really wanted, with conductive paint to power it. But that's pretty microscopic kind of stuff there.
Cockpit backwall.
The backwall will require a lot of cutting of the original kit to fit. The Bandai cockpit tube contains a lot of junk that'll need to be removed. There are covers over the ends and internal tubes to hold the halves together. The backwall has four horizontal openings to simulate the backlit white plastic strips (use Microscale Micro Kristal Klear glazing, or else glue translucent material behind them or into them), and a bunch of tiny square holes for light positions. The model doesn't have any surface detailing, mostly since you can't actually see it at all once it's installed, and also because the design is intended to be backlit.
The lights aren't screen-accurate, but they can't be since they'd be unprintably small if thet were. These large (relative to the prototype) lights are very much a compromise after a lot of test prints.
They'll probably be filled with 3D printing support wax when you receive the product. Run hot water over the part and gently poke an ultrafine wire through the holes to clean them up. Dabs of clear yellow, red, and blue paint will let the holes light up in the proper colours.
The door is permanently closed, even though it was open in ANH, because otherwise it'd be hard to install lighting. And speaking of lights, I've included a cylindrical bracket that you can glue behind the backwall. This is designed to hold a white 3mm LED.
I did not include the side shelf or the interior cockpit sidewalls. This is because they'd be hard to see and easily broken. And, in the case of the sidewalls, very difficult to illuminate properly. The interior of the cockpit tube is fairly thick plastic in the Bandai kit, so it'd also have to be cut or filed back to make room. As it is, paint the interior black and you'll be good. People will be astounded that a cockpit so small has detail anyway!
Gunbay interiors.
It's kind of silly, making these interiors! First, they're insanely small. And second, the bars on the gunbay windows had to be pretty big to make them reliably printable. But hey - if we're going for a completist approach, then let's go all out!
The gunbays are both equipped with gunner seats, the octagonal walls with holes for lights, and a connecting ladder tunnel. Now, the tunnel is famously problematic, since the interior sets could never fit into the exterior set. So we've had to fake it here, with this little short section of tunnel. The tunnel also has concentric cutouts running the length of the tube, so that when lit it vaguely resembles the look of the movie. I've also built a cylindrical tube shaped bracket that can accommodate a white 3mm LED, so you can light it all up. Unfortunately the tube doesn't do a very good job of lighting the gunbay walls themselves, so you'll probably need to drill out the holes for 0.25mm fibre optics if you want that look.
As above, you'll have to cut a fair bit of Bandai plastic out to get these parts to fit.
Bandai 1:350 Falcon. Set 3: Ramp and Landing Gear.
You get the internal boarding ramp and back corridor. And you get 3 sets of landing gear with 5 feet, since the Bandai 006 model represents the original 1977 model. (all subsequent versions of the ship have featured 5 sets of landing gear with 7 feet) Each set of landing gear has simulated door flaps and an internal bracket for installation.
Installation Note.
This is one of the more complex accurizing sets I've produced, in terms of the amount of work required to install. Because the 1:350 kit is designed to be shown in-flight only, it doesn't have openings for either the ramp or the landing gear, the way its 1:144 sibling does.
So to install these parts you have to cut precise rectangular openings in the lower saucer. I'd recommend cutting a slightly smaller hole, and carefully filing and cutting the opening to fit the parts. Then you can glue the parts in place and patch with putty if required.
Ramp.
The ramp is fixed in a down position - the model is just too tiny to engineer a reliable moving ramp - and includes the visible sections of corridor. The ramp roof is equipped with holes for fibre optic lighting, and is a separate part in order to facilitate painting somewhat. The back wall of the internal corridor is included, with a hole for a fibre light. Note that the middle is a bit compressed. Partly to keep it simple and partly to clear the gunbays. However it's really hard to see up the tiny ramp, so it isn't too noticeable. But notice that I modelled the corridor correctly - it's a curved toroid corridor, which means the two rows of wall cushions curve outwards the way they should! How's that for insane attention to detail?
The ramp is NOT easy to install - you need to cut a perfect rectangular opening in the underside, glue in the ramp, and putty any slight gaps. The struts are a bit oversized, but unfortunately necessarily so to be printable and not too fragile. The ramp is constructed in two sections to facilitate painting of the interior.
The top of the ramp includes a very short segment of the internal corridor, including the famous Falcon hall cushions. There are small holes on the corridor wall and the ramp ceiling for fibres, so you can install lighting if you want.
Landing gear with doors and brackets.
As noted, the 1977 Falcon has three landing gear boxes. You'll need to cut the Bandai gear boxes to install the internal support brackets from the inside. You can then install the landing gear from below, gluing them to the box. There is also a rectangular frame with the gear bay doors in a fixed open position. As with the ramp, this is not an easy modification to make, as it's such a tiny model.
All components are slightly overscale, as they'd be unprintably small if they were correct sizes! The gear rings are not pierced for the same reason. In fact, the legs are a little simplified because the Shapeways printing process can't actually render detail as sharply and precisely as Bandai's injection moulding process.
The legs are partly hollow so you can install a length of 0.5mm brass wire to improve the strength of the part. This makes a big difference, since the legs are pretty vulnerable to lateral pressure and will simply snap if bumped. To add a wire you'll need to use a tiny 0.6mm drill, and carefully and slowly drill out the landing gear legs by hand. I put a pilot hole at the top to simplify this process. I couldn't, however, make the legs hollow all the way down as it would have caused problems with printing.
Doors/flaps.
Next, there are the landing gear hatch doors. These are designed to represent the film set's doors, though the detailwork is a bit of an approximation as the available photographic documentation is a bit hard to come by. The doors are formed with rectangular brackets that fit into the opening, and so they need to be fitted before you glue the legs into place!
One cool aspect to this design, incidentally, is that the doors conceal the long edges of the rectangular hole, so if your hole in the saucer isn't perfect they'll be partly covered up. The frame doesn't help conceal flaws in the short edge of the hole, though.
Obviously there are no landing gear cables supplied with this set - for that you could use the thinnest magnet wire you can find, painted black, hanging in loops.
November 2019 update: Shapeways' changing algorithms affect pricing quite a bit. But by sprueing all the parts and rearranging them I was able to control the price. However this does mean you have to cut the parts off each sprue/runner very carefully! This is brittle 3D printed acrylic here. Use flush-cut sprue cutters - side-shear cutters tend to break things.
Details
What's in the box:
1:350 Falcon ANH Complete

Dimensions:
Success Rate:
First To try.
What's this?
Rating:
Mature audiences only.


