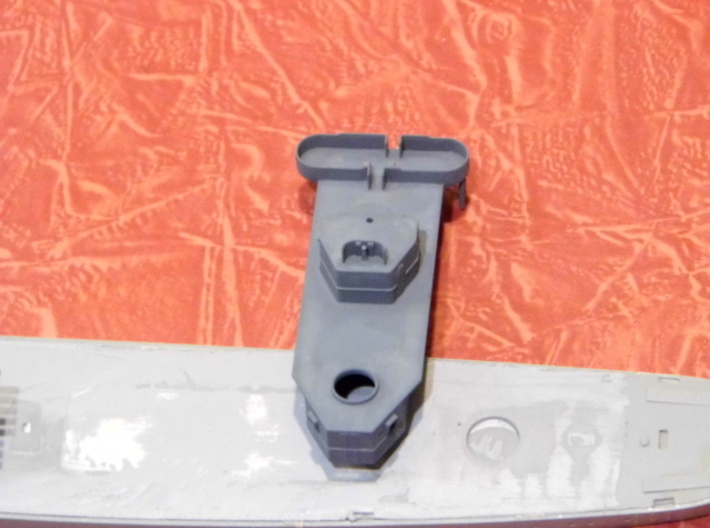
An aft view.


Product Description
This is an after deckhouse to convert your Dragon 1/350th early war Benson model into either the USS Hughes or the USS Russell circa December, 1941, through the Battle of Midway. It may work for other ships of the class refitted at the same time and yard, but as always check your references. To make the Russell, the tiny ‘ears” or extensions atop the splinter shielding should be clipped away to make the shielding all one consistent height.
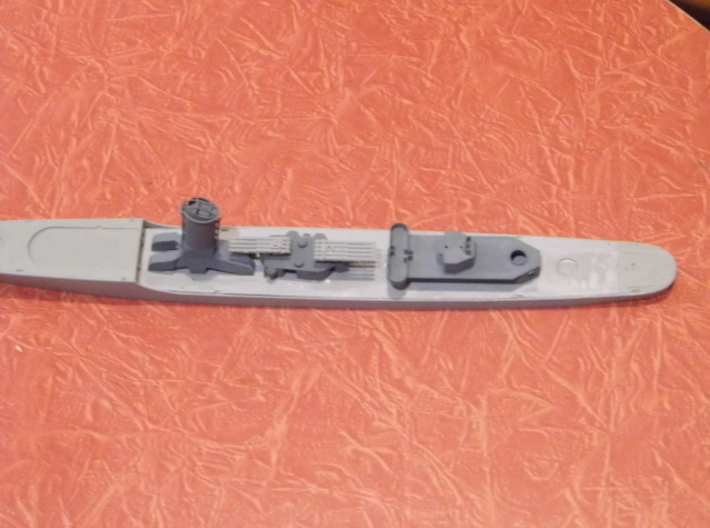
To make either ship, the Sim-class funnel and midships deckhouse will be necessary unless you choose to scratchbuild your own.
Clean the deckhouse in warm, soapy water and clean CAREFULLY with a soft toothbrush or similar. The little supports underneath the 20mm tubs are very fragile. They are actually overscale to make them printable; you may elect to remove them completely and replace them with small wire or photoetch, if available.
To install, putty in the depressions in the donor kit’s deck and sand smooth. Then, simply place the new deckhouse over the filled in areas and cement using CA glue. Be careful clamping, as printed parts can be brittle.
A word on accuracy... I did the that I could using US Navy plans and period photographs, but in some cases a little bit of freelancing and poetic license was required, as the plans did not always accord with the photos. Items like portholes and door/hatch types were frequently in conflict between the plans and the photos. Any errors are ultimately my responsibility. I would recommend checking your references before ordering to ensure that the deckhouse will work for the ship you are modeling. I can tell you that there were several variations of the after deckhouse during this period for the Sims-class ships, depending upon which yard refitted them prior to their transfers to the Pacific. Other after deckhouses will be released before the end of the year representing other ships of the class for whom I can obtain decent photographs.
I would recommend using water based acrylics to paint printed parts. I have used enamels without problems, but my experiences may not mirror your’s. In the end, acrylics seem a good recommendation.
Details

More From This Shop

$40.00