
Product Description
Work in Progress - Coming soon!
I like to run oversize loads on flatcars. BIG flatcars. It's a sure draw and something people love seeing at train shows. However, you can't count on everyone building an N-Trak module to be aware of the clearances necessary for modern equipment.
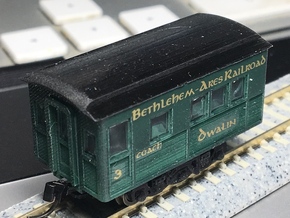
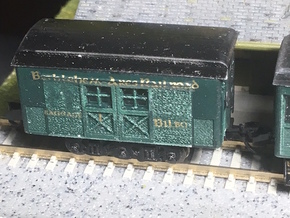
There's very few prototype physical clearance cars in use any more (most of this sort of thing is done with lasers from a hi-rail truck these days...), and finding pictures of them is even more difficult. The only one I've been able to track down in recent use was a boxcar modified with feelers that ran in the trains running the SRB sections for the space shuttle from Utah to Florida... and they're not seeing much use right now.
So, after looking around at some of the clearance cars that used to be in service, I decided to freelance a more modern one for my own railroad... after all, that's what the real railroads did. They built them themselves, and every one was different.
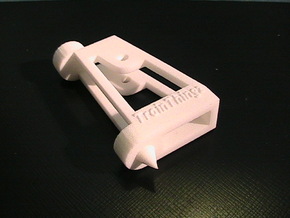
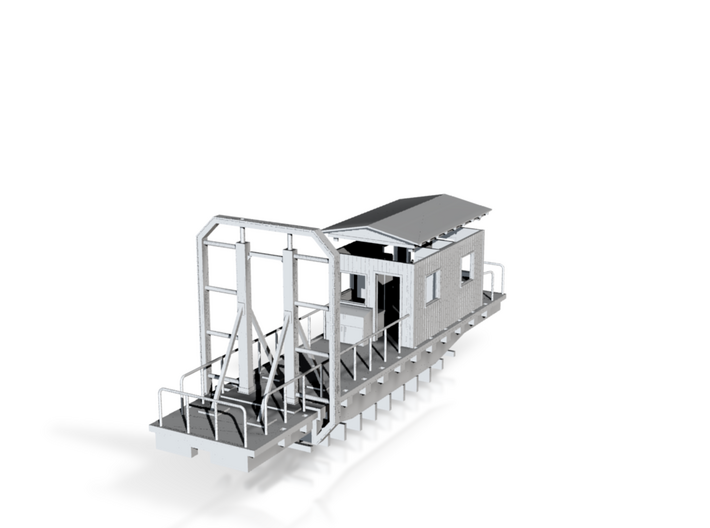
This clearance car is made to test a layout to Plate K, the largest modern standard. Anything that passes should clear auto racks, SkyBox cars, and the largest of flat car loads, if you don't try to run them on 11" curves! If it doesn't, it's not the module's fault...
I like to run this as section one of an oversize move, about a scale half mile in front of the main load. It makes for a great crowd pleaser to see the trains working together.
The roof of the cabin part of the car is a separate piece, and the inside is detailed with equipment racks, cabinets, and crew amenities. There's a spot for a piece of brass bar stock under the car, between the bed and the frame, to add needed weight to the car. It's designed to accept MT body mount couplers and trucks.
The feelers are best made from the black fibers from a cheap, soft hairbrush. I found one at the dollar store that has enough to do a lifetime of testing. Just pluck them from the brush and glue them to the "halo" with superglue, then trim to length. There's a separate pattern ( Clearance Car Trimming Guide) made from cheaper plastic to keep the costs down. All you need to do is place it behind the halo frame (It fits just one way) and trim the feelers flush with sharp scissors.
By the way... if you're actually testing a layout, run this ahead of a camera car and you'll not only test the layout, but have a record of exactly where the problems are and what's causing them!
I like to run oversize loads on flatcars. BIG flatcars. It's a sure draw and something people love seeing at train shows. However, you can't count on everyone building an N-Trak module to be aware of the clearances necessary for modern equipment.
There's very few prototype physical clearance cars in use any more (most of this sort of thing is done with lasers from a hi-rail truck these days...), and finding pictures of them is even more difficult. The only one I've been able to track down in recent use was a boxcar modified with feelers that ran in the trains running the SRB sections for the space shuttle from Utah to Florida... and they're not seeing much use right now.
So, after looking around at some of the clearance cars that used to be in service, I decided to freelance a more modern one for my own railroad... after all, that's what the real railroads did. They built them themselves, and every one was different.
This clearance car is made to test a layout to Plate K, the largest modern standard. Anything that passes should clear auto racks, SkyBox cars, and the largest of flat car loads, if you don't try to run them on 11" curves! If it doesn't, it's not the module's fault...
I like to run this as section one of an oversize move, about a scale half mile in front of the main load. It makes for a great crowd pleaser to see the trains working together.
The roof of the cabin part of the car is a separate piece, and the inside is detailed with equipment racks, cabinets, and crew amenities. There's a spot for a piece of brass bar stock under the car, between the bed and the frame, to add needed weight to the car. It's designed to accept MT body mount couplers and trucks.
The feelers are best made from the black fibers from a cheap, soft hairbrush. I found one at the dollar store that has enough to do a lifetime of testing. Just pluck them from the brush and glue them to the "halo" with superglue, then trim to length. There's a separate pattern ( Clearance Car Trimming Guide) made from cheaper plastic to keep the costs down. All you need to do is place it behind the halo frame (It fits just one way) and trim the feelers flush with sharp scissors.
By the way... if you're actually testing a layout, run this ahead of a camera car and you'll not only test the layout, but have a record of exactly where the problems are and what's causing them!