Coach 64

Discussion in 'My Work In Progress' started by rkapuaala, Jan 17, 2016.

  1. rkapuaala
    rkapuaala Well-Known Member
    doorsNbumperHW.jpg
    This is my latest render of the 3D model with the doors and hardware. Next I'm going to work on the chains. I'm still debating modeling the inside.
     
  2. rkapuaala
    rkapuaala Well-Known Member
    hotrucks.jpg
    I finally got around to cleaning and priming the HO trucks I ordered. This print was just to see if it was feasible to offer these trucks in FXD. They didn't turn out as well as I had hoped.
    [​IMG]
    Now, if they had the detail they had the render they might be worth $25 for one truck.
    I'm also not convinced that they would even be strong enough. I blew out one journal housing trying to fit install the wheels. They are also a tad too wide. I'll have to correct that on both the HO and the rest of the scales. I thought I had tested the gauge prior to upload but I guess not.
    I know a few of you have been asking about HO kits of coach 64. Right now, I don't think that would be possible in the aviailalbe materials. I know now with certain the trucks would not because they won't take the rigors of being placed on and off the track repeatedly.
    One of the issues with offering an HO kit are the railings. Even in 1:20.32 scale the railing almost doesn't print. I'm not sure how to get around that and any viable suggestions will be investigated.
     
  3. rkapuaala
    rkapuaala Well-Known Member
    siderailtopdetail.jpg rearrailstopdetail.jpg
    The scrollwork brackets for the top of the observation deck posts arrived early today and I had enough time to clean and give them one coat of paint.
    I got a lot of thin wall warnings before and after printing these so I was worried they'd arrive in pieces. They look really good to me and I can't wait to install them. Even if my etchings had been successful they never would have looked as good as these because they would have been 2 D and void of all the little details that show up in these FXD models.
     
  4. rkapuaala
    rkapuaala Well-Known Member
    testfitbrackets.jpg
    I attached the brackets to the posts and screwed the posts and rails to the deck then slid the body on to make sure everything cleared. The tops haven't been attached because there is still a lot to do.
     
    Last edited: Mar 5, 2016
  5. rkapuaala
    rkapuaala Well-Known Member
    workingonundercarriage.jpg
    I am working on the undercarriage of the coach. I've installed the braking devices, the front and rear brackets for the brake wheel and coupler release bar and the eyehole bolts for the truck chains and the side coupler releases.
    [​IMG]
    I decided to print the kingposts out. I just submitted the kingposts for printing, and I'm not sure at this point if they will make it through the manual checks. I hope they do as I do not want to make 8 kingposts using solder and wire; BORING.
    I fittingsundercoach.jpg
    This image shows me aligning the brake wheel and coupler release bar with the bottom bracket. This bracket acts as a pivot point for these two parts. It also holds a part of the brake cut gear just beneath the coupler head as well as the air hose.
    In addition to printing out the kings posts, I have the steps
    [​IMG]
    and the
    [​IMG]
    front and rear windows.
    [​IMG]
    The doors are just too expensive to print at this point because I want to print them in FXD so I can see the little shield plate for the key hole. I will have to wait till I sell a lot more products on my shop to print those out and I may just end up making them from wood if that doesn't happen soon.
     
  6. rkapuaala
    rkapuaala Well-Known Member
    BUMMER! they won't print the kingposts in raw bronz. I'm going for WSF. I don't think strength will be an issue since they are not supporting real torsion rods, if they were I would definately need to fab them with brass rods and solder.
     
  7. rkapuaala
    rkapuaala Well-Known Member
    kingposts.jpg
    Bummer the kingpost arrived yesterday and 3 were completely missing and one was broke. After I ordered 8 more (I'm crossing my fingers that at least 8 arrive)
    mountedkingsposts.jpg
    I painted and mounted the ones I have.
    torsionrodsadded.jpg
    Then I added the torsion rods. All the holes are drilled for rods and posts. I'm not going to complete the linkage on this 1:20 scale model, but I am on the 7/8ths scale.
     
  8. rkapuaala
    rkapuaala Well-Known Member
    frontstepsmounted.jpg
    I painted and mounted my steps today. They fit perfectly. It really is nice not having to build any steps. They are tedious and printing them out is really the best thing in the world since the cost is way less than the time I have to put in to making each set.
     
  9. rkapuaala
    rkapuaala Well-Known Member
    comparingSEtoNG.jpg
    Got my print of the 7/8ths scale railing yesterday. You can't appreciate how much bigger 7/8ths is than 1:20.32 scale unless you see them side by side. I printed this railing out completely assembled. I think it turned out great and I'll go ahead and print out the front railing next.
     
  10. rkapuaala
    rkapuaala Well-Known Member
    completedexteriorfront.jpg
    I've got the doors painted and attached to the body.
    CompletedExteriorrear.jpg
    At this point all the exterior details are completed on the 1:20 scale modle. I could do the interior, but my passion lies in the larger 7/8ths scale models now a days so I think I'm going to stop here and call it finished,,,, for now. I can't say I won't complete the interior in the future or not. I've left the body removable so it is a possibility, but I don't see that happening in the immediae future.
     
    vfxguy likes this.
  11. rkapuaala
    rkapuaala Well-Known Member
    cartertruckWSF2.jpg
    Okay, almost finished. I kept looking at it and my eyes kept focusing on the trucks. I built these trucks from scratch a long time ago. When I built them I only had a few poor images to work from and some basic dimensions.
    Since that time I have much better dimensions and a very large collections of the trucks as they were being rebuilt by a coach builder in Hawaii named Lomas.
    So naturally I built a 3D model of the trucks. I just received these prints yesterday. Note the side frames, they were done a while back, but the unpainted center structure which is very detailed and accurate. I was surprised at how well they printed out in WSF material especially since they are 1:20.32 scale.
    cartertruckWSF3.jpg
    The suspension hangers and bolster will barely be seen, but well worth the effort. I plan on redoing the trucks for the 1:20.32 model using prints of the center structure (which would be impossible to cast) and castings of the side frames and brake assembly.
    cartercoachbrakeassemblyFXD.jpg
    I printed out the brake assembly in FXD because the detail is so fine on it, even the best WSF print will not show it off. I'll make molds from this print and cast them in resin which will be much cheaper than printing them out.
    I will probably also print order the lower beam of the side frames in FXD so the star detailed journal boxes will be a lot sharper. The rest of the side frame details are fine.
    Once that print is done I'll make a mold of this part too.
    The center structure is not so expensive to print, and like I already said, it would be a pain to make a mold and cast it. So I'll order them as I need them. I'm definitely going to need one more for coach 64. I have to replace those old trucks.
     
  12. rkapuaala
    rkapuaala Well-Known Member
    an accounting of parts 12-10-17.jpg
    After ordering a few prototype parts for my 7/8ths coach 64 build I realized, it would be cheaper to buy a solid 3D printer and print them myself. So, I did just that. I picked up a Monoprice Maker Select Ultimate from Amazon on a black Monday sale. All the gray parts in the above photo are parts I printed. Total cost for materials 6 U.S. dollars.
    Good threshold plate - bad threshold plate.jpg
    The first thing I printed were these threshold plates. These plates appear on all the coaches built in the OR&L shops. The are small enough for a quick test and for practicing setting up my printer. I don't advise buying a printer to print your own parts for everybody. Shapeways does a much better job at printing them than I have been able to do so far. That threshold took me 8 tries to get it right and many hours of experimenting and adjusting and learning obscure parameters whose names vary from slicing application to slicing application.
    assembled truck parts.jpg
    To make matters even more frustrating, these parameters change from model to model. What worked perfectly on the threshold plates didn't work so well on the brake beams, and what worked well on the brake beams didn't work at all on the rest of the parts of the truck.
    bolster parts.jpg
    Cuss, I had to print this bolster assembly in 4 separate parts; if I did it through Shapeways I could print it in White strong flexible completely assembled with the crossbeams and all so that all I would have to do is slip the side frames on and the journal assembly and I'd be ready to go. There are 16 different parts to this structure and after my test assembly this morning I can see I will need to break it down into at least 5 more parts to make sure the quality and accuracy meet my expectations.
    20171202_074507.jpg
    But that is the great thing about having my own printer. I can experiment with my models and learn how best to design them. Like this 1:24th scale Lincoln model I currently have in my shop. I printed this after my success with the threshold plates. I didn't really expect it to print out at all, but it did. I printed it at .05 mm layer thickness but it still printed some detail. If I printed it at .02mm (which my printer is capable of) it would have looked twice as good except for a few nagging issues with mesh, that I didn't know about (because Shapeways fixes small problems like that).
    Now, I will go back and update those models when I get the time with my new mesh, but first I will focus on perfecting the trucks.
     
  13. rkapuaala
    rkapuaala Well-Known Member
    Day 18 on my new 3D printer and I am beginning to value the services at Shapeways a whole lot more.
    20171213_130156.jpg 20171213_115733.jpg
    There are so many things that can go wrong with a poorly designed, or oriented or supported model it baffles the mind. You never really see the issues that Shapeways deals with probably a thousand times a day till you've actually tried to print out a model yourself. Still I don't regret my purchase, it will make me a better modeler and when I do submit models for a final print, I can be sure they will print.
    My projected 8 additional parts increased to 13, but now I have a truck kit that I will be able to confidently upload to my shop.
    test fitting wheels bolster and journals.jpg
    I redesign the journals so that the wheel sets fit perfectly and there is room for either a bearing or a brass bushing. I'm still printing out the rest of the parts, but as they print, I can move on to some other coach 64 parts. I think I will print out some templates for the rafters, or a few windows.
     
  14. stannum
    stannum Well-Known Member
    You are learning for FFF printing (which SW did, then didn't, then does again in limited terms) not other systems like SLS or resins, and "pricing" is time and material used. Do you bill yourself per part? do you add thicker sprues? *wink*
    You may want to give a quick look at http://www.madge00n3.co.uk/3DPrinting/3d01.htm sometimes splitting a lot is the way to go. Per part optimimum design and printing, less time/material in supports, huge time saving because discarding some small parts is faster than one huge part that fails in just the small zone multiple times. And that is without going into mixed media (3d prints, plastic sheet, cardboard, metal tubes...).
    If all machines and vendors were standard, experience would translate or just directly apply across them all.
     
  15. rkapuaala
    rkapuaala Well-Known Member
    Thanks Stannum.
    testing fit with new fastners.jpg
    I finished printing all my truck parts out a few days ago and was just waiting on the fasteners to arrive in the mail. They came yesterday evening.
    20171217_154847.jpg
    While I waited I worked on some other parts of the coach. I had to reprint the threshold plates after discovering a scaling error I made. My calculations were way off, but didn't show up till I printed the door casing above.
    I've decided to print the whole set of roof rafters out as well as possibly the framing for the front deck (I'm still not sure about doing that). Today I will be assembling the trucks and getting some primer on them though, and while I wait for primer to dry, I'll be working on the roof rafters and windows.
     
  16. rkapuaala
    rkapuaala Well-Known Member
    trucks assembly at a stand still.jpg
    Curses stalled again! Misplaced my 00-80 tap and die, ran out of 3/64 brass rod, and lost the wooden truck parts I previously manufactured when I thought I was going to build this out of wood. I ordered a replacement tap and die and some more brass rod, but I don't know what happened to the wooden truck parts so I had to make some new stretchers. I used some 3/64 inch brass tubing in the hopes of aligning the cross members but they are useless without nuts to tighten the structure up.
    front beam with railing.jpg So, I started printing out more parts while I wait for the other stuff to arrive (again). The end beams printed out perfectly and were an exact fit for the railings Shapeways printed out in WSF. I am pretty sure my printer will never be able to print these railings, no matter how good I get at slicing.
     

    Attached Files:

  17. rkapuaala
    rkapuaala Well-Known Member
    3rd attempt at printing Abe 06mm.jpg
    While I work on the rafters and other parts, I decided to keep the printer printing, so, I tried a 3rd attempt at Lincoln at .06mm layer resolution. It took 5 hours, but is not too bad considering I lost the tip of his nose and it got a little hairy.
    Processing figures is a lot harder than parts for coach and each failure makes me appreciate Shapeways' services more and more.
     
  18. Taylz
    Taylz Member
    Looks good mate, I am constantly impressed by your work.
     
    rkapuaala likes this.
  19. rkapuaala
    rkapuaala Well-Known Member
    1 12 scale Albert.jpg
    While I waited for fasteners, brass rod and a new tap and die I practiced printing out figures. Figures are way more difficult to print than parts. Occlusions, undercuts, overhangs and undulating surfaces make figure models for complicated to slice. It's a compromise between orientation, printer speed, and layer thickness. This 5.25" tall Albert printed out great, after two tries, the first one failed half way through.
    Albert in two scales.jpg
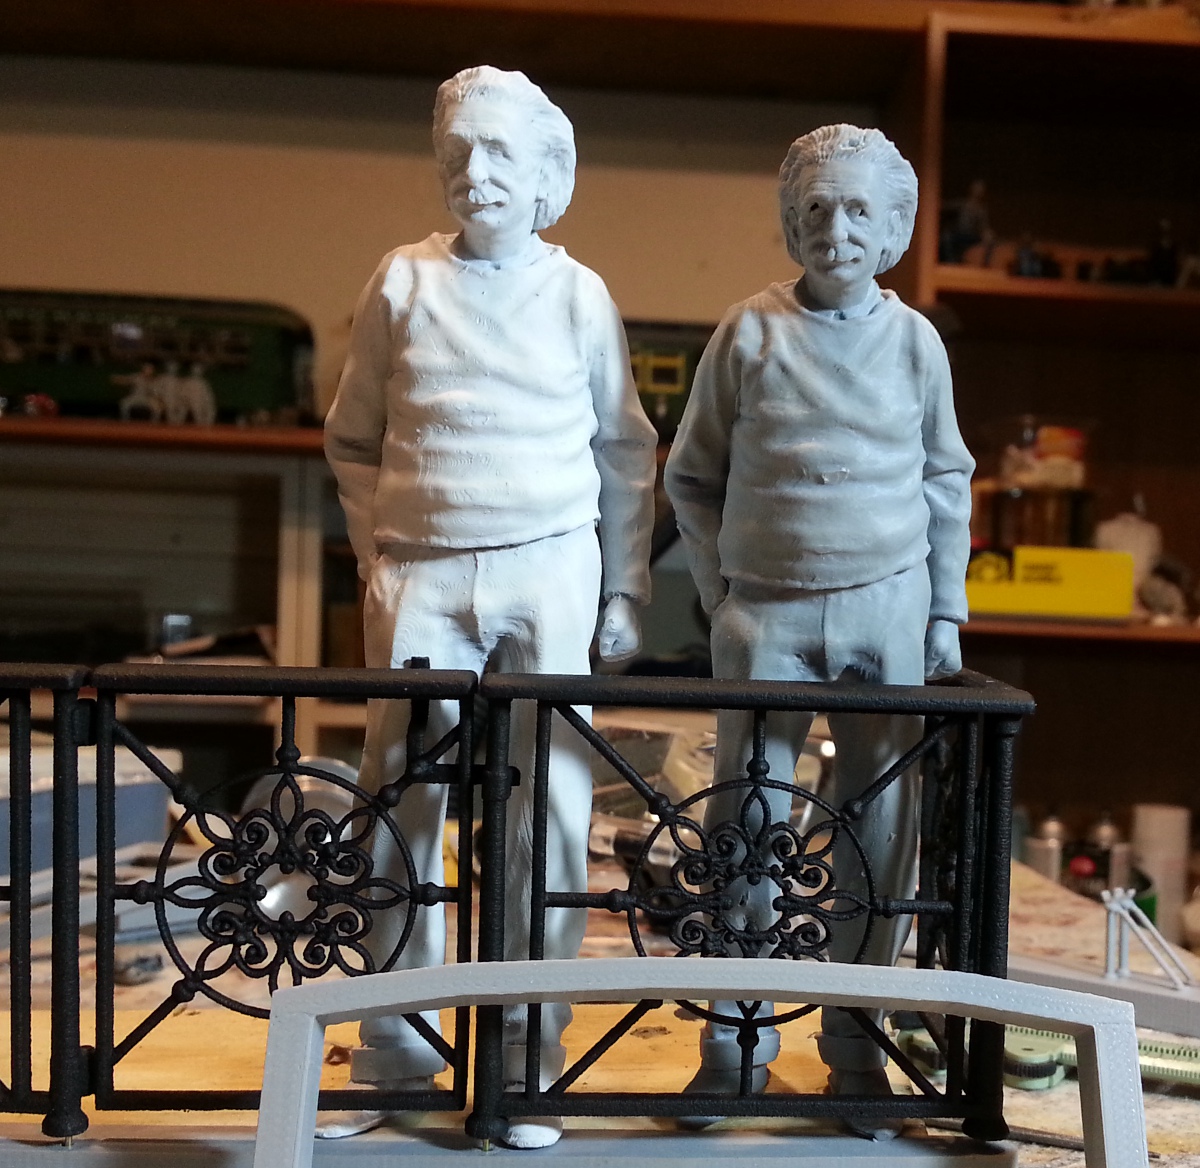
    I finally got him oriented correctly on the table and then scaled him down to an Albert closer to the prototypes height in SE scale.
    practicing printing figures.jpg
    Before I started on Albert, I practices on 1:20.32 scale figures of Lincoln. These two are not as good as Shapeways, but with a little extra cleaning and sculpting, they'll do.
    rafters amd queen posts.jpg
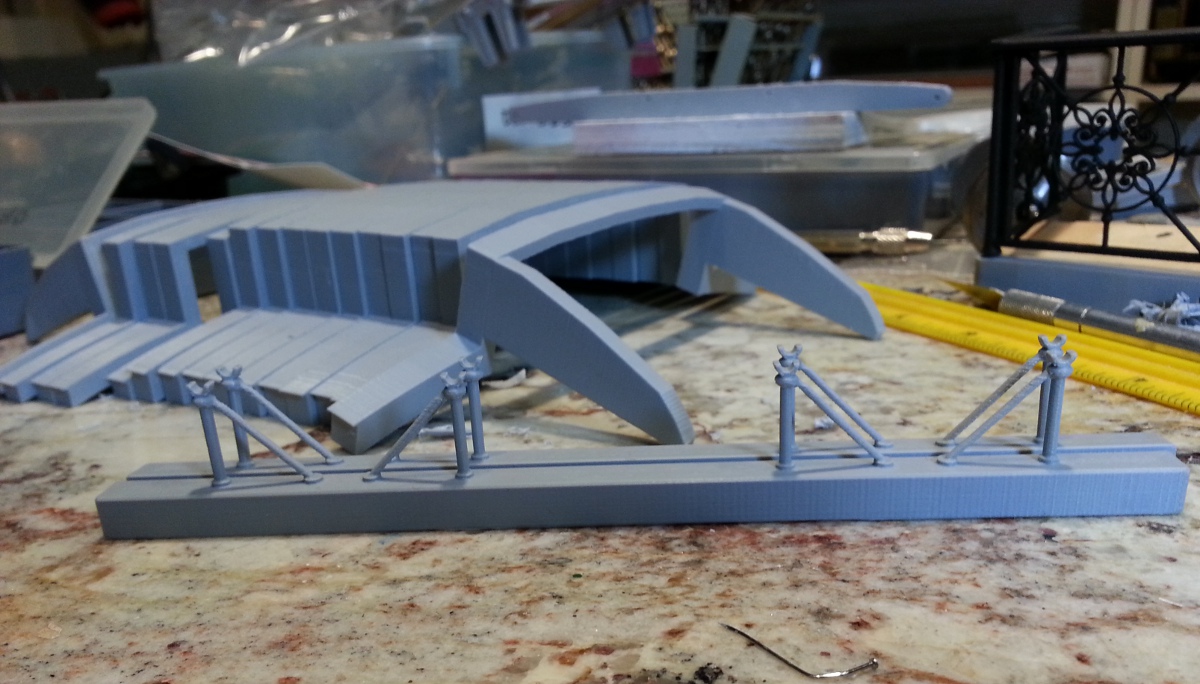
    In between figures I printed up lots and lots of parts for the coach 64 build. I decided I would print as much of this model as I possibly can on my small printer. The rafters and the queen posts mounting beams in addition to windows and small brackets. When I finally got my tap and die I started assembling parts.
    fastening hand rails.jpg
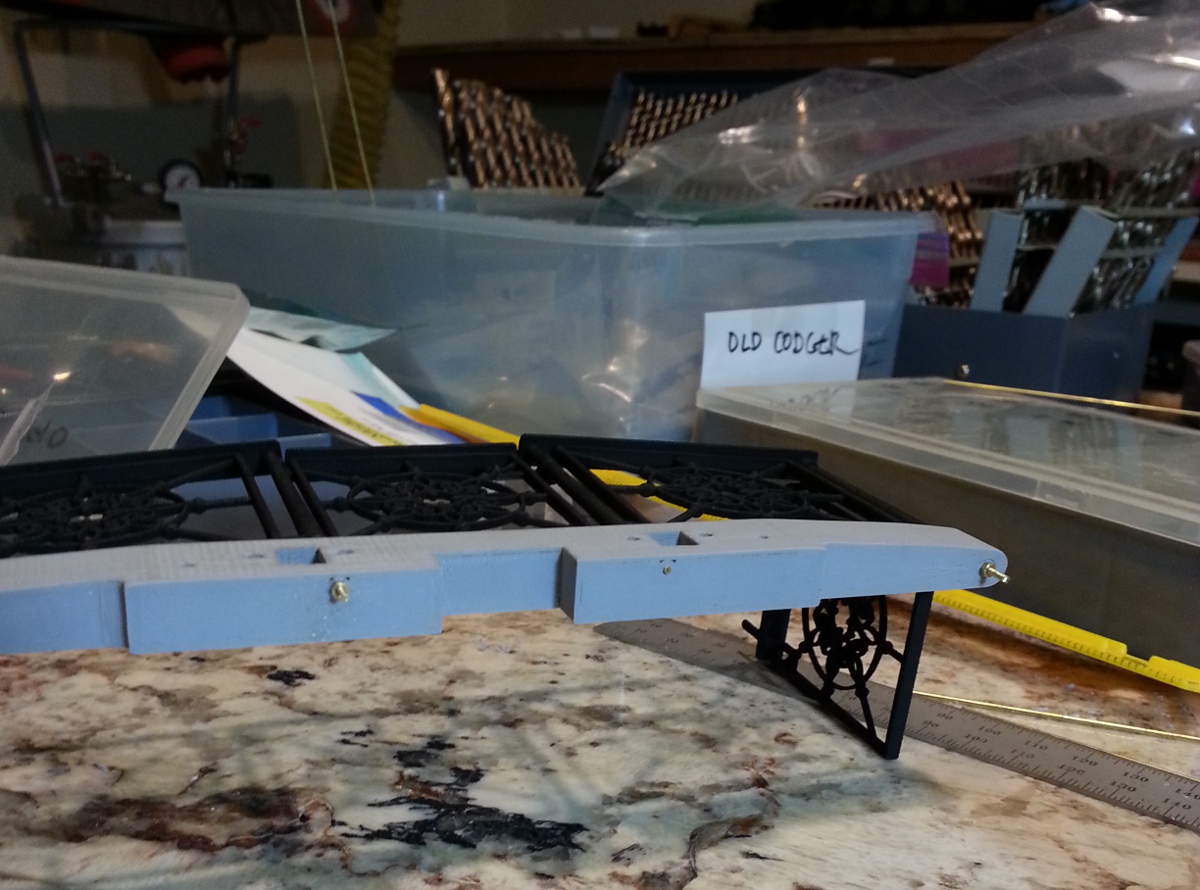
    The dimensional tolerances on my printer are so fine, I was able to pre-drill the handrail mounting hole in the modeling application using Boolean intersects and they lined up perfectly with the hand rail I had printed at Shapeways.
    The project is moving along faster with the new printer, but now I'm having problems with ADS,,, I keep going back between the coach and other projects and the rain has driven me inside where the temptation to model is greater than the temptation to print.
     
  20. rkapuaala
    rkapuaala Well-Known Member
    20180105_091359.jpg
    Did a lot of threading and tapping and some family problems have stalled my efforts, but I'll start again soon.