Coach 64

Discussion in 'My Work In Progress' started by rkapuaala, Jan 17, 2016.

  1. rkapuaala
    rkapuaala Well-Known Member
    coach64withsides.jpg
    I'm creating a new thread for this project. My work on modeling coach 64 began over a decade ago.
    coach64progress120scale.jpg
    This is as far as I've gotten to date with this wooden model. Everything on this version is scratch built using combinations of wood, brass, resin and polystyrene. That includes the trucks.
    I stalled on this project mainly because of the ornate railing.
    frontdeckcloseup.jpg
    The image above is of the actual coaches front observation deck. My soldering and forming skills are just not keen enough to do this in 1:20.32 scale,,, I tried though. My failure was in the repetitive bends in the forms in the outer circles. In that scale you can't even be off .003" or nothing fits.
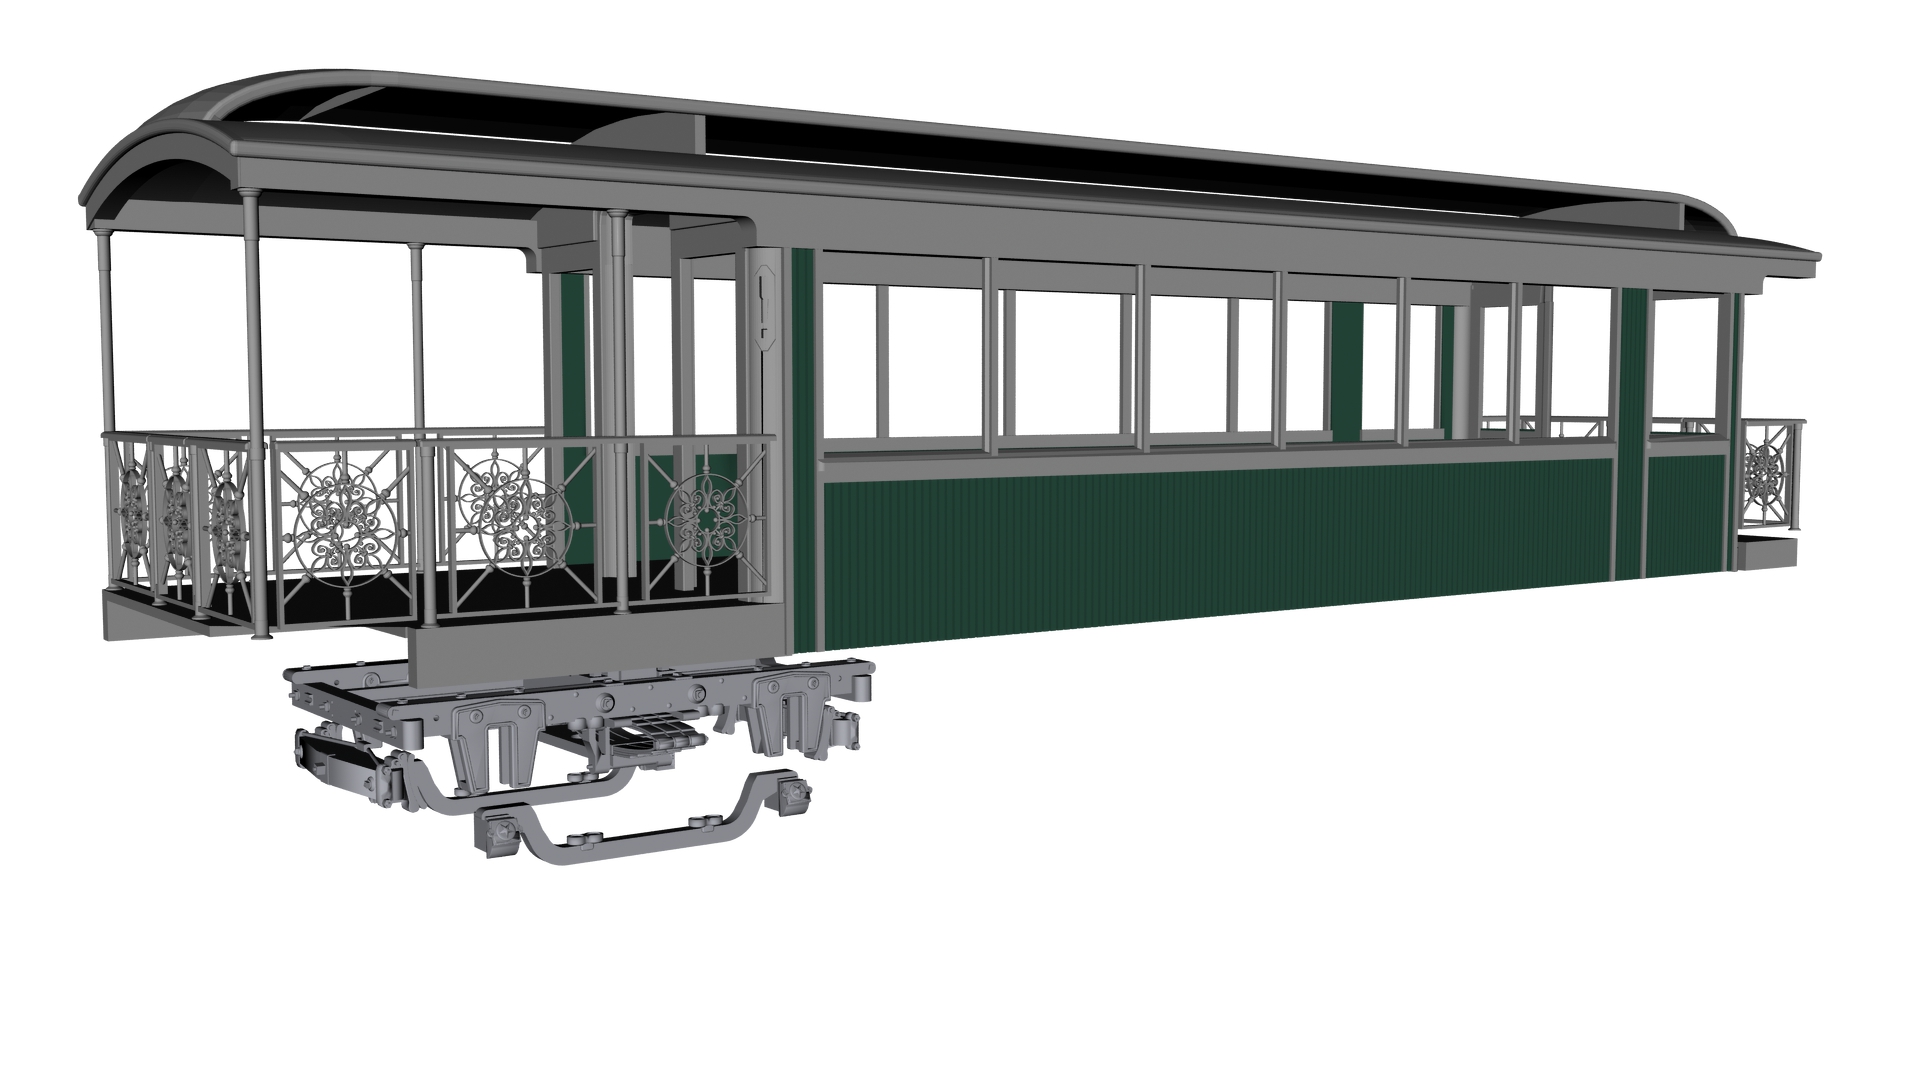
    So as you can see from the render above, I did them in 3D which allows me to work in 1:1 scale and explode details to microscopic levels if I want. Not to mention that I can make repetitive parts and copy them over and over again.
    I currently have the side frames of the trucks and the railings being printed out in WSF.
    I don't think I'm going to get the detail I desire on the trucks in that material but it is a test run so that I don't waist a fortune on a higher resolution material like FXD.
    I will post images of the finish prints here along with progress reports on my 3D coach build.
    It would be economically ruinous to print this entire project out as the 1:20.32 scale model is 21" long, but I'm building it for the future when printing prices go down and material quality goes up. Till then I can print some of the smaller fussier parts as I need them to complete 2 scaled versions I'm doing in wood and other materials.
     
  2. rkapuaala
    rkapuaala Well-Known Member
    coach64numbertexture.jpg
    I decided to stop making parts till I texture what I've already made. These are crude textures just till I get the UV coordinates on everything. The coach body (what I've finished of it so far) is all textured. If it rains tomorrow I'll texture the trucks.
     
  3. rkapuaala
    rkapuaala Well-Known Member
    trucks100pertextured.jpg
    I finished the trucks tonight. There is still a lot of work left on coach 64 body, but I have sworn to at least set up the UV coords and provide some crude textures before moving on. There were a little over 300 parts in the trucks alone, and I finished almost the whole thing before texturing. It became a hurdle and not a task.
     
  4. rkapuaala
    rkapuaala Well-Known Member
    prototyperailingdetail.jpg
    Progress has been slowed down by texturing and some changes in current features. I decided to redo the railing detail and use the prototypical dimenstions as you can see above it is much more elegant than the heavy printable model. I will try to print these out in 7/8ths. The detail would be lost anyway in 1:20.
    closeupoftrucks.jpg
    I also finished all the parts for the trucks with the exception of the brakelinkage. The textures are crude, but the important thing is to get them oriented on the geometry and then worry about how they look.
    observation entrance finished.jpg
    I finished the observation deck entrance wall. I decided to stage my albert figure on it to get a better sense of scale.
     
  5. rkapuaala
    rkapuaala Well-Known Member
    railingprint.jpg
    Got the first of the prints for this project this evening. The railings turned out alright. They weren't as good as I would have liked, but not as bad as I imagined they could be.
    WSFsideframesNGandSE.jpg
    The side frames were incredible. All the detail seems to have printed out, the bottom suspensions must have been printed separately because it no longer fits easily into the journal housings. That should be easily remedied with a file. Still the cost of printing these makes it cost prohibitive to finish the print job with printed side frames alone. I will have to make molds and do resin castings.
    The HO trucks seem to be okay, but I'll have to soak and prime them before I reach a conclusion.
     
    Last edited: Jan 30, 2016
  6. rkapuaala
    rkapuaala Well-Known Member
    NGsideframesprimed.jpg
    I was eager to prime these side frames today, but it was raining outside so I had to brush on some gray primer. These are the 1:20 scale side frames with one coat of primer and for WSF material the detail is incredible. I will be able to use the top beam assembly for a mold easily after cleanup, but I'm going to need to have an FUD or FXD print of the lower suspension so that the start on the journal box is a little more pronounced.
    SEsideframesprimedsloseup.jpg
    No problem with using both these prints for the 7/8 scale side frames mold. The detail is so good I can even see the tiny rivets for the side frame panel that I swore would not show up with this material. The only detail that did not make it was the division between the top beam flange and the wooden top beam. Both edges on the wooden beam and the metal flanged were chamfered, but they are barely visible.
    firstcoat.jpg
    I spent a lot of time cleaning up the railing detail and was rewarded. The detail emerged beneath the white powder that caked the print. This is the first coat of paint. I'm not going to primer because I do not want to loose any detail on the railing. Now I'm confident my more detailed 7/8ths scale model will print out.
     
  7. barkingdigger
    barkingdigger Well-Known Member
    Wow - been following this with interest!

    If the only part of the 1:20 lower arm that needs better definition is the journal covers, why not just print those two lids and graft them onto the existing WSF arm? You're using it to cast an RTV mould anyway, so it isn't worth the cost of a full FUD/FXD print of the whole thing just for those lids...

    (I'd "slice" the lids free in your CAD program, and then add a mounting pin on the back that can double as a sprue attachment to turn two lids into one printed part. Then scrape off the WSF lids and drill a hole for the pins.)

    Looking forward to seeing this take shape!
     
  8. rkapuaala
    rkapuaala Well-Known Member
    Thats a great suggestion. I don't need to slide it though. The lid is a separate layer, so all I need to do is hide the other layers and print it out.
     
  9. rkapuaala
    rkapuaala Well-Known Member
    fasteningrailingsbolts.jpg
    I've been busy working on the NG coach and the SE Kauila in tandem. The above image is of the bolts I am using the fasten the hand rails to the deck. This is exactly the way the prototype handrails were fastened to coach 64's deck with the exception that they used 1/2" all thread and a nut and washer and I am using an 00-90 1/2" bolt. One thing I dislike about WSF is that it is hard to drill by hand, you have to use a dremel which seems odd since it is not really hard material like resin,,, which I can drill by hand. But that characteristic also makes it perfect for taping for a threaded bolt. WSF locks the bolt securely.
    einsteinonobsdeckSW.jpg
    I placed my Albert figure on the deck and took the above shot of the fastened railings. They've only got a single coat of primer on the same as Albert and will need to be removed and fiinished, but I still have some milling to do on the tops.
    badetchings.jpg
    As I rummaged through the box of parts for the NG coach 64 I found these. I forgot that 7 years ago I tried to etch the scroll work on the top rail and it failed.
    Added End Beams.jpg
    My solution is to make 3D models of the scroll work and have them printed in FXD. I'm not sure they'll turn out (pictured in the render above) but if they do that will be one less hurtle I have to jump to complete this project.
     
  10. Youknowwho4eva
    Youknowwho4eva Well-Known Member
    Just need a picture of him dropping an apple while traveling the speed of light :)
     
  11. rkapuaala
    rkapuaala Well-Known Member
    I'll have to do a sculpt of Sir Isac Newton so that someone will be there to catch the apple when it finally hits the ground 25 years later ;) Might make a good animation!
     
  12. rkapuaala
    rkapuaala Well-Known Member
    frontrailingsraw.jpg
    Got the front railing last night and wow. The detail was really good for WSF. I took this image before dusting the model off with a dry paint brush.
    frontrailingsprimed.jpg
    I took this photo after priming. I can't wait to see how well my 7/8ths scale pieces turned out.
     
  13. rkapuaala
    rkapuaala Well-Known Member
    frontdeckcloseup.jpg
    Here is an image of the real coach 64s front railing.
     
  14. rkapuaala
    rkapuaala Well-Known Member
    makingbeams.jpg
    I thought I should start getting the 1:20 scale wooden model caught up with the 3D model so I made the front and back beams today.
    separtingfrontrailingpanels.jpg
    The 3D model and prints to not have the articulated panels for the rear and front doors, or the side doors so I separted those parts from their main parts also.
    fittingcoupler.jpg
    After making the beams and fitting the rear beam to the deck I needed to fit the pocket for the couplers. The couplers are 1:20 scale couplers from Accucraft I bought specifically for this project ove 7 years ago.
    modstocouplers.jpg
    I had to modify the couplers a little to fit the coach by paring off the top and bottom of the flange. I need the side flange to secure to the pocket beams after I fabricate them.
    testfittingrearbeam.jpg
    As usually I test fitted all the pieces.
     
  15. rkapuaala
    rkapuaala Well-Known Member
    brokendetails.jpg
    I recieved the 7/8ths scale railings an hour ago and was disappointed to find that none of the center detail printed. This railing was done specifically to match the prototypical dimensions of the original coach. I would have thought that given the wire sizes were the same as the 1:20 scales railings (which were thickened to meet the minimum requirements) that these would have printed without issue. I was wrong. I'll have to use the thicker versions I guess, which is a shame on such a large model.
     
  16. stannum
    stannum Well-Known Member
    How big are the real (not 1:20 or 7/8ths) strips? Depth and thickness.
     
  17. rkapuaala
    rkapuaala Well-Known Member
    Various depths and thickness' From - 3/8ths of an inch (.8.2285 mm) up to 1/2 inch (12.7mm). But the 7/8ths and 1:20 are not. The cross rods on the prototype would scale out to just -3/8ths" ( .6 mm) in SE on my model I thought I made them 1mm, but I'm checking the dims out in the actual scaled down (I made it in 1:1 scale first) model and looks like they're about .79mm so I must of screwed up somewhere. The 1:20 scale details were larger then I guess. My bad. Looks like I'll have to go to the full scale model and make sure that I thicken everything more. Not sure where I screwed up, but it is obviously my screw up.
     
  18. stannum
    stannum Well-Known Member
    Just wondering if the central part could be done in multiple layers of photoetching. Being the same design per wagon (11? 14?), and requiring multiple copies each, it should fill the minimuns some labs require.
     
  19. rkapuaala
    rkapuaala Well-Known Member
    I've done etchings before on other things but not multiple layered etchings. I'm just going to thicken this up and print it out as soldering the etchings together would be a nightmare for me and I wouldn't be able to etch the rounded nobs on the outside and inside of the circular parts.
     
  20. rkapuaala
    rkapuaala Well-Known Member
    frontdeckbeams.jpg
    I finished framing in the platform supports.
    brakewheelSW.jpg
    Then I fit the front beam and the railing and the Brake wheel. I need to find som more information on the lever on the opposite side of the brake wheel. I'm pretty sure it was for releasing the coupler, but I'm not real sure and I don't have any idea how the mechinism below the deck worked.
    In the mean time...
    [​IMG]
    I added another part to my model list. The image doesn't show all the detail in the doors. For this 1:20 scale project I'm going to have to use FUD or I will lose the cool little shield shaped key hole plate next to the knob. I am pretty sure I can use WSF for the 7/8ths scale version.
    I've also make the little pocket flanges for the bumpers.
    [​IMG]
     

    Attached Files: