Best Way To Arrange Small Parts For Printing?

Discussion in 'Newcomers Lounge' started by bburr45, Nov 7, 2020.

  1. bburr45
    bburr45 Member
    Hi, I'm somewhat new to 3d printing, but have produced a few different files which I would like to try printing. Attached is a screenshot of the individual parts I designed (which are intended to be roof brackets for a scale model building). The trouble is that I need multiples of each part, and due to their geometry, I'm not sure of the best way to arrange them to be the most efficient and cost-effective. I've also attached a screenshot of my first trial; it seems like it should work, but I can't help but wonder if there's still a better way? Any guidelines that are specifically applicable to this situation as well as general 3d printing guidelines for any projects are both welcome!
    Mobile Upload 2020-11-07 12-37-50.jpg Mobile Upload 2020-11-07 12-42-49.jpg
     
  2. stonysmith
    stonysmith Well-Known Member Moderator
    The actual arrangement doesn't matter much (in your case), however... You need to run a "sprue" thru all those items so that they are "connected". You've got about 60-80 separate parts there, and some of them are very likely to get lost during printing. The major point here is to construct an "assembly" that has only one part, so that it can be picked up by one hand as they pull it out of the printer.

    In several of the materials, you will pay a "pre part" penalty for all 80 items, if they are separated. That minimum per part fee could run you hundreds of dollars alone. Running a sprue thru the holes turns it into a single part and will drastically lower the price. The sprue does not need to actually connect with the parts, it just needs to keep them from flying away and getting lost during the cleaning process.

    Some materials don't allow interlocking parts, but most of the plastics don't have that rule, and I don't think you're going to print these in one of the metals <GRIN>

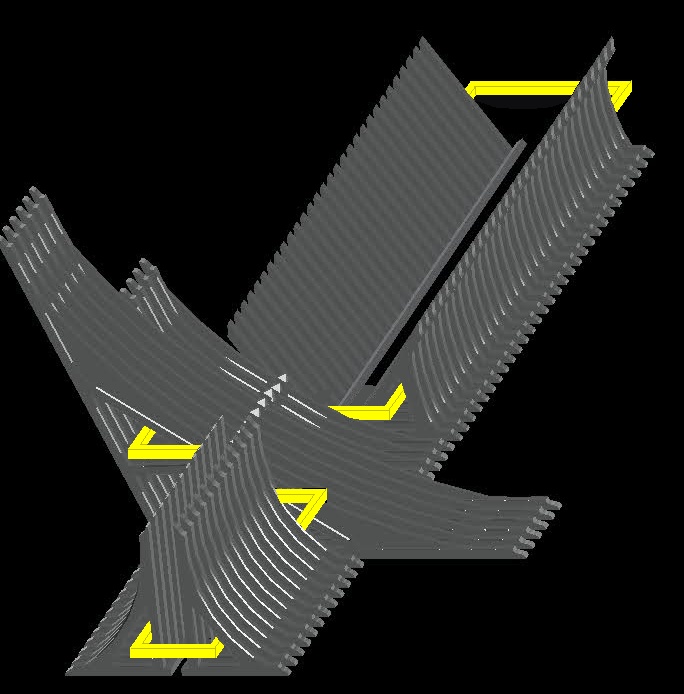
    Here is one suggestion for how to connect the parts. Note: the sprues themselves are suggested to be 1mm thick at a minimum.
    Image1.jpg
     
  3. bburr45
    bburr45 Member
    Very good information, thank you!

    Though it's difficult to see there, I had actually put on some 3-to-4mm-thick bits that acted as sprues and connected them through the bottom. So, it's technically one solid piece, though I may modify it a bit more to make it more solid. I didn't realize that the sprues could be constructed in the way you mentioned (i.e. running through the empty spaces), so that should definitely help me with other projects.
     
  4. mhristau
    mhristau Member
    I've been printing product prototypes here for more than a year now. About to open shop and had two models rejected for wall thickness (Thickness: 1.273mm) but I can't find anything close to that dimension in the local indicated. I've been using 2mm frames with 1mm x 1mm direct connect sprues. Any advice?
     

    Attached Files: