Polymer clay inset

Discussion in 'My Shapeways Order Arrived' started by DarrenAbbey, Sep 15, 2012.

  1. DarrenAbbey
    DarrenAbbey Member
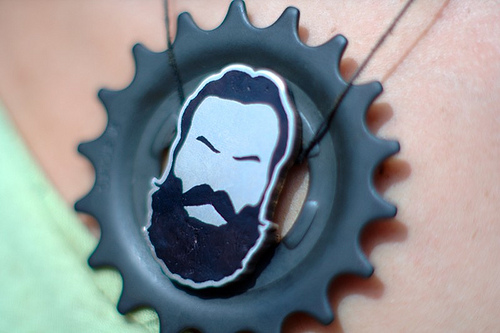
    A client commissioned me to make her a piece, and now that she has taken possession of it, I can show you fine folks.

    The design works from the logo of the local brewery (
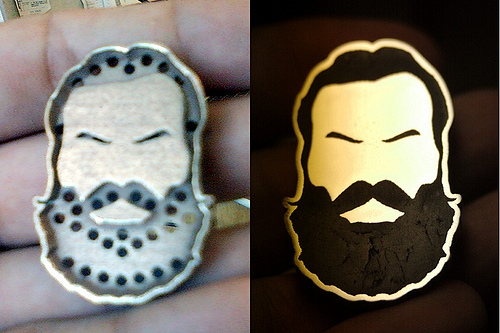
Dangerous Man Brewing) where she's soon to be working. (The brewery owners had no concerns about the project, indeed they were amused.) The design we came up with involved using a polymer clay inset to give the piece the same strong contrast as the brewery logo.

    The first picture shows the piece in raw form. The inset area is full of holes where the polymer clay can grip the stainless steel, to avoid the potential issue of the inset popping loose late. The holes are narrower at the front than at the back and the raised areas are also slightly undercut, again to help ensure the inset would never come loose. These design considerations also had the benefit of reducing the total printed volume and price.

    I pushed the polymer clay in from the front until it was extruding nicely through the holes. I trimmed off the extruded bits, then made sure the clay filled the entire volume of the holes.

    I was worried about the clay shrinking during baking and cracking against the unyielding metal, but it worked fine.

    After letting it cool I polished the front surface smooth. I wet-sanded the front starting with some 400 grit sandpaper and progressed through to 12000 grit sandpaper.

    This resulted in a very shiny front to the SS piece, but also revealed small irregularities hidden within the mass of the polymer clay. I was annoyed at the clay issue, but the client was tickled pink at the overall effect. For future pieces I will have to do further tests on how to avoid the irregularities within the polymer clay.

    photo_1_2.jpg
    photo_3.jpg
     
    Last edited: Sep 15, 2012
  2. lensman
    lensman Well-Known Member
    Nice. Been meaning to try something like this myself (along with all my other projects!). Have you used polymer clay before? I'm wondering if you managed to compress it well enough before putting it into the piece? Did air bubbles get left inside it? If you don't already have one get a pasta machine (dedicated for clay only!) to roll your clay through to condition and flatten it.

    Sorry, for the basics if you're an experienced user but someone else might benefit from this.

    Glenn
     
  3. DarrenAbbey
    DarrenAbbey Member
    This was the first time I'd used it. I spent a bunch of time reading about it and watching youtube videos on it...

    There weren't air bubbles on the interior, but more that different internal layers did not bond to each other well. Better preparation of the clay or starting with a softer clay probably would have been to my advantage. I was hesitant to get a pasta machine due to upfront cost, but it is apparent that the device makes preparing the polymer clay much easier... and I've already got a couple more clients talking about larger projects using this plastic inlay technique.
     
  4. lensman
    lensman Well-Known Member
    Geez, I'm slow on the uptake... I said this was something that I was going to try... It is in fact something I have already tried ! Here is a pendant I made a LONG time ago... Uhm, it was supposed to be a broken heart...

    pmc-heart-pendant.jpg

     
    Last edited: Oct 9, 2012
  5. DarrenAbbey
    DarrenAbbey Member
    Cool. It looks like the stainless ring and loop would protect the center of the pendant much better than an entirely clay-based one would.