
Coupler_NEM365_MediumShort Rapido for Conflat P
Made by
Print With Shapeways
 Choose Your Material
 Choose your color and finish
$7.97
Have a question about this product?
contact the designerYou must be logged in and verified to contact the designer.
Product Description
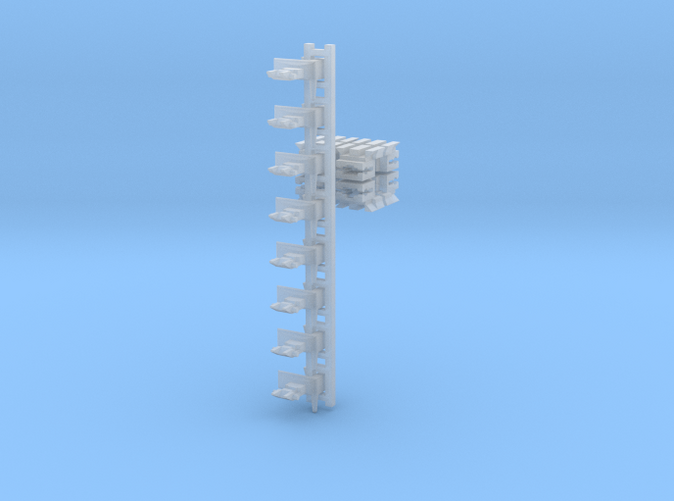
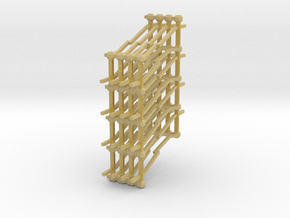
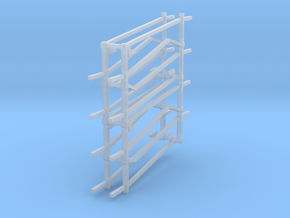
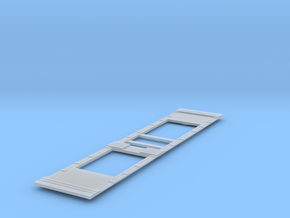
This model is a sprue of 8 x N-gauge NEM coupler pockets designed around the NEM365 standard, with a mounting to fit my Conflat P wagon, which needs those grooves in the top of the mounting, and allows room for the extra thickness in the back of the mounting needed to strengthen the grooved top.It is experimental so please bear that in mind before you order it. You would not readily be able to use these pockets on my other wagons, as they wouldn't fit fully forward behind the headstock.
As a self-check on the pocket design, I have included a sprue of NEM fitting short rapido couplers which are to the same standard, and should obviously fit the pockets (or I'm an idiot). Rapido couplers made by a number of RTR manufacturers should also fit these pockets, but there is some variability between them. Those with tangs which are too large may split the pockets when you put them in. Those with tangs which are too small will not stay in under load, and will pull out in service (parting a running train). Compare the tangs on the ones you want to use with the tangs on those included with this print (separate them by clipping away the sprue that's around them) to assess your chances.
It has been said (I saw it somewhere) that you can't make working NEM pockets out of Shapeways' smooth/smoothest (formerly frosted high/extreme) detail plastic, and if they seem to work at first they will break or start to pull out after a bit of use.
Challenge accepted.
Try them if you dare. No money back, no guarantee. Feedback welcome.
Tips:
(1) Make sure they're clean before you try to use them. If they're full of hard wax, that's not going to work.
(2) If you need force to get couplers in, stop. File the lump off the top of the tang. This is intended to fill the space that part of the tang on a lifting rapido is allowed to rise into, and helps your NEM hook not pull out. If it is tight anyway, you don't need it. File away at the bottom of the tang for a bit more leeway.
(3) Short rapido NEMs need to lift at quite an angle to couple with each other. If they don't rise enough, file away a bit of the top of the tang between the pivot and the hook to make this easier, or a bit of the middle of the lip at the top of the pocket mouth.
(4) If they're loose, put them in hot water and squash the mouth shut, for a bit more bite. Opening them up to make more room might also work if you don't want to make the tangs smaller.
(5) If they're loose and they don't need to lift, consider gluing them in, or if they need to turn a little left and right, drilling vertically through the box and the coupler (separately, but in corresponding locations) so they can be kept in with a fine wire which is bent at the top to stop it falling through.
(6) If the whole coupling mount pushes backwards out of the wagon, fit a bit of straight wire between the backs of the couplers. Use the tiny hole (0.3mm diameter) that is provided in the coupler pocket backing to keep the wire in place (root it in one coupler and flex it to get the other end in the other coupler). Take wheels out first, no?
You could glue them, but that could limit your options if the pocket breaks.
(7) Smoothest fine detail plastic is possibly going to be stronger than smooth fine detail plastic, because the stepping lines will be less pronounced. These stepping lines aren't just a cosmetic feature on the surface of a wagon body; in something that needs to flex or bear load, however small, they are incipient cracks, and the smaller they are, the better. That said, I have not bothered to specify print orientation to make them longitudinal on either part in this model.
(8) Remember that when it is wet, the plastic is a litle swollen. Let it dry if your couplings are a little on the large side (e.g.Dapol). If you want to do (4) it might not be a smart thing to put the coupler all the way in.
(9) Etched Pixel's Shapeways double-ended NEM bars are a bit too big to go in and don't have a fork at the tail, or a taper to the bottom surface. Consider filing or cutting these features into the ends of the tangs, and maybe filing top and bottom too, if you want to use them. You may have to retouch the surface with paint or dye in places if you bought them in black, as filing will expose white plastic beneath the dyed surface.
UPDATE 2021-05-03 In smoothest fine detail plastic this design was basically a success. However, I have adjusted the cage to around the rapido-style couplers because it was slightly too close top and bottom on the hooks, and unnecessarily close to the back plates. This was no problem in smoothest fine detail plastic, but limited the option to print it in PA12 plastic, which I want to try.
UPDATE 2021-07-04 Acting on some very useful feedback, I have made the coupler arm slightly longer, so it is half way between GF short and standard NEM rapido adapter. I'm calling it "MediumShort". They're 1.35mm longer than "short", and 1.35mm shorter than "standard". You can replace the couplers with "short" or "standard" if either of those suits you better, and they should still work in the same pockets.
Details
What's in the box:
Coupler_NEM365_ShortRapido_08
Dimensions:
Success Rate:
First To try.
What's this?
Rating:
Mature audiences only.
