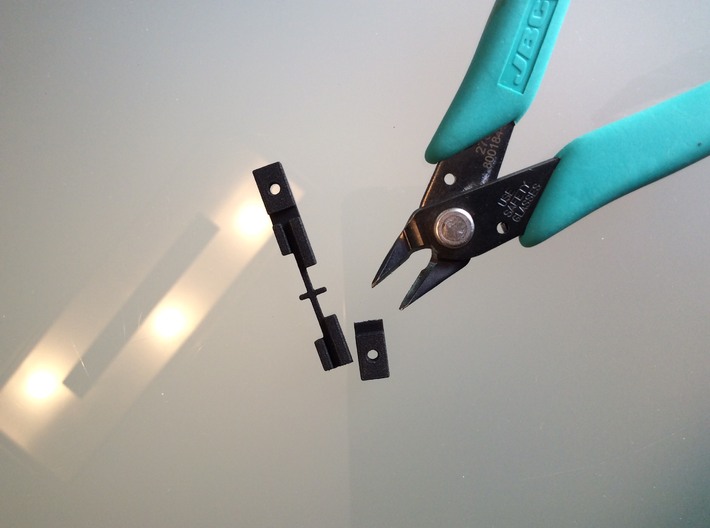
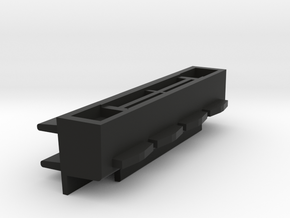
How to cut to repair one side only


Brokenback HP41C
Made by
Print With Shapeways
 Choose Your Material
 Choose your color and finish
$20.98
Have a question about this product?
contact the designerYou must be logged in and verified to contact the designer.
Product Description
Instructions for use of back side repair piece.
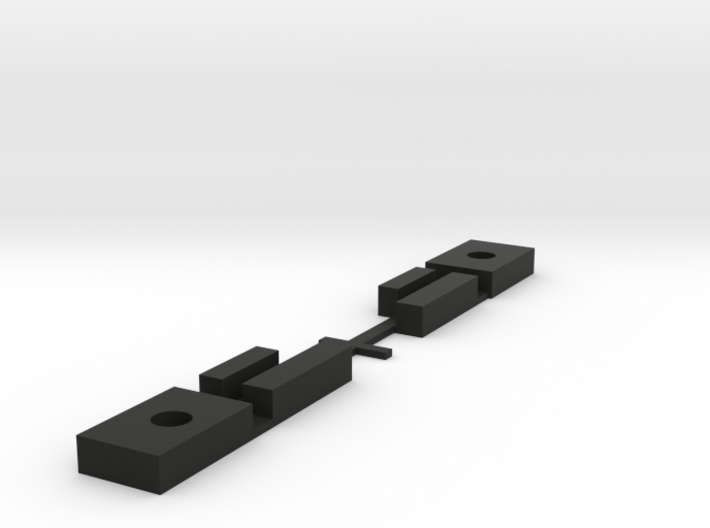
1. Be aware, before everything else, that the piece has a right side and a left side. This is due to the space for the tabs in the calculator that keep the battery-port assembly in place. You need to be aware of this at all times - more so if you want to cut it as explained below.
2. Decide whether you will replace both sides or just one. The decision is easy when both are broken, but if one is not, you'll have to check whether the old standing support will withstand the pressure for long. Our recommendation is to replace both sides. If later one of the sides breaks down, the repair will be much more difficult and probably less solid. And you have already paid for both sides!!
3. If you are going to replace just one side, cut with a hobbyist scissors just the side you don't need, according to picture enclosed, again, be careful of cutting the side you dont need, since the piece has a single correct orientation!. The rest of the piece will serve to increment the glued area, better align the piece in place and also to better support the battery-port assembly.
4. With a Dremel machine, file and level the area that had the support. You don't need to remove the tabs in between the two screw post, but you need to remove them if they are twisted or half-broken.
5. Put the piece in place. There is only one "right" way. The cross part is tight because it is needed to properly locate both holes at the extremes. Do not force it. Please make sure it is not bent downwards. Make sure it makes good contact. Remove the piece.
6. Put some glue in the bottom of the piece. Do not put too much or it will go out when pressed. We have used E6000 black glue with good results. Do not use cyanoacrylate glues. Put the piece back in place. Press and remove with a stick or a blade the excess glue, if any. If the screw holes are partially obstructed by glue, pass a screw in the opposite direction (to avoid separating the piece from the back side).
7. Secure the piece in place with a pair of clamps - lighter pressure like clothes' pegs will not be enough. Be careful that there is no excess glue from the other side of the case and the clamps are adhered to the piece! Leave for 24h for the glue to cure. And you're done! You have a repaired back that will withstand a lot of abuse again.
8. The piece is designed to accept both the original and the new battery-ports assembly - so you need to press it down to have it in place. The screw holes should fit a little bit tighter than in the original calculator, but should be perfectly aligned with the assemblies and the screw posts below.
Details
What's in the box:
Brokenback2

Dimensions:
Success Rate:
First To try.
What's this?
Rating:
Mature audiences only.
