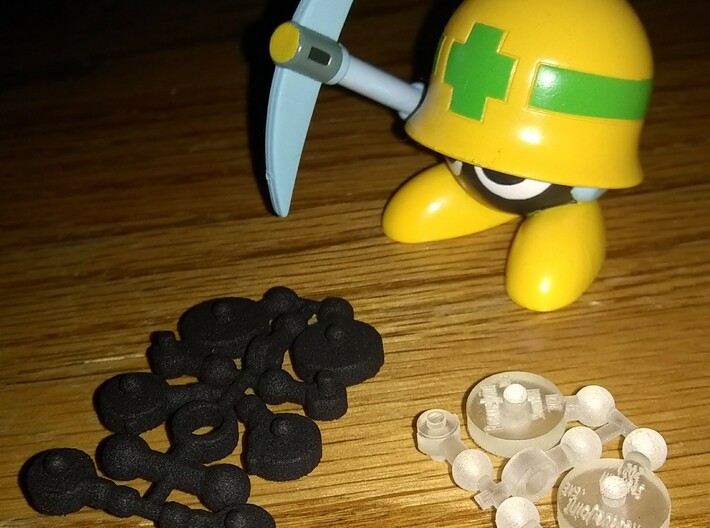
Black Natural Versatile Plastic


Rockin' Action Rescue Joint.EXE Kit 2.0
Made by
Print With Shapeways
 Choose Your Material
 Choose your color and finish
$13.99
Have a question about this product?
contact the designerYou must be logged in and verified to contact the designer.
Product Description
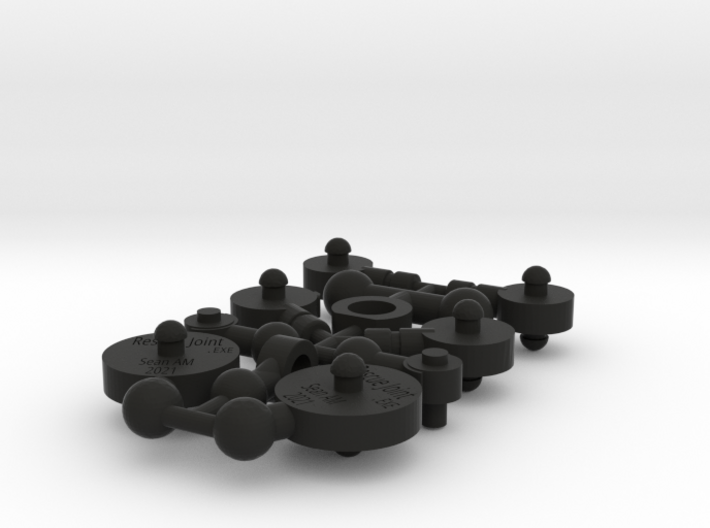
This is a complete* joint replacement kit for the parts which are most often broken on the 2001 Bandai Rockin' Action series of figures from CAPCOM's Rockman.EXE (Mega Man Battle Network) gaming series. One order contains two shoulders, two elbows, one waist joint, one hip joint, two knees, and two ankles for a total of ten (10) parts.
(*Not really 100% complete because there's no replacement neck, no lower knee/shin inserts, and no forearm inserts, which are all technically joints, but I've not yet seen one of these toys with a broken neck, broken lower knee, or broken forearm section.)
Please be aware that these parts are very small, and that 3D printing has various acceptable tolerances depending on the material and printing methods specified in your order. Be prepared to carefully make small modifications to the parts, usually for the waist and hip joint rings specificallty. Some materials are more brittle than others, so please research your material choice. The interior joints, for example (waist and hip joints) frequently need to have their holes enlarged ever so slightly to fit. (I recommend using a small drill bit, appropriately sized, and twisting it by hand to enlarge any hole.) I do not recommend "Detail Plastic" for interior joints such as: shoulders, waist, or hip joints; consider using "Versatile Plastic" for these areas.
If you desire color-accurate joints: feel free to paint them yourself. I have not found the colors available from Shapeways to be a suitable replacement for the original factory colors. Please be aware that certain kinds of paints/inks do not react well to certain kinds of plastic, so make sure whatever paint/marker you use to color your joints is safe for plastic.
I am not responsible for parts damaged during installation and/or from minor modifications including (but not limited to) cutting, drilling, sanding, or colorizing/painting; I am not responsible for damage to your figures from removal of broken joints, and/or from installation of new joints.
INSTALLATION PROCESS
(Recommended tools: hair dryer, small flat-head screwdriver, needle-nose pliers, hobby nippers and/or exacto knife; small phillips head screwdriver and maybe a small drill bit for interior joints. I highly recommend replacing all the elbows, knees, and ankles at one time -- even if unbroken -- since you already have all the tools ready, and then they'll all match.)
ALWAYS WARM PIECES BEFORE SEPARATING, JOINING, REMOVING, AND INSTALLING PARTS
HISTORYInspiration for this project is thanks to Hot Shot's Parts and Accessories, which offered the original one-to-one replacement parts for these action figures; if you just want to order a few parts which are near-exact replacements for the original: please visit that shop.
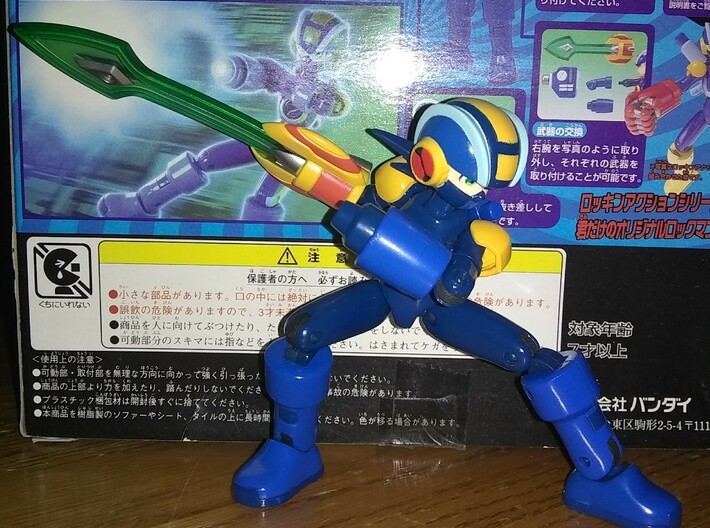
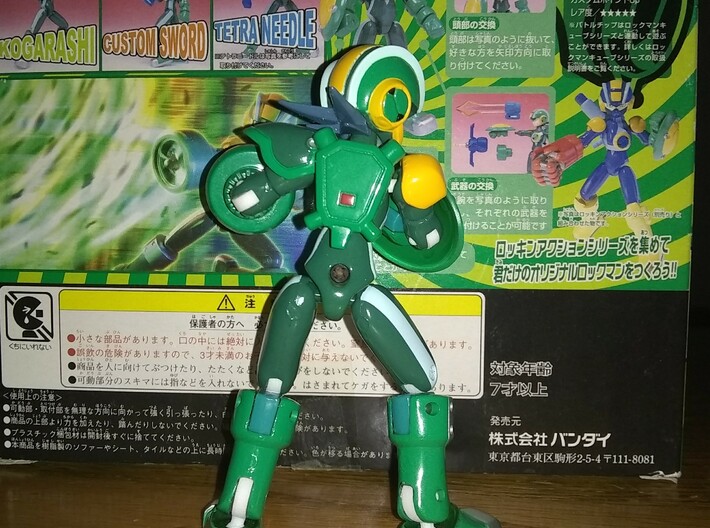
After replacing several figure joints using parts designed by energonhotshot04, I thought that I would like to try a different approach; I didn't want to just offer replacement parts, but parts which (hopefully) improved upon the original design. Individual replacement parts were also very expensive -- surpassing the cost of one of these figures for just a few replacement parts -- so I wanted to offer a solution to replace all joints for one figure with a single order. After many hours disassembling, measureing, fumbling through various CAD programs, and ordering/testing a few prototypes: the "Rockin' Action Rescue Joint.EXE" was born, and is available for you to resurrect these fabulous action figures!
These joints (when printed in the Versatile Plastic, NOT Detail Plastic) are guaranteed to be more durable than the original joints.
During the design process I discovered that one of the reasons these joints fail is due to the disc-and-peg design of the elbows, ankles, and knees. The pegs in the knees, ankles, and elbows are meant to be fixed inside the disc (that's why they are polygonal instead of cylindrical: so they bite into the disc) and these are designed to rotate with the disc; the pivot points are the holes in the sides of the limbs. The joints were manufactured this way for ease-of-manufacture and assembly at the factory; the disc would be inserted into the limb slot, and then the peg was pressed through to secure the disc. However, because the points of the peg shaft dig-in to the hole at the center of the disc --a disc which also shrinks over time -- the points of the peg shaft crack the disc. To remedy this: I have decided to merge the discs and pegs into one piece, therefore strengthing the joint, reducing the number of potential failure points, and making replacement a much simpler process. (Detail Plastic discs may have weaker pegs, so exercise caution, and if you are shipped a defective part: please contact Shapeways for a replacement.)
(*Not really 100% complete because there's no replacement neck, no lower knee/shin inserts, and no forearm inserts, which are all technically joints, but I've not yet seen one of these toys with a broken neck, broken lower knee, or broken forearm section.)
Please be aware that these parts are very small, and that 3D printing has various acceptable tolerances depending on the material and printing methods specified in your order. Be prepared to carefully make small modifications to the parts, usually for the waist and hip joint rings specificallty. Some materials are more brittle than others, so please research your material choice. The interior joints, for example (waist and hip joints) frequently need to have their holes enlarged ever so slightly to fit. (I recommend using a small drill bit, appropriately sized, and twisting it by hand to enlarge any hole.) I do not recommend "Detail Plastic" for interior joints such as: shoulders, waist, or hip joints; consider using "Versatile Plastic" for these areas.
If you desire color-accurate joints: feel free to paint them yourself. I have not found the colors available from Shapeways to be a suitable replacement for the original factory colors. Please be aware that certain kinds of paints/inks do not react well to certain kinds of plastic, so make sure whatever paint/marker you use to color your joints is safe for plastic.
I am not responsible for parts damaged during installation and/or from minor modifications including (but not limited to) cutting, drilling, sanding, or colorizing/painting; I am not responsible for damage to your figures from removal of broken joints, and/or from installation of new joints.
INSTALLATION PROCESS
(Recommended tools: hair dryer, small flat-head screwdriver, needle-nose pliers, hobby nippers and/or exacto knife; small phillips head screwdriver and maybe a small drill bit for interior joints. I highly recommend replacing all the elbows, knees, and ankles at one time -- even if unbroken -- since you already have all the tools ready, and then they'll all match.)
ALWAYS WARM PIECES BEFORE SEPARATING, JOINING, REMOVING, AND INSTALLING PARTS
- Heat limb joint area carefully with a hair dryer. The limbs of these figures are very flexible, and are easy to bend when warmed. This will not damage or deform your figure permanantly. You do not need to heat the figure for replacement of shoulder joints, the waist joint, or hip joint; you will only need a small phillips head screwdriver for these, as both the hips and torso are held together by small screws.
- Separate all joint parts; separate knees from thighs; separate bicep from forearm/weapons; separate feet from shins. Isolate the part on which you are working.
- Remove original/broken joint pieces. Each limb joint (elbows, knees, and ankles) have flaps which can be easily bent after being warmed. If the disc part of the joint is broken: remove those pieces first. Usually you can just push on the pieces with a small screwdriver and rotate them around the peg until you can grab them. Center joint pegs can then be grabbed with a small set of pliers and pulled out. If the disc is not broken: use your fingernail or a small flat-head screwdriver inserted between the disc and limb flap to pry the limb flaps outward over the pegs. The warmer the area: the less risk of damage to your figure.
- Carefully remove the necessary replacement joint(s) from the Rescue Joint.EXE runner. I recommend using a pair of flush-cut or single-blade nippers, commonly used for model building. Compare the original joint to the replacement joint before removal to identify where to cut.
- Warm the joint area again with a hair dryer.
- Insert the correct replacement part from the Joint Kit 2.0 into the limb slot by first bending the warmed limb flaps outward.
- Press the flaps on the sides of the limb (upper arm, thigh,or ankle) down onto the relacement joint so that the pegs are fully inserted into the limb flap holes. If the pegs do not fully insert: warm the part more, and gently stretch the flap around the peg. Sometimes rotating the joint while pinching the flaps together helps the pegs seat correctly.
- Warm the area of the figure which will receive the joint peg; this means shins, forearm/weapon parts, and feet.
- Insert replacement joint pegs into warmed receiving holes. For the shoulders, upper thighs, and feet: heat the socket before inserting the ball.
- For interior joints: you may need to slightly ream the holes of the new waist and hip parts with a drill bit to get them to fit, as this can vary per print order. If necessary: select an appropriately-sized bit, insert into the hole, and twist gently by hand. Please be aware that "Detail Plastic" can be brittle, and is prone to cracking; I do not recommend the "Detail Plastic" for replacement of interior joints; consider "Versatile Plastic" for interior joints. DO NOT FORCE JOINTS ONTO PEGS!
- The waist joint has a rubber insert over the ball; this can be easily removed after being heated, and needs to be installed on the replacement joint. Do not damage this part, as there is no replacement.
- Please be aware that replacing Forte's ankle joints is particularly dificult due to the bulk of his lower legs; please excersice caution while repacing these particular joints, and be sure the legs are very warm.
- Test range-of-motion, and enjoy your repaired figure!
HISTORY
After replacing several figure joints using parts designed by energonhotshot04, I thought that I would like to try a different approach; I didn't want to just offer replacement parts, but parts which (hopefully) improved upon the original design. Individual replacement parts were also very expensive -- surpassing the cost of one of these figures for just a few replacement parts -- so I wanted to offer a solution to replace all joints for one figure with a single order. After many hours disassembling, measureing, fumbling through various CAD programs, and ordering/testing a few prototypes: the "Rockin' Action Rescue Joint.EXE" was born, and is available for you to resurrect these fabulous action figures!
These joints (when printed in the Versatile Plastic, NOT Detail Plastic) are guaranteed to be more durable than the original joints.
During the design process I discovered that one of the reasons these joints fail is due to the disc-and-peg design of the elbows, ankles, and knees. The pegs in the knees, ankles, and elbows are meant to be fixed inside the disc (that's why they are polygonal instead of cylindrical: so they bite into the disc) and these are designed to rotate with the disc; the pivot points are the holes in the sides of the limbs. The joints were manufactured this way for ease-of-manufacture and assembly at the factory; the disc would be inserted into the limb slot, and then the peg was pressed through to secure the disc. However, because the points of the peg shaft dig-in to the hole at the center of the disc --a disc which also shrinks over time -- the points of the peg shaft crack the disc. To remedy this: I have decided to merge the discs and pegs into one piece, therefore strengthing the joint, reducing the number of potential failure points, and making replacement a much simpler process. (Detail Plastic discs may have weaker pegs, so exercise caution, and if you are shipped a defective part: please contact Shapeways for a replacement.)
THANK YOU, and ENJOY your ROCKIN' ACTION FIGURES!
Details
What's in the box:
Rockin' Action Joint Kit 2.0

Dimensions:
Success Rate:
First To try.
What's this?
Rating:
Mature audiences only.
