Red Processed Versatile Plastic


MiSTer Case Universal v5.x ButtonsKit
Made by
Print With Shapeways
 Choose Your Material
 Choose your color and finish
$16.83
Have a question about this product?
contact the designerYou must be logged in and verified to contact the designer.
Product Description
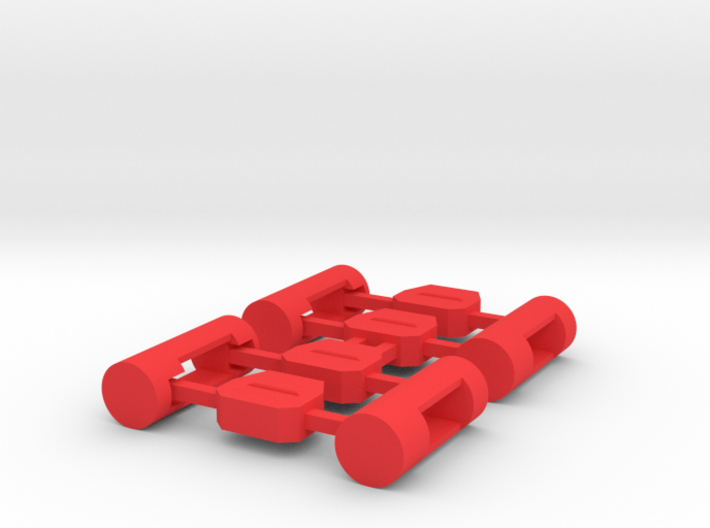
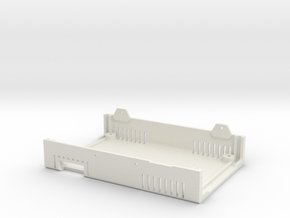
MiSTer Case Universal v5.x ButtonsKit (for MiSTer - Case Universal v5.x Top with holes for "modular" buttons) (Part 4 of 4)
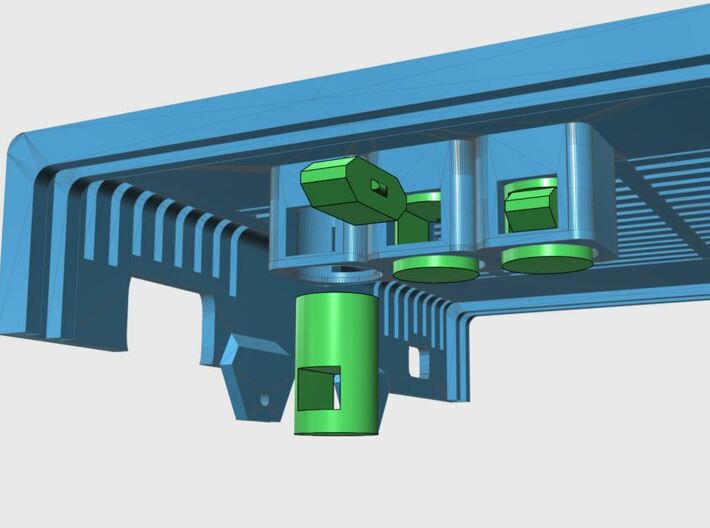
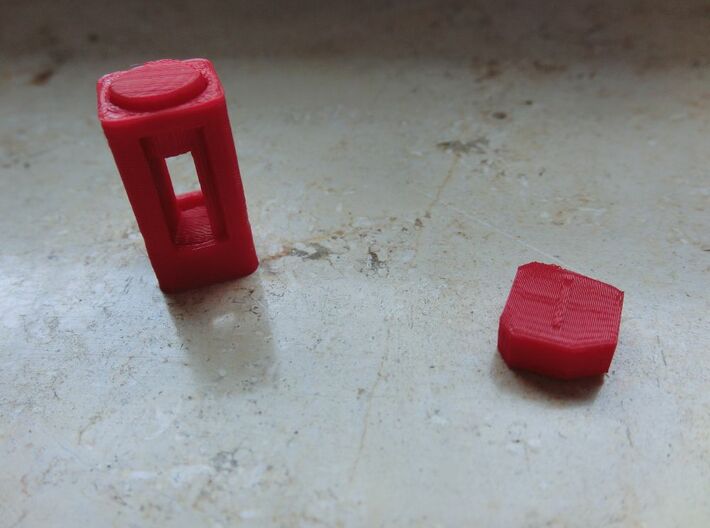
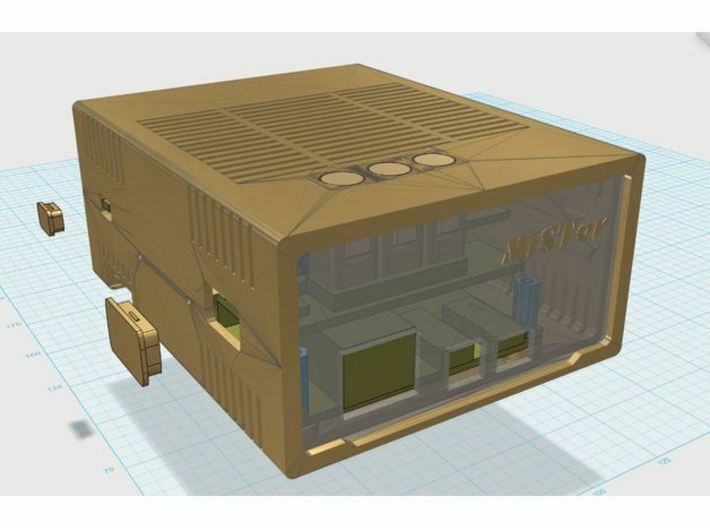
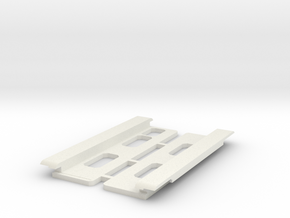
The kit has 4 buttons á 2 parts. You have to separate the parts, insert the tubular part into the hole of the Top Shell and then lock it with the other part. Look at the pictures to see how it should look.
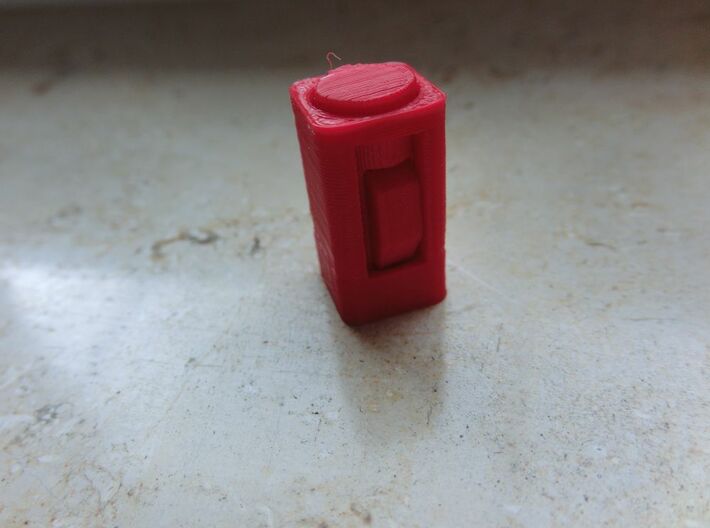
How it is assembled: After inserting the tubular parts, you will slide and press (carefully!) the other part of the button in place. This parts then acts as a locking bolt. This way you should get a functional moving part. At least that is how it is supposed to work
An example of items to be ordered together to assemble a full case:
1x MiSTer Case Universal v5.x Top Shell(1/4) https://www.shapeways.com/product/YE5XSF42N/mister-case-universal-v5-x-top-shell-1-4?optionId=65445488
1x MiSTer Case Universal v5.x Bottom Shell (2/4) https://www.shapeways.com/product/5LSGLD5JW/mister-case-universal-v5-x-bottom-shell-2-4?optionId=104600582
1x MiSTer - Case Universal v5.x - Front/Back/Plugs(Part 3/4) https://www.shapeways.com/product/4TZS6J62E/mister-case-universal-v5-2-front-back-plugs?optionId=65200339&li=shop-inventory
1x MiSTer Case Universal v5.x ButtonsKit (Part 4/4) https://www.shapeways.com/product/NMCVMDT4U/mister-case-universal-v5-2-buttonskit?optionId=65445844&li=shop-inventory
This ButtonsKit is for MiSTer Case Universal v5.x - It cannot be used for the XS version of the case! Please for XS version use the dedicated XS ButtonsKit! https://www.shapeways.com/product/U86CSC5AV/mister-xs-case-v5-2-xs-buttonskit-part-4-4?optionId=65446996&li=shop-inventory
---
MiSTer - Case Universal v5.x
---
This Top has "modular" buttons that have to be ordered separately in kit form (MiSTer Case Universal v5.x ButtonsKit). You will then be able to plug the buttons together to make them work. This step is necessary to get movable buttons with this design as Shapeways does not like to print objects in objects...
---
Original text for Top Shell with buttons:
I remixed the Universal Case for the MiSTer to now support the I/O-Board 5.2 and 5.5.
The I/O-Board 5.2 now features a second SD-card slot and a protruding SoG switch rendering the older Case Universal 1.2 version obsolete.
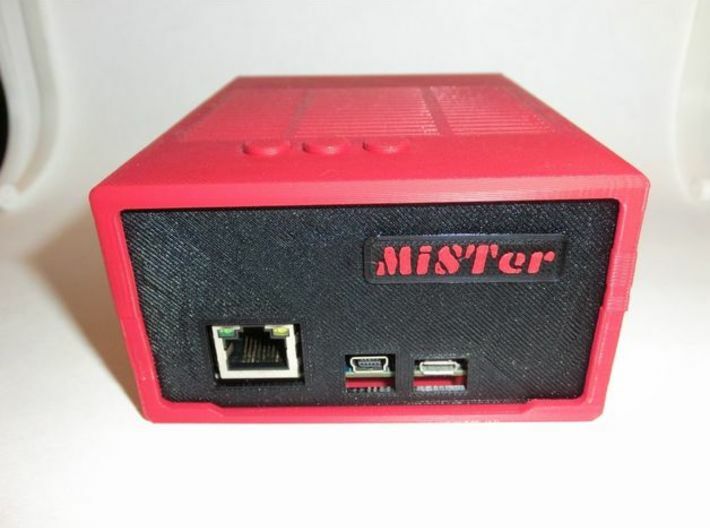
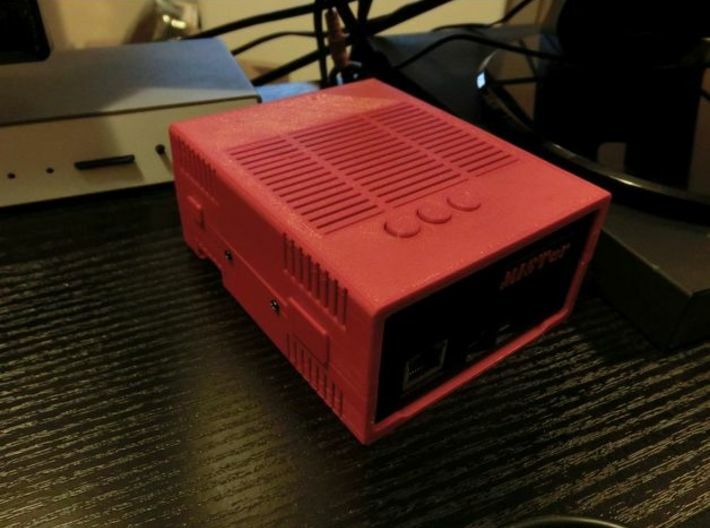
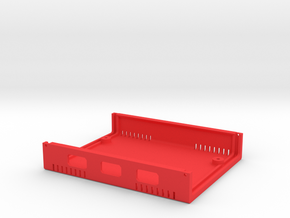
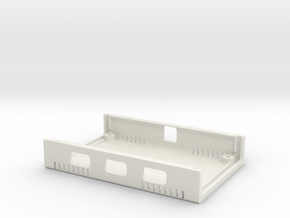
The new case has new asymmetric connector points between top and bottom shell. It has new cut-outs for SD-card slot, SoG switch and the a wider VGA connector. The fan now is mounted directly on the I/O-board PCB. Therefore the fan mounts are now omitted. To increase air flow the vents on the top have been drastically enlarged.
To cover the side cut-outs for the SoG and SOD-card slot there are separate plugs available as covers.
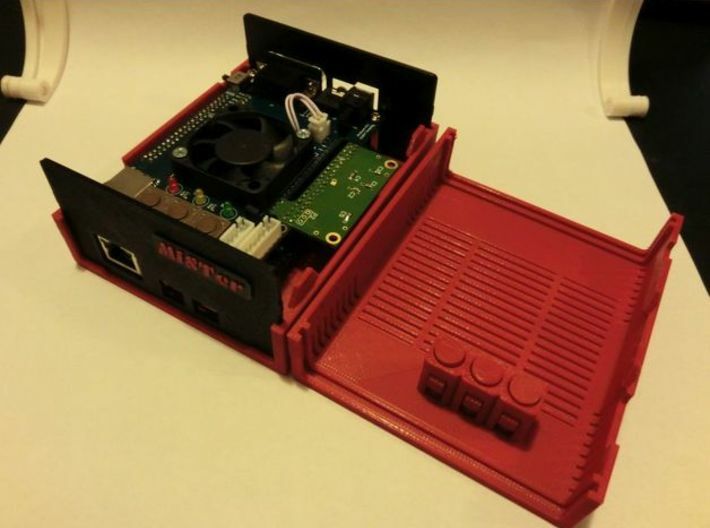
Another feature are the three integrated buttons allowing to press the I/O-boards tactile switches while the case is closed. The buttons are printed in place. Should they not move after the print, try using little force to break them free. I tested the print with 0,18mm layer height and 2 outer shells.
For those not interested in external buttons find a top shell file without buttons:
MiSTer_Uni_52_Top_No_Buttons.stl
The original screws of the DE10 Nano can again be used to fix the DE10 Nano inside the case (see pictures). If you find this to be too difficult try using sharp screws to prepare the holes. It works!
Enjoy.
https://github.com/MiSTer-devel/Main_MiSTer/wiki
http://www.atari-forum.com/viewforum.php?f=117
The kit has 4 buttons á 2 parts. You have to separate the parts, insert the tubular part into the hole of the Top Shell and then lock it with the other part. Look at the pictures to see how it should look.
How it is assembled: After inserting the tubular parts, you will slide and press (carefully!) the other part of the button in place. This parts then acts as a locking bolt. This way you should get a functional moving part. At least that is how it is supposed to work
An example of items to be ordered together to assemble a full case:
1x MiSTer Case Universal v5.x Top Shell(1/4) https://www.shapeways.com/product/YE5XSF42N/mister-case-universal-v5-x-top-shell-1-4?optionId=65445488
1x MiSTer Case Universal v5.x Bottom Shell (2/4) https://www.shapeways.com/product/5LSGLD5JW/mister-case-universal-v5-x-bottom-shell-2-4?optionId=104600582
1x MiSTer - Case Universal v5.x - Front/Back/Plugs(Part 3/4) https://www.shapeways.com/product/4TZS6J62E/mister-case-universal-v5-2-front-back-plugs?optionId=65200339&li=shop-inventory
1x MiSTer Case Universal v5.x ButtonsKit (Part 4/4) https://www.shapeways.com/product/NMCVMDT4U/mister-case-universal-v5-2-buttonskit?optionId=65445844&li=shop-inventory
This ButtonsKit is for MiSTer Case Universal v5.x - It cannot be used for the XS version of the case! Please for XS version use the dedicated XS ButtonsKit! https://www.shapeways.com/product/U86CSC5AV/mister-xs-case-v5-2-xs-buttonskit-part-4-4?optionId=65446996&li=shop-inventory
---
MiSTer - Case Universal v5.x
---
This Top has "modular" buttons that have to be ordered separately in kit form (MiSTer Case Universal v5.x ButtonsKit). You will then be able to plug the buttons together to make them work. This step is necessary to get movable buttons with this design as Shapeways does not like to print objects in objects...
---
Original text for Top Shell with buttons:
I remixed the Universal Case for the MiSTer to now support the I/O-Board 5.2 and 5.5.
The I/O-Board 5.2 now features a second SD-card slot and a protruding SoG switch rendering the older Case Universal 1.2 version obsolete.
The new case has new asymmetric connector points between top and bottom shell. It has new cut-outs for SD-card slot, SoG switch and the a wider VGA connector. The fan now is mounted directly on the I/O-board PCB. Therefore the fan mounts are now omitted. To increase air flow the vents on the top have been drastically enlarged.
To cover the side cut-outs for the SoG and SOD-card slot there are separate plugs available as covers.
Another feature are the three integrated buttons allowing to press the I/O-boards tactile switches while the case is closed. The buttons are printed in place. Should they not move after the print, try using little force to break them free. I tested the print with 0,18mm layer height and 2 outer shells.
For those not interested in external buttons find a top shell file without buttons:
MiSTer_Uni_52_Top_No_Buttons.stl
The original screws of the DE10 Nano can again be used to fix the DE10 Nano inside the case (see pictures). If you find this to be too difficult try using sharp screws to prepare the holes. It works!
Enjoy.
https://github.com/MiSTer-devel/Main_MiSTer/wiki
http://www.atari-forum.com/viewforum.php?f=117

Details
What's in the box:
D_Button_SWj_3

Dimensions:
Success Rate:
First To try.
What's this?
Rating:
Mature audiences only.
