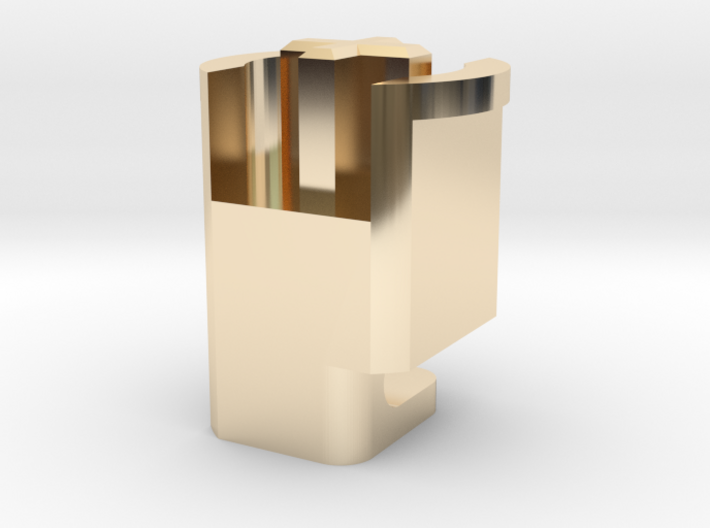
14k Gold Plated Brass

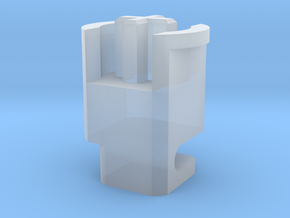
Topre to MX 6u Stabilizer Plunger (Right)
Made by
Print With Shapeways
 Choose Your Material
 Choose your color and finish
$27.50
Have a question about this product?
contact the designerYou must be logged in and verified to contact the designer.
Product Description
IMPORTANT NOTE
All these parts are printed and tested. I strongly recommend choosing "Smoothest Fine Detail Plastic" material for better resolution, strength, and texture, among other resin based materials, although it's more expensive. The "Versatile Plastic" material on the orther hand, provides wide range of color options. Although it's basically functional, but from my experience, they are more soft and fragile than "Smoothest Fine Detail Plastic", and its resolution quality is not very stable, may have chances of production defects. In addition, its coloring is made by a thin layer of color powder, and it's very easy to fall off when you touch it. The powder surface texture may also affect the mechanical performance and hand feeling. The "Smoothest Fine Detail Plastic" on the other hand, is translucent and offers no color options. However they use better resin similar to SLA printing which can produce more detailed resolution, more smooth surface texture and stronger strength. I provide both the options because of pricing/quality choices and color options.
However, resin based material has its natural limit in strength when compared to metal material. For parts like the plunger where it needs to be tightly inserted into other components like your keycap, stronger the material is always better. It will make your life easier when inserting and removing the parts. A few customers broke their plunger when removing it from the keycap, even printed in the "Smoothest Fine Detail Plastic" material. As for experiments, a few customers tried to print the plungers in metal, and the results according to their kindful feedbacks, are very good. "The installation and removal of the space key is smooth and comfortable." said by one customer after changing to Rhodium Plated Brass for his spacebar pungers. Therefore, if you want ultimate strength and reliability, go with metal options like "Rhodium Plated Brass" or "Polished Brass".
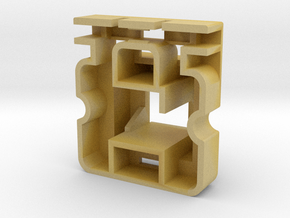
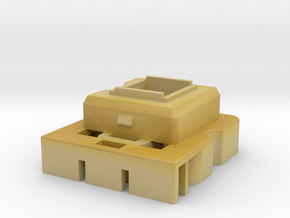
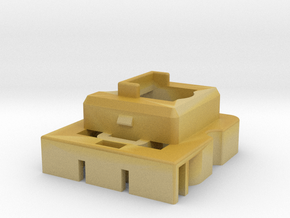
If you want to use these stabilizers, you have to 3D print all the 4 different parts: a left/right pair of housings, and a left/right pair of plungers. The metal wire came from the original HHKB's wire, and of course you will need the standard 1u Topre to MX plunger at the center. You CAN ONLY use these stabilizers with centered stem 6u MX spacebar with (with the two outer stems 95.25mm apart). If you want to use 6.25u Universal Spacebar, please check out my Topre to 6.25u MX Spacebar Stabilizer set.
When installing MX spacebar, first replace the housings. Then insert the stabilizer plungers into the spacebar stems, push them tight. Then insert the 1u plunger from the bottom, and remember to put the spring on the top of the plunger. Then put the spacebar in place, firstly insert the center 1u plunger into the center stem on the spacebar, then let the stabilizer plungers fall into the holes on the housings' top. Finally push and click the metal wire in place.
When uninstalling MX spacebar, reverse the installing procedures in the EXACT ORDER! First open up the case, remove PCB, until you face the bottom of the plungers, then pop and remove the metal wire. Then use standard MX keycap puller tool to remove the spacebar from the center 1u plunger. Without the metal wire, the stabilizer plungers should be pulled out from the housing together with the spacebar. This is important because if you don't remove the metal wire, it will stop the stabilizer plungers from pulling out. If the linkage between the stabilizer plungers and the stems are too strong there could be great chance the pulling force would break and permanently damage the stabilizer plungers. When the spacebar and stabilizer plungers are pulled out together, manually pull the stabilizer plungers out by pinching and pulling the large body part of the stabilizer plungers. It protects the part from breaking.
LICENSE
HHKB Topre to Cherry MX Adapters by Naiwei Zheng is licensed under a Creative Commons Attribution-NonCommercial-ShareAlike 4.0 International License.
Support this Work
If you want to support this work, you can buy from this Shapeways shop where I make 10% fixed profits, or you can donate to my PayPal or BitCoin wallet: 14VSt78bfgMx9pWXV9qbMMsxter7KYHCRd.
However you are always welcome to print and use this work for personal use without paying me. The source files for this part and the project is hosted on my GitHub repository. You are free to download the STL files from the repository and 3D print them from your own Shapeways account or any other 3D printing service without paying me.
All these parts are printed and tested. I strongly recommend choosing "Smoothest Fine Detail Plastic" material for better resolution, strength, and texture, among other resin based materials, although it's more expensive. The "Versatile Plastic" material on the orther hand, provides wide range of color options. Although it's basically functional, but from my experience, they are more soft and fragile than "Smoothest Fine Detail Plastic", and its resolution quality is not very stable, may have chances of production defects. In addition, its coloring is made by a thin layer of color powder, and it's very easy to fall off when you touch it. The powder surface texture may also affect the mechanical performance and hand feeling. The "Smoothest Fine Detail Plastic" on the other hand, is translucent and offers no color options. However they use better resin similar to SLA printing which can produce more detailed resolution, more smooth surface texture and stronger strength. I provide both the options because of pricing/quality choices and color options.
However, resin based material has its natural limit in strength when compared to metal material. For parts like the plunger where it needs to be tightly inserted into other components like your keycap, stronger the material is always better. It will make your life easier when inserting and removing the parts. A few customers broke their plunger when removing it from the keycap, even printed in the "Smoothest Fine Detail Plastic" material. As for experiments, a few customers tried to print the plungers in metal, and the results according to their kindful feedbacks, are very good. "The installation and removal of the space key is smooth and comfortable." said by one customer after changing to Rhodium Plated Brass for his spacebar pungers. Therefore, if you want ultimate strength and reliability, go with metal options like "Rhodium Plated Brass" or "Polished Brass".
If you want to use these stabilizers, you have to 3D print all the 4 different parts: a left/right pair of housings, and a left/right pair of plungers. The metal wire came from the original HHKB's wire, and of course you will need the standard 1u Topre to MX plunger at the center. You CAN ONLY use these stabilizers with centered stem 6u MX spacebar with (with the two outer stems 95.25mm apart). If you want to use 6.25u Universal Spacebar, please check out my Topre to 6.25u MX Spacebar Stabilizer set.
When installing MX spacebar, first replace the housings. Then insert the stabilizer plungers into the spacebar stems, push them tight. Then insert the 1u plunger from the bottom, and remember to put the spring on the top of the plunger. Then put the spacebar in place, firstly insert the center 1u plunger into the center stem on the spacebar, then let the stabilizer plungers fall into the holes on the housings' top. Finally push and click the metal wire in place.
When uninstalling MX spacebar, reverse the installing procedures in the EXACT ORDER! First open up the case, remove PCB, until you face the bottom of the plungers, then pop and remove the metal wire. Then use standard MX keycap puller tool to remove the spacebar from the center 1u plunger. Without the metal wire, the stabilizer plungers should be pulled out from the housing together with the spacebar. This is important because if you don't remove the metal wire, it will stop the stabilizer plungers from pulling out. If the linkage between the stabilizer plungers and the stems are too strong there could be great chance the pulling force would break and permanently damage the stabilizer plungers. When the spacebar and stabilizer plungers are pulled out together, manually pull the stabilizer plungers out by pinching and pulling the large body part of the stabilizer plungers. It protects the part from breaking.
LICENSE
HHKB Topre to Cherry MX Adapters by Naiwei Zheng is licensed under a Creative Commons Attribution-NonCommercial-ShareAlike 4.0 International License.
Support this Work
If you want to support this work, you can buy from this Shapeways shop where I make 10% fixed profits, or you can donate to my PayPal or BitCoin wallet: 14VSt78bfgMx9pWXV9qbMMsxter7KYHCRd.
However you are always welcome to print and use this work for personal use without paying me. The source files for this part and the project is hosted on my GitHub repository. You are free to download the STL files from the repository and 3D print them from your own Shapeways account or any other 3D printing service without paying me.
Details
What's in the box:
6u Stabilizer Plunger Right rev.2

Dimensions:
Success Rate:
First To try.
What's this?
Rating:
Mature audiences only.