


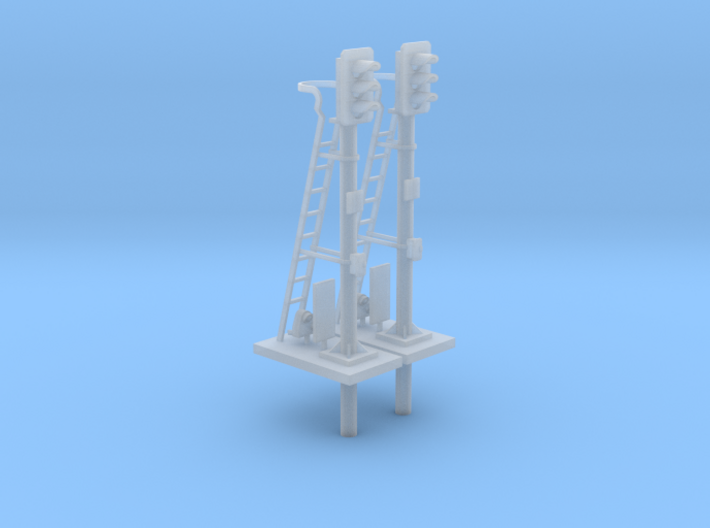

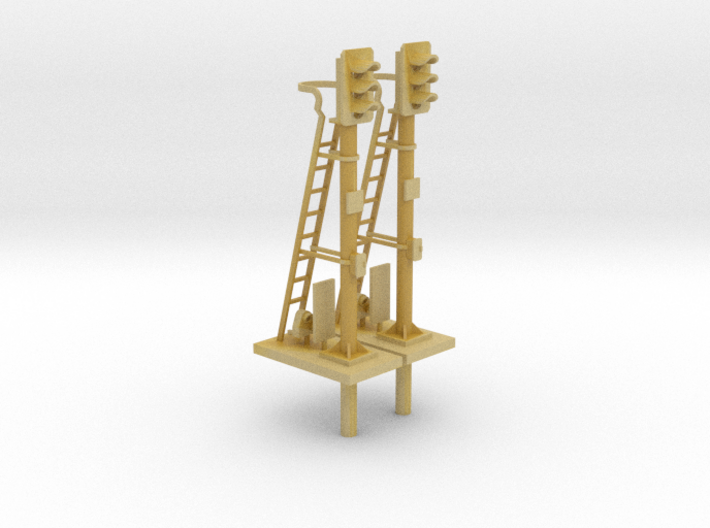
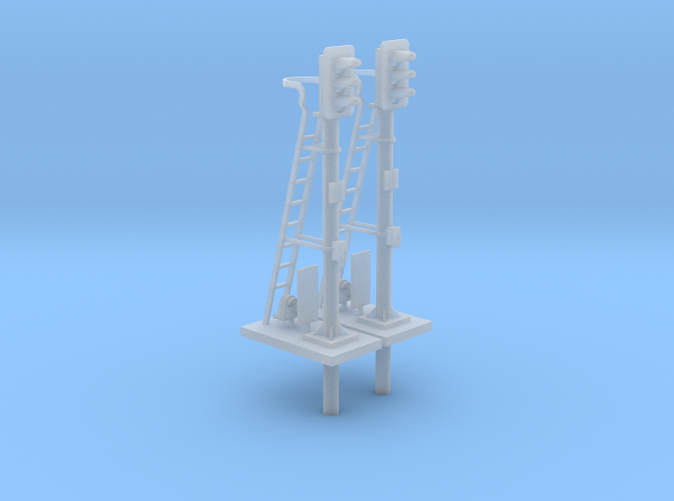
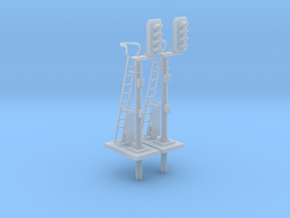
Pair of OO scale 3 Aspect Signals With Pole 1:76
Made by
Print With Shapeways
 Choose Your Material
 Choose your color and finish
$21.03
Have a question about this product?
contact the designerYou must be logged in and verified to contact the designer.
Product Description
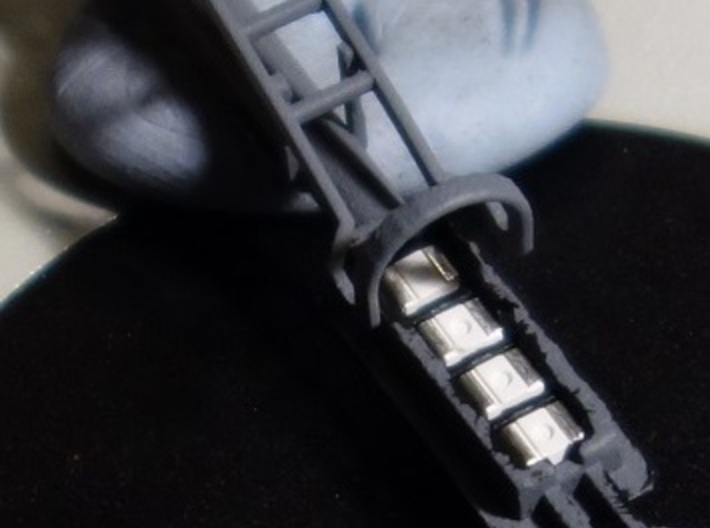
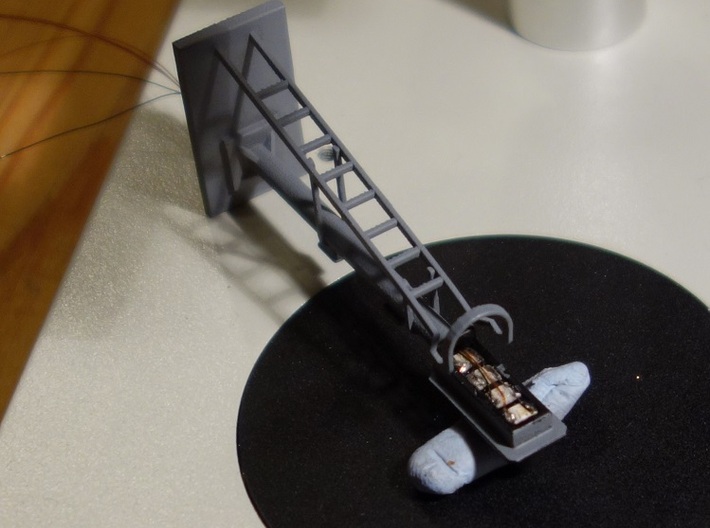
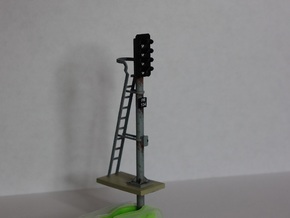
<p>This is a pair of UK 3 aspect signals for OO scale model railways.</p><p>The signals can be painted and fitted to a layout as they are without lights, or leds can be fitted so that the signals can be used with switches or electronics to set the aspect.</p><p>The signals are designed to take standard PLCC leds and the pole of the signal is hollow to allow fine wires to run down the pole through the baseboard.</p><p>Example leds are available from Farnell in the UK</p><p> Green part number 2322106</p><p> Yellow part number 2322111</p><p> Red part number 2322107</p><p>I wire the leds with Roadrunner wire which is designed to be solderable. Applying heat from a soldering iron melts the sheath and allows the wire to be soldered. Farnell do a pack of 4 different colours 5017245.</p><p> </p><p>Underneath the ladder of the signal there is a cover to go on the back of the signal and an optional shunting signal which can have a 2mm by 1.6mm white led fitted (Farnell 2062228). The shunting signal is very fine to fit the led, wire it and then fix it to the signal pole. A hole will need to be drilled if it is fitted and results can be variable since it is a single led shining through two apertures.</p><p>Fitting and wiring the leds will need a magnifying glass or microscope and some good lighting!</p><p> </p><p>For the main signal the suggested assembly with leds is as follows:</p><ol><li>Clean the raw signal with IPA (alcohol) to remove any left over wax and clean out any wax inside the pole with a suitable piece of wire.</li><li>Spray the signals all over with a grey undercoat - particularly get into the back of the signal head. I use Halfords car spray undercoat which is an acrylic.</li><li>Paint the inside and front of the head with matt black paint. I use acrylic. This will prevent light bleed between leds.</li><li>Fit the leds into the head. From bottom to top Red, Yellow, Green. Make sure they are all the same way round.</li><li>Put a tiny drop of superglue on each led to hold it in place.</li><li>Wire the common down one side of the leds. I wire all of the cathodes together to go to 0V or ground using purple/blue roadrunner wire and feed it down the pole.</li><li>Wire the other side of each led with a seperate wire and feed them down the pole. You end up with four wires down the pole.</li><li>Test the leds with the diode setting on a multimeter which should light them. Alternatively use a PP3 9V battery or 12V dc from a track controller with a suitable resistor in series with the led. Start with 2k2 resistor or greater for 9V or 12V.</li><li>Once the leds are tested glue the back panel onto the head (the panel is under the ladder) or simply fill the back of the head with more superglue so it is flush and allow to set.</li><li>The shunting signal (if required) takes a single white led and is painted and wired in the same way. A hole will need to be drilled on the front of the pole (best to do this before wiring the head!) and the shunting signal glued to the front of the pole after feeding the wires down the pole.</li><li>Paint the signal and weather to taste.</li></ol><p>If you just want the signals on the layout non operating then you could put a bit of coloured card into the head to represent the lenses rather than the four empty holes.</p>
Details
What's in the box:
3 Aspect Signal With Pole And Shunt OO Pair 2016 S
Dimensions:
Success Rate:
First To try.
What's this?
Rating:
Mature audiences only.
