
Polished Gold Steel

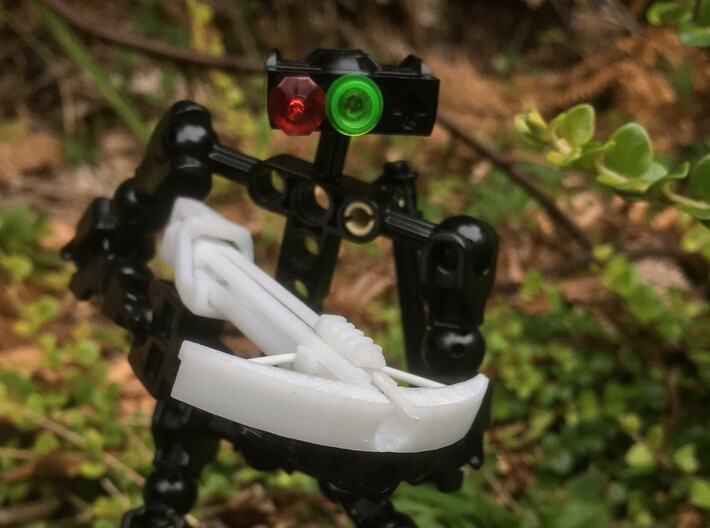

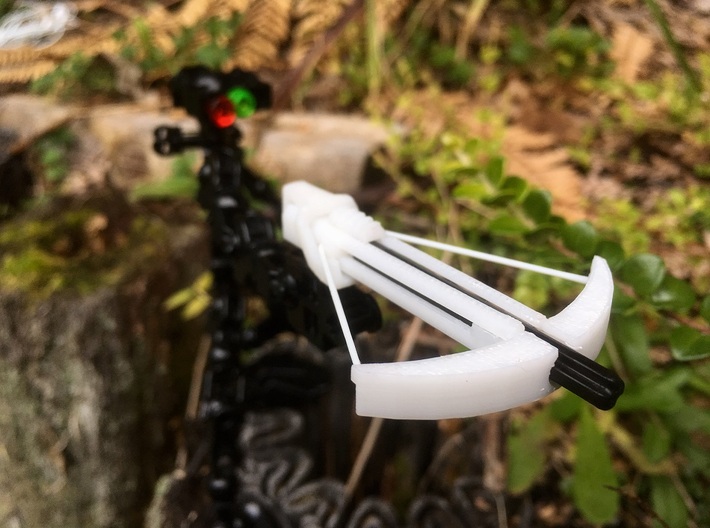

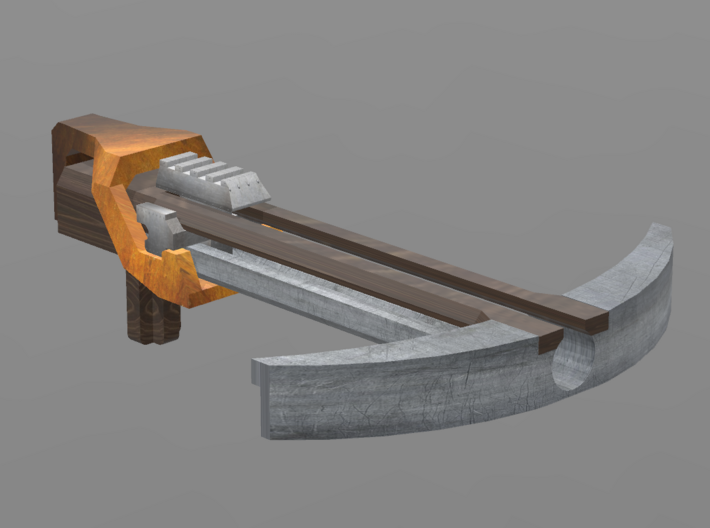

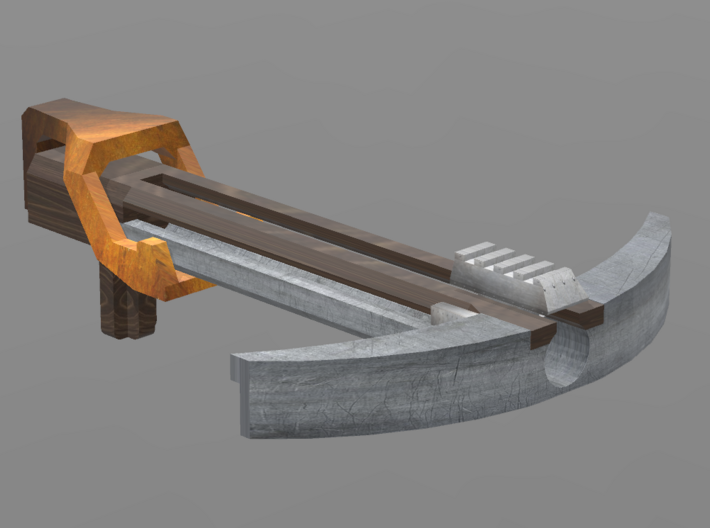


Lego Bionicle Compatible Crossbow- Shoots Axles
Made by
Print With Shapeways
 Choose Your Material
 Choose your color and finish
$155.47
Have a question about this product?
contact the designerYou must be logged in and verified to contact the designer.
Product Description
Pew! Pew! Pew! Use at your own risk!
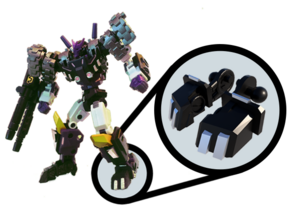
Kit out your Bionicle with the Bionicle Compatible Crossbow!
I advise that you always wear eye protection when using this, it shoots pretty hard. This is just a I-told-you-so in advance, so it's not my fault if you take an eye out.
ASSEMBLY:
I've prepared an assembly video and uploaded it to youtube, check it out here:
https://youtu.be/m_cF44cNEms
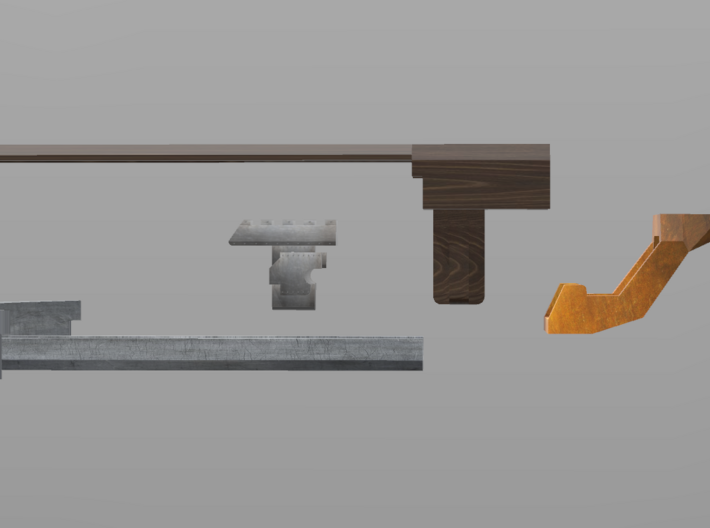
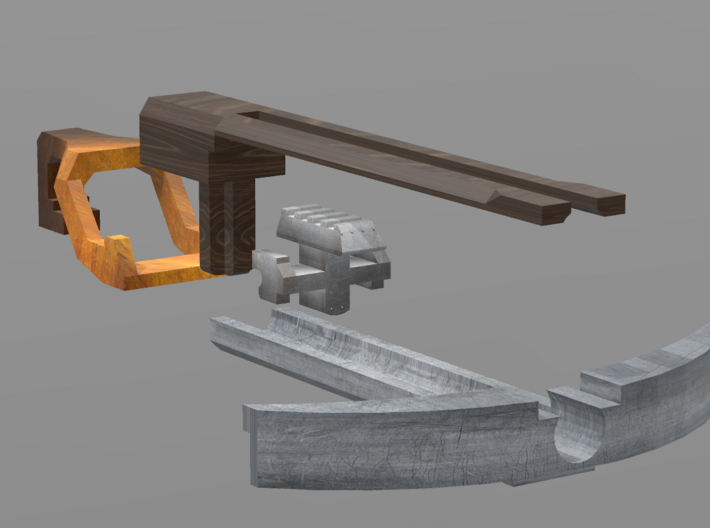
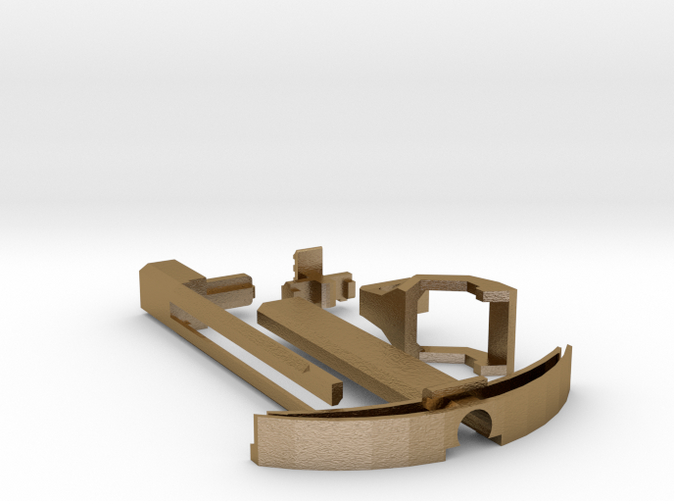
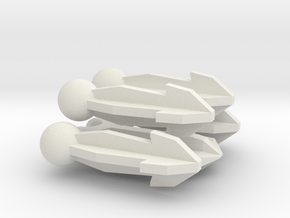
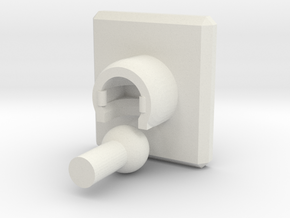
This comes as a 4 piece kit that you assemble with a little superglue. For the string, use a white lego o-ring for maximum pew, but you can use whatever band you want (as long as it's not too long, short or thick.)
You can paint it if you want, however that may add friction to the slider and decrease pew.
You should be able to tell from the pictures how it assembles; the latch plugs in the back, then slide the slider onto the main bow, attach the band inside the hollow at the front and behind the small slider, then you stick the pieces together with superglue (try not to accidentally stick the slider in place).
To additionally strengthen the latch (optional, but recommended), coat it with superglue before attaching it, but be careful to not let it gather on the latch.
If you have any uncertainties about the assembly, feel free to contact me at megawillbot@gmail.com. I can print it out, paint it, and assemble it personally for a negotiable fee (I ship from NZ).
USE:
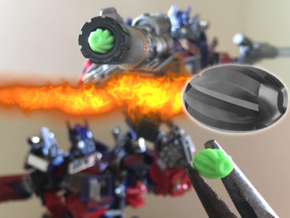
Push an axle the shaft and make sure the latch firmly clicks on. Pulling the slider back can also work, but it doesn't latch on as well (The finger grip is for simple pull-and-shoot action).
Point away from the eyes (that you put goggles on like a good safe person), and shoot it (not at someone else's eyes, you maniac)
Press down on the back of the crossbow, unhooking the latch and letting the axle fly
Lose the axle
Find another axle
Repeat times ∞
Kit out your Bionicle with the Bionicle Compatible Crossbow!
I advise that you always wear eye protection when using this, it shoots pretty hard. This is just a I-told-you-so in advance, so it's not my fault if you take an eye out.
ASSEMBLY:
I've prepared an assembly video and uploaded it to youtube, check it out here:
https://youtu.be/m_cF44cNEms
This comes as a 4 piece kit that you assemble with a little superglue. For the string, use a white lego o-ring for maximum pew, but you can use whatever band you want (as long as it's not too long, short or thick.)
You can paint it if you want, however that may add friction to the slider and decrease pew.
You should be able to tell from the pictures how it assembles; the latch plugs in the back, then slide the slider onto the main bow, attach the band inside the hollow at the front and behind the small slider, then you stick the pieces together with superglue (try not to accidentally stick the slider in place).
To additionally strengthen the latch (optional, but recommended), coat it with superglue before attaching it, but be careful to not let it gather on the latch.
If you have any uncertainties about the assembly, feel free to contact me at megawillbot@gmail.com. I can print it out, paint it, and assemble it personally for a negotiable fee (I ship from NZ).
USE:
Push an axle the shaft and make sure the latch firmly clicks on. Pulling the slider back can also work, but it doesn't latch on as well (The finger grip is for simple pull-and-shoot action).
Point away from the eyes (that you put goggles on like a good safe person), and shoot it (not at someone else's eyes, you maniac)
Press down on the back of the crossbow, unhooking the latch and letting the axle fly
Lose the axle
Find another axle
Repeat times ∞
Request a custom order
and get this product personalized just for you

Details
What's in the box:
Crossbow
Dimensions:
Success Rate:
First To try.
What's this?
Rating:
Mature audiences only.
